
Driver Profiling and Order Auto-Assignment
Driver Profiling captures key details about each driver, such as availability, vehicle/equipment information, and operating area as soon as their account is created. Dispatchers can view and manage these profiles from the web app.
When Auto-Assignment is enabled, the system automatically sends order or route requests to eligible drivers as soon as an order or route is created, and drivers can accept or reject the request from the mobile app. If auto-assignment is disabled, dispatchers assign orders to drivers manually instead.
In this article, you will learn how to:
- Set up a driver's profile from the mobile app
- View and manage driver profiles from the web app
- Enable auto-assignment for orders and routes at the workspace level
- Understand what happens when an order is auto-assigned and accepted
- Manually trigger auto-assignment on an individual order
Setting Up the Driver Profile (Mobile App)
To enable proper auto-assignment functionality, the driver profile must be correctly configured immediately after the account is created. Drivers can do this from the mobile app once they log in using the credentials provided to them.
The driver profile has three sections that need to be completed: Working Hours, Your Vehicle, and Operating Area.
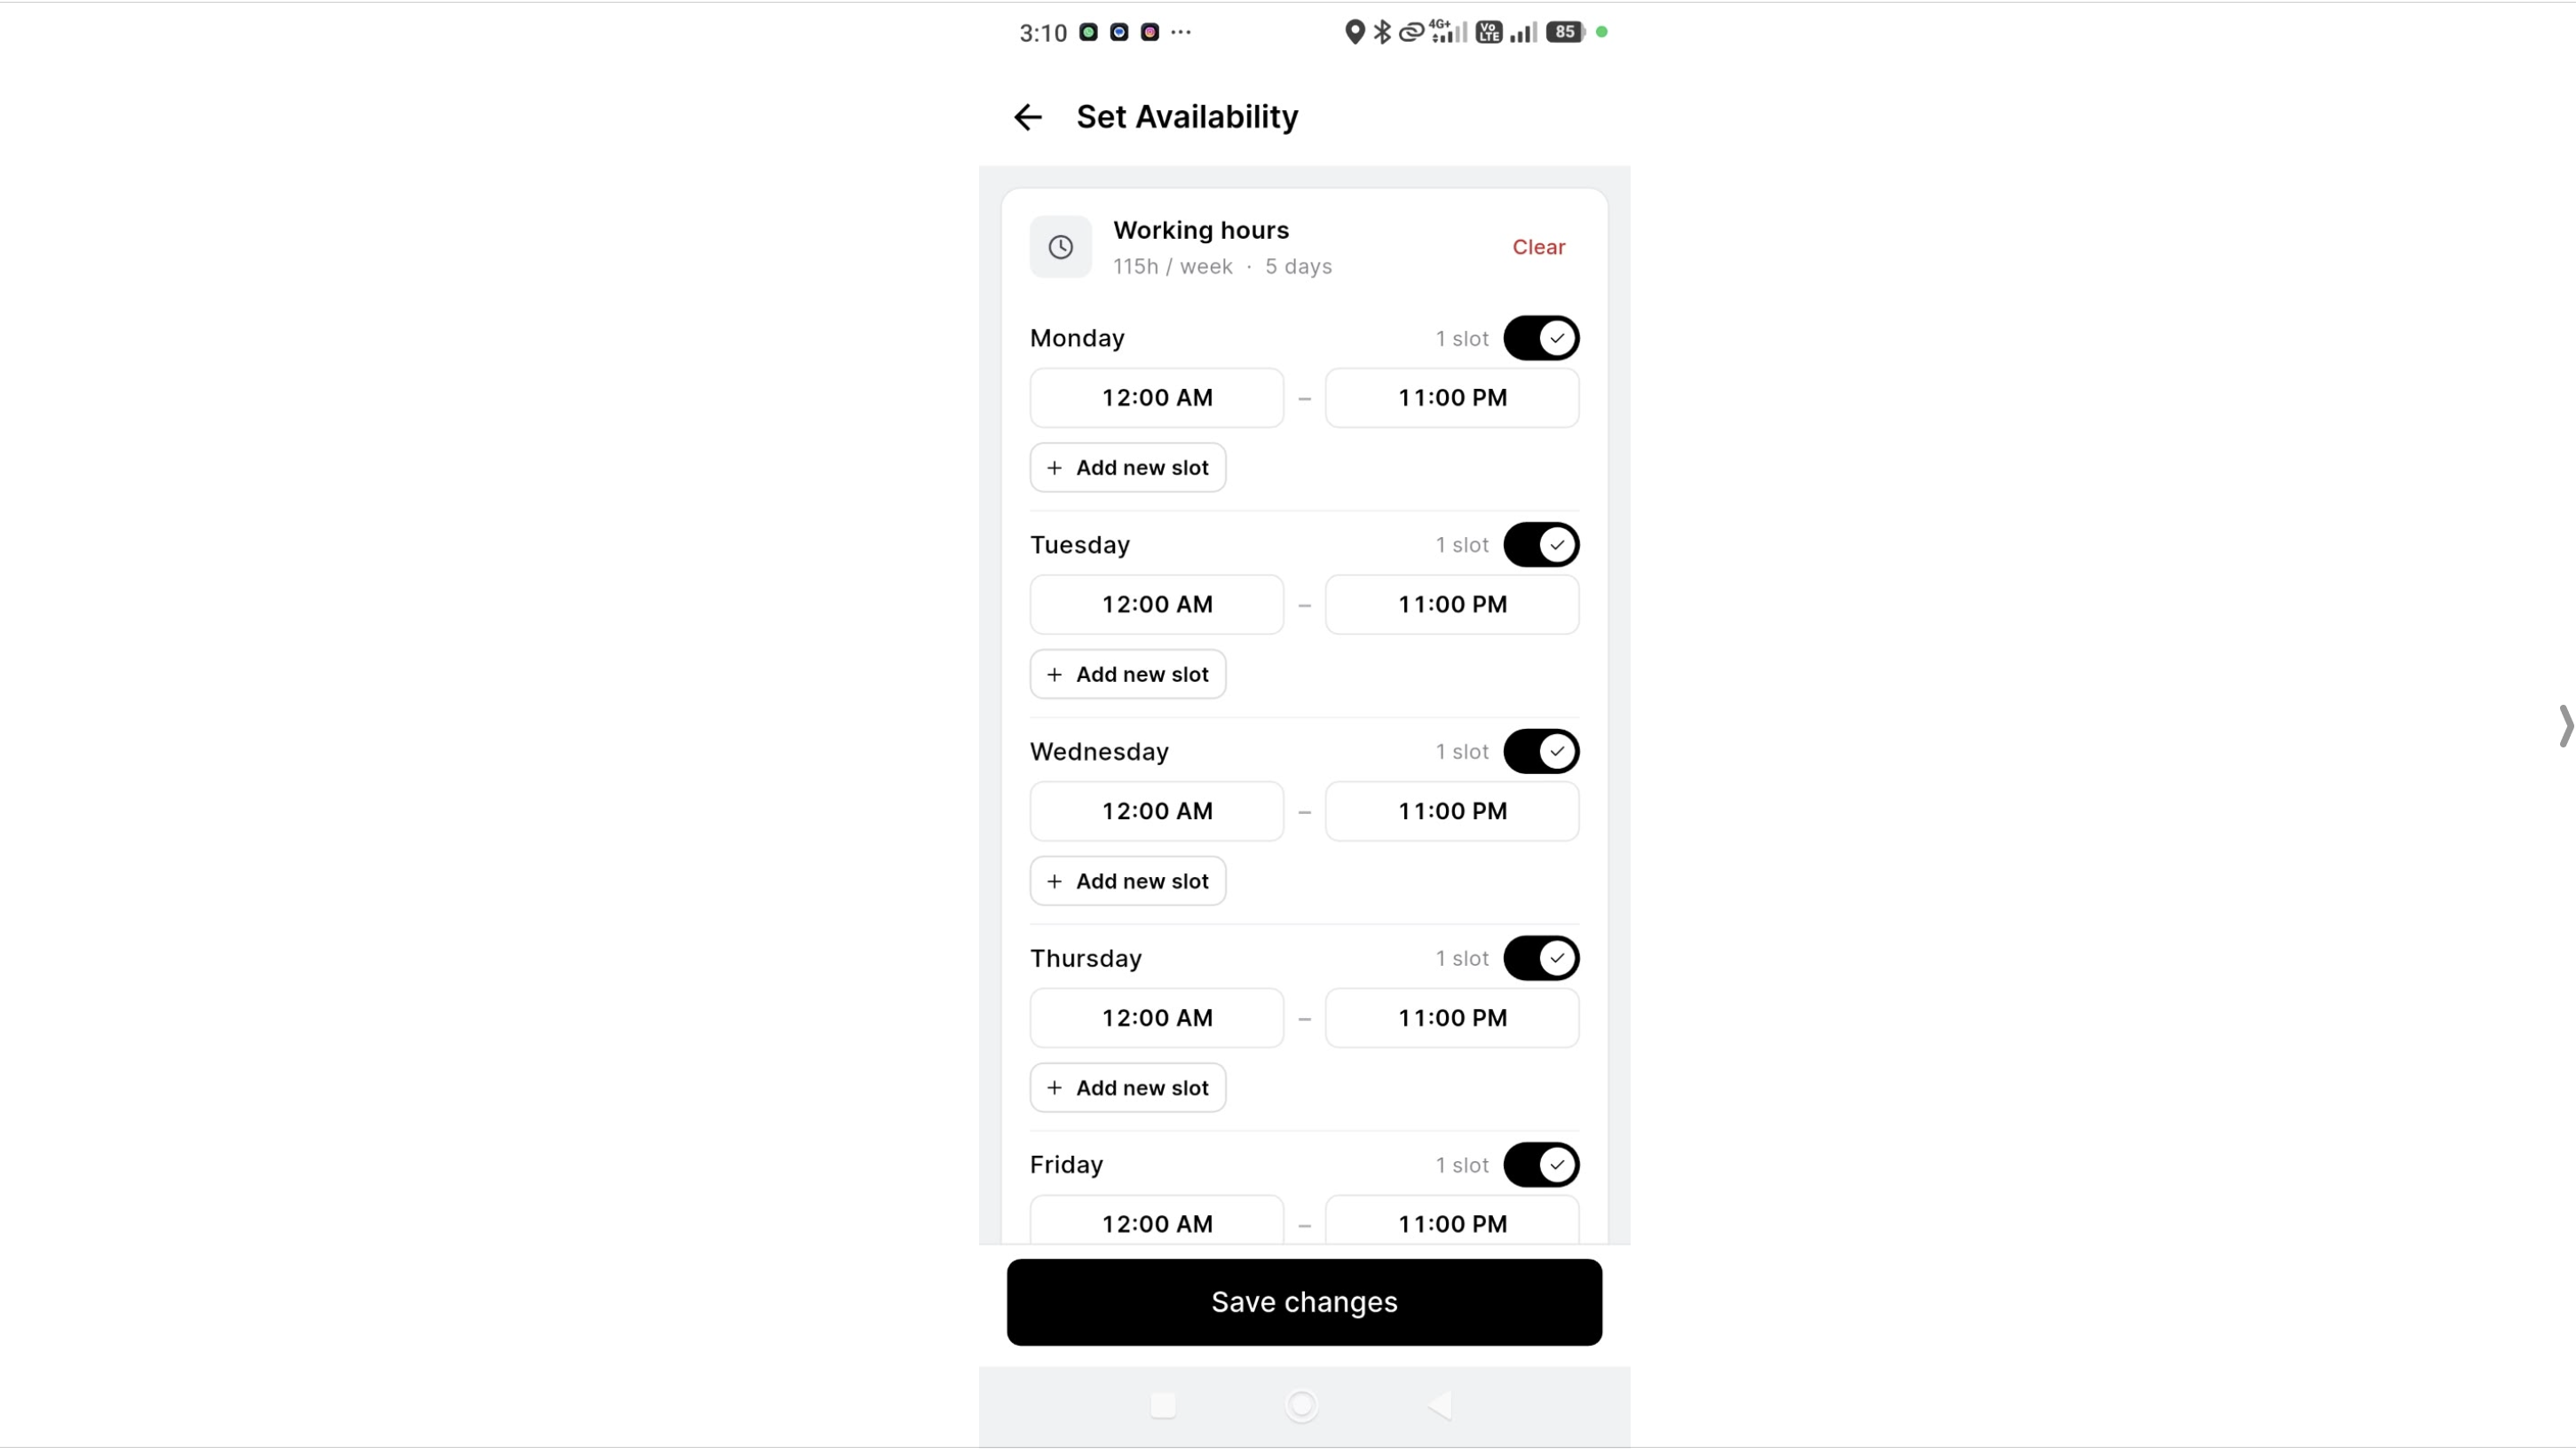
Step 1: Set Availability
From the driver profile, tap Edit next to Working Hours to set recurring availability for deliveries. Toggle on the days the driver is available, set the time slot(s) for each day, and add additional slots if needed. Once done, tap Save changes.
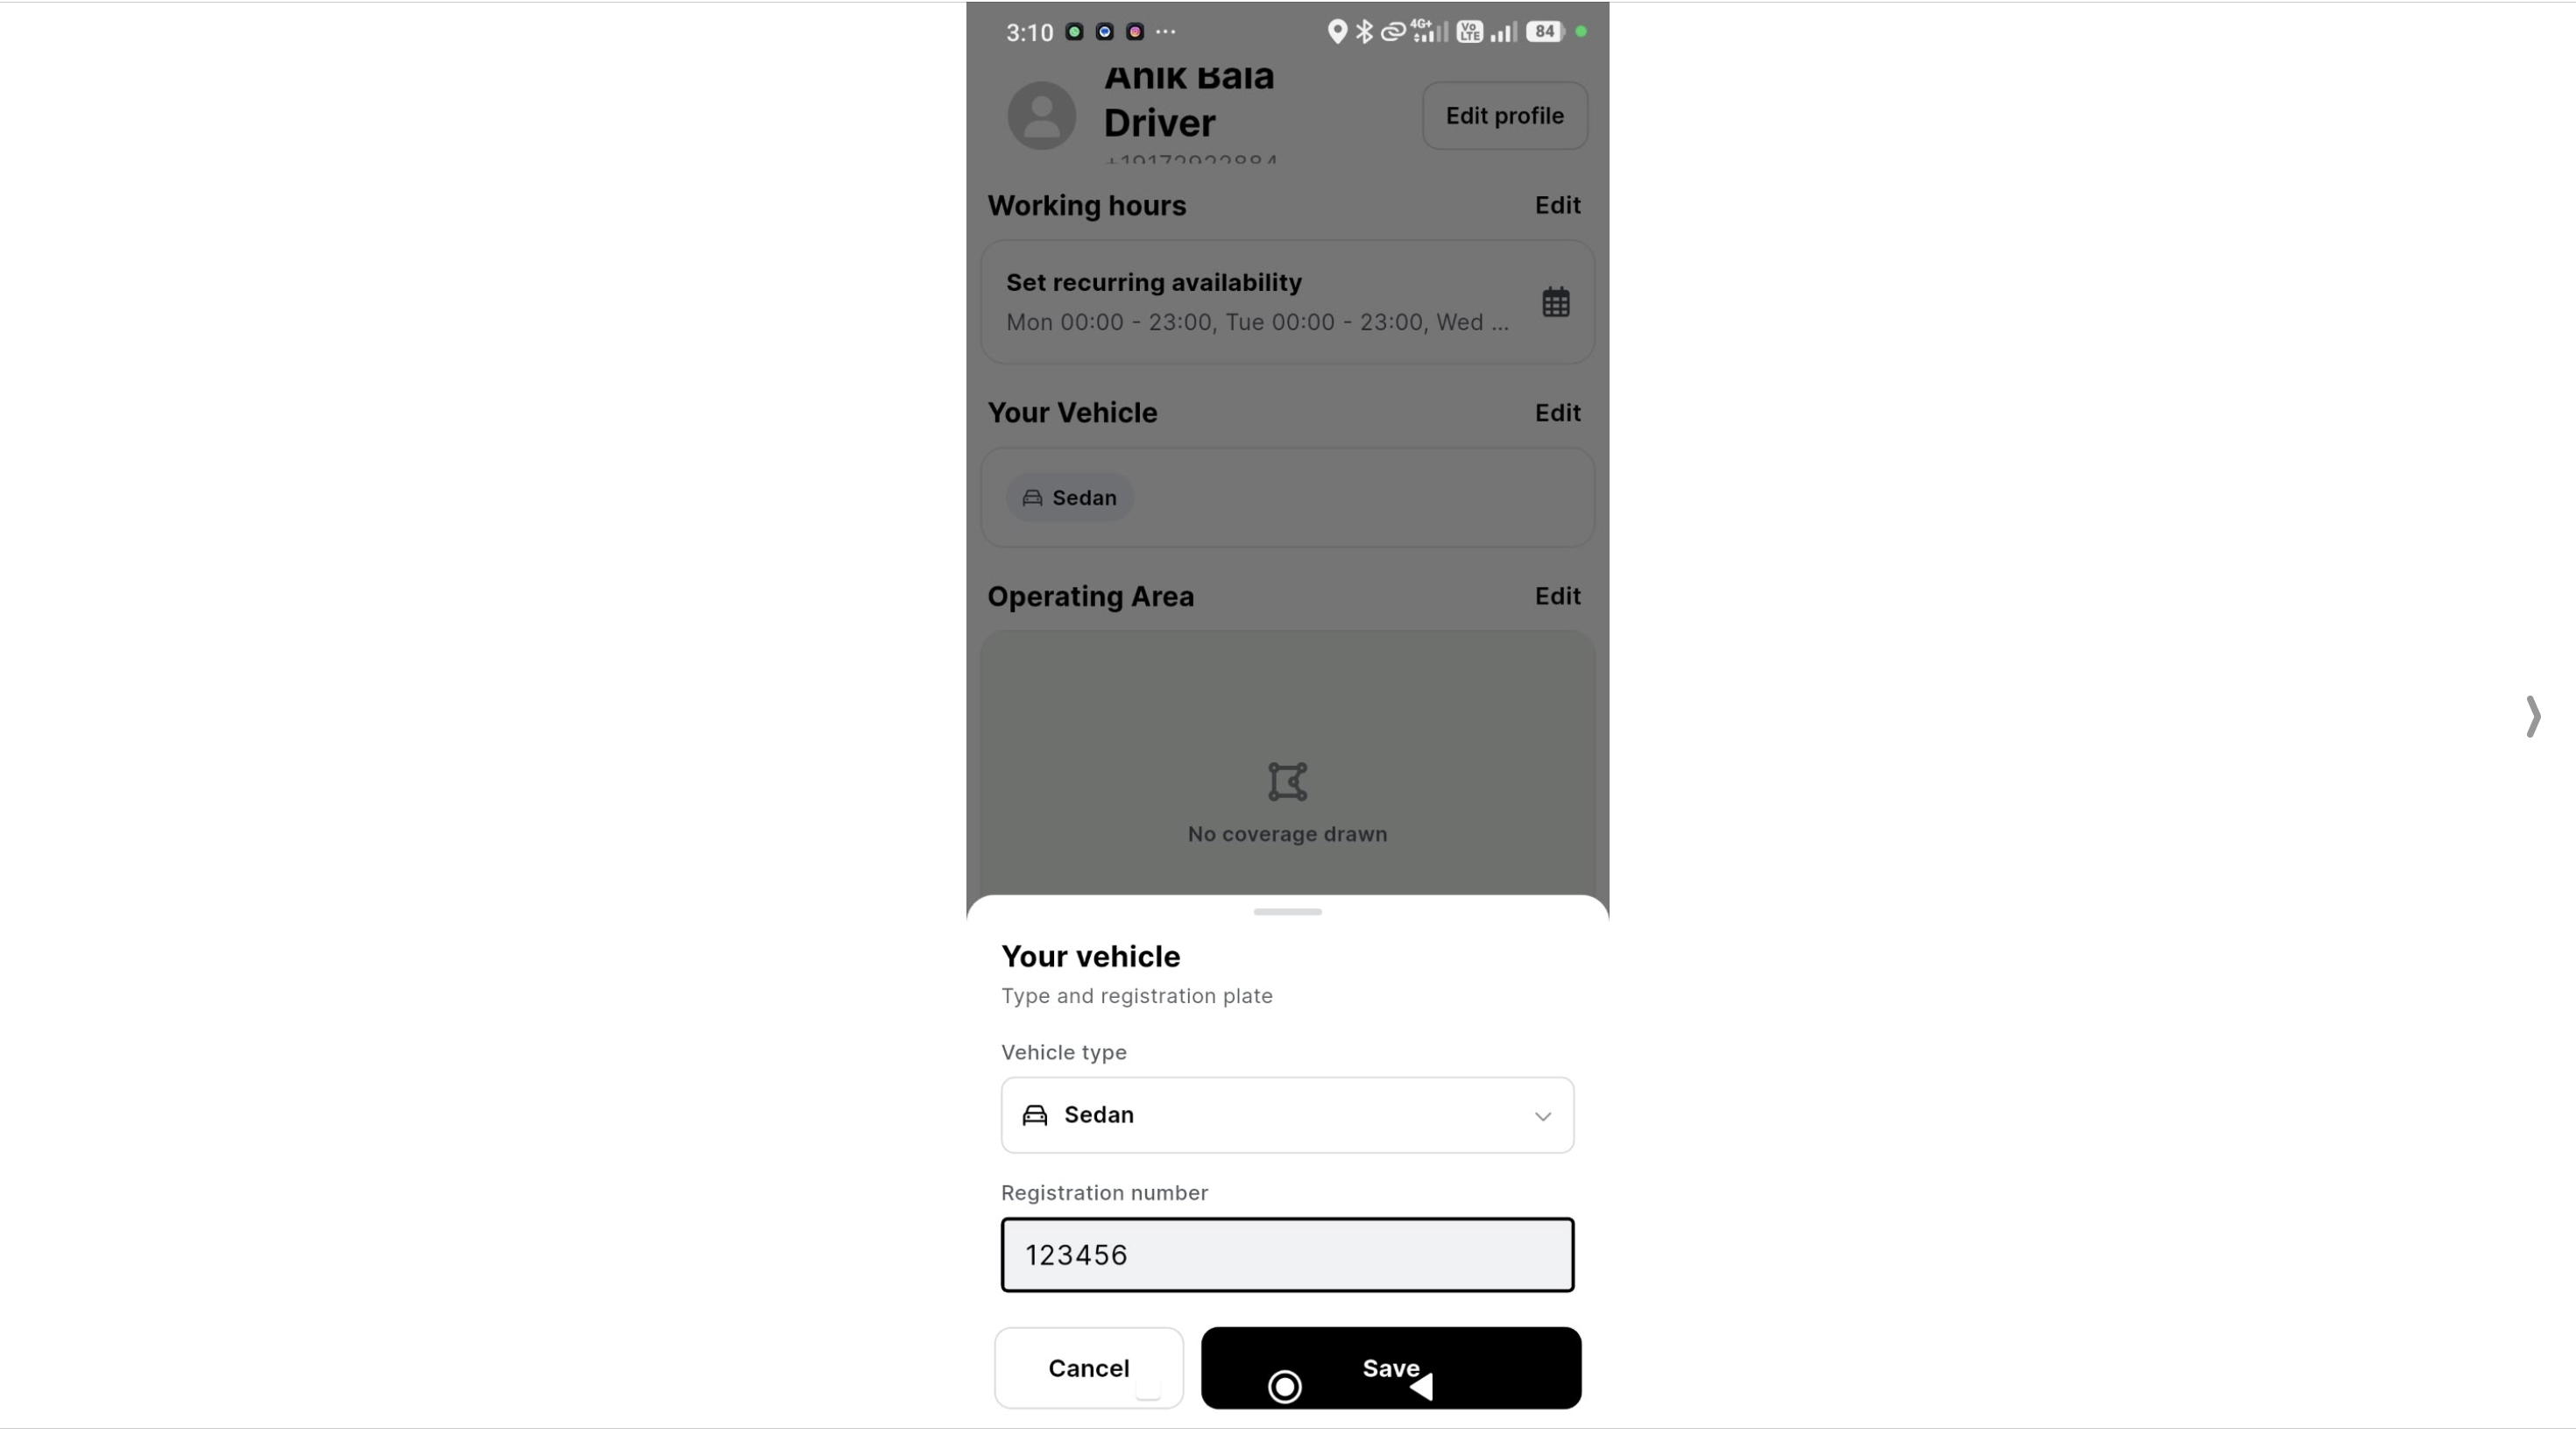
Step 2: Add Vehicle Details
Next, the driver needs to enter their vehicle details. Tap Edit next to Your Vehicle, select the Vehicle Type, and enter the Registration Number. Tap Save once complete.
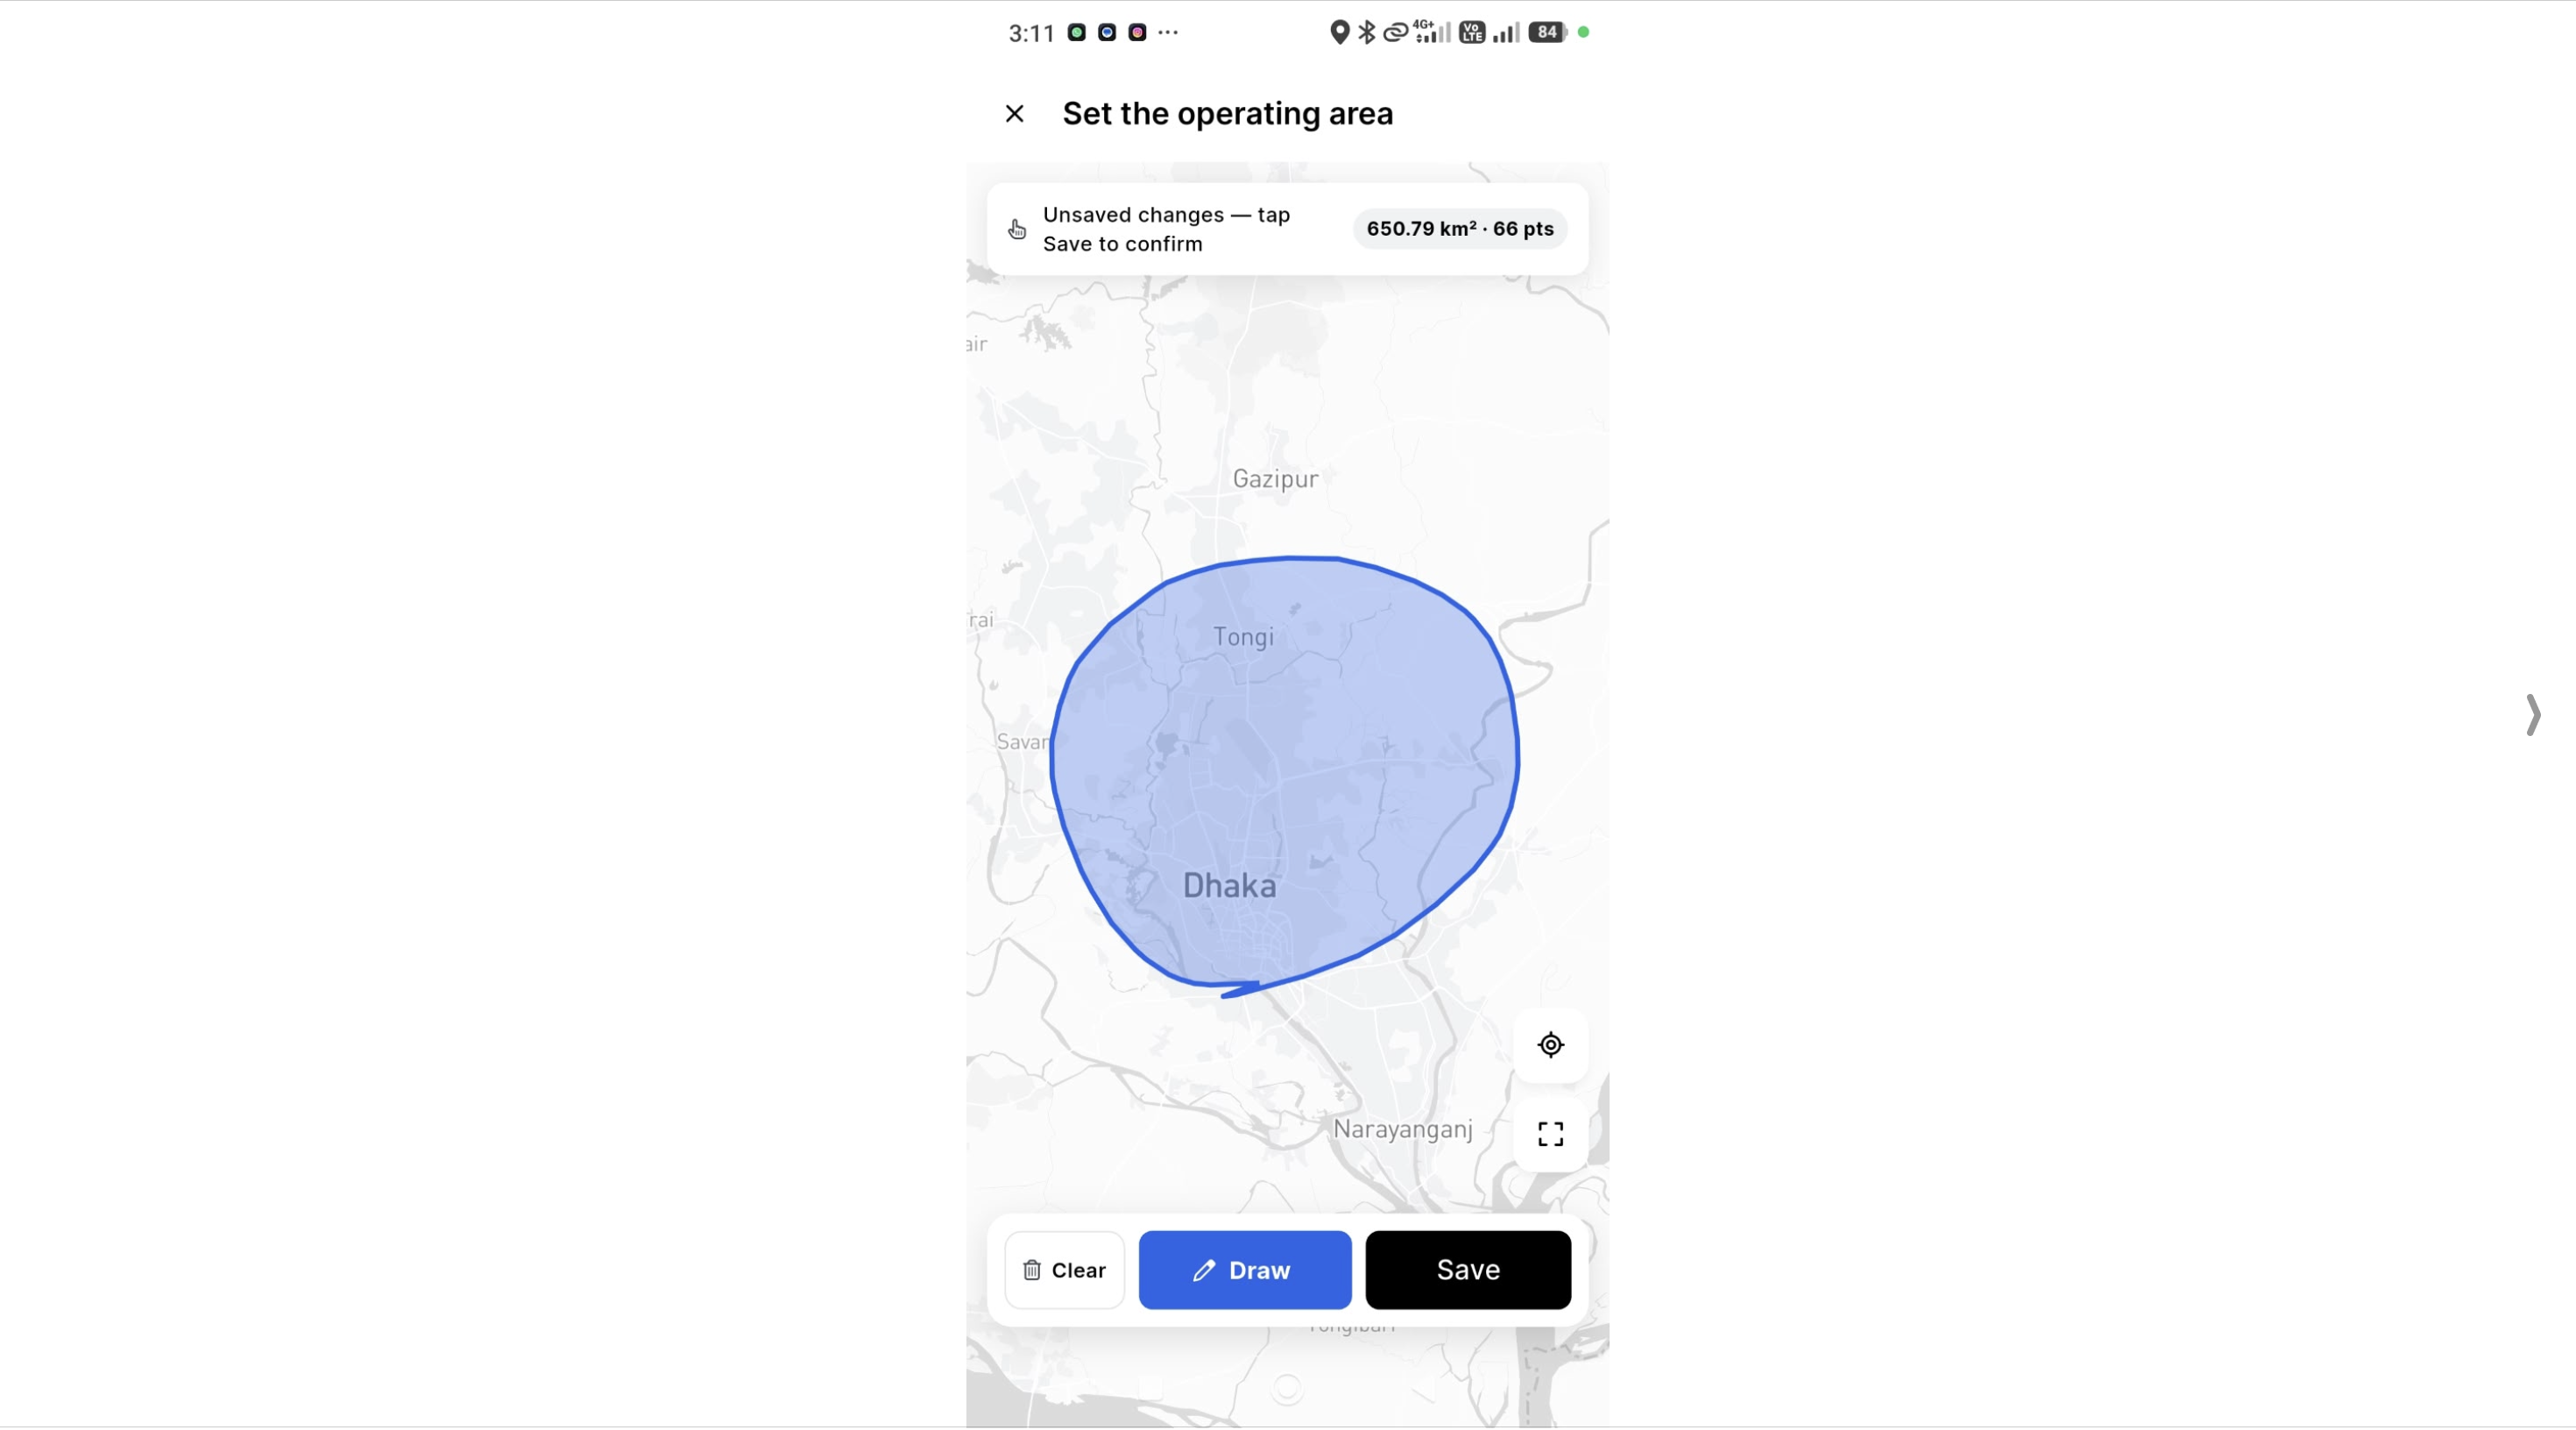
Step 3: Set the Operating Area
After that, the driver needs to set their operating area — the zone in which they're available to receive orders. Tap Edit next to Operating Area, use the Draw tool to mark the coverage zone on the map, and tap Save to confirm.
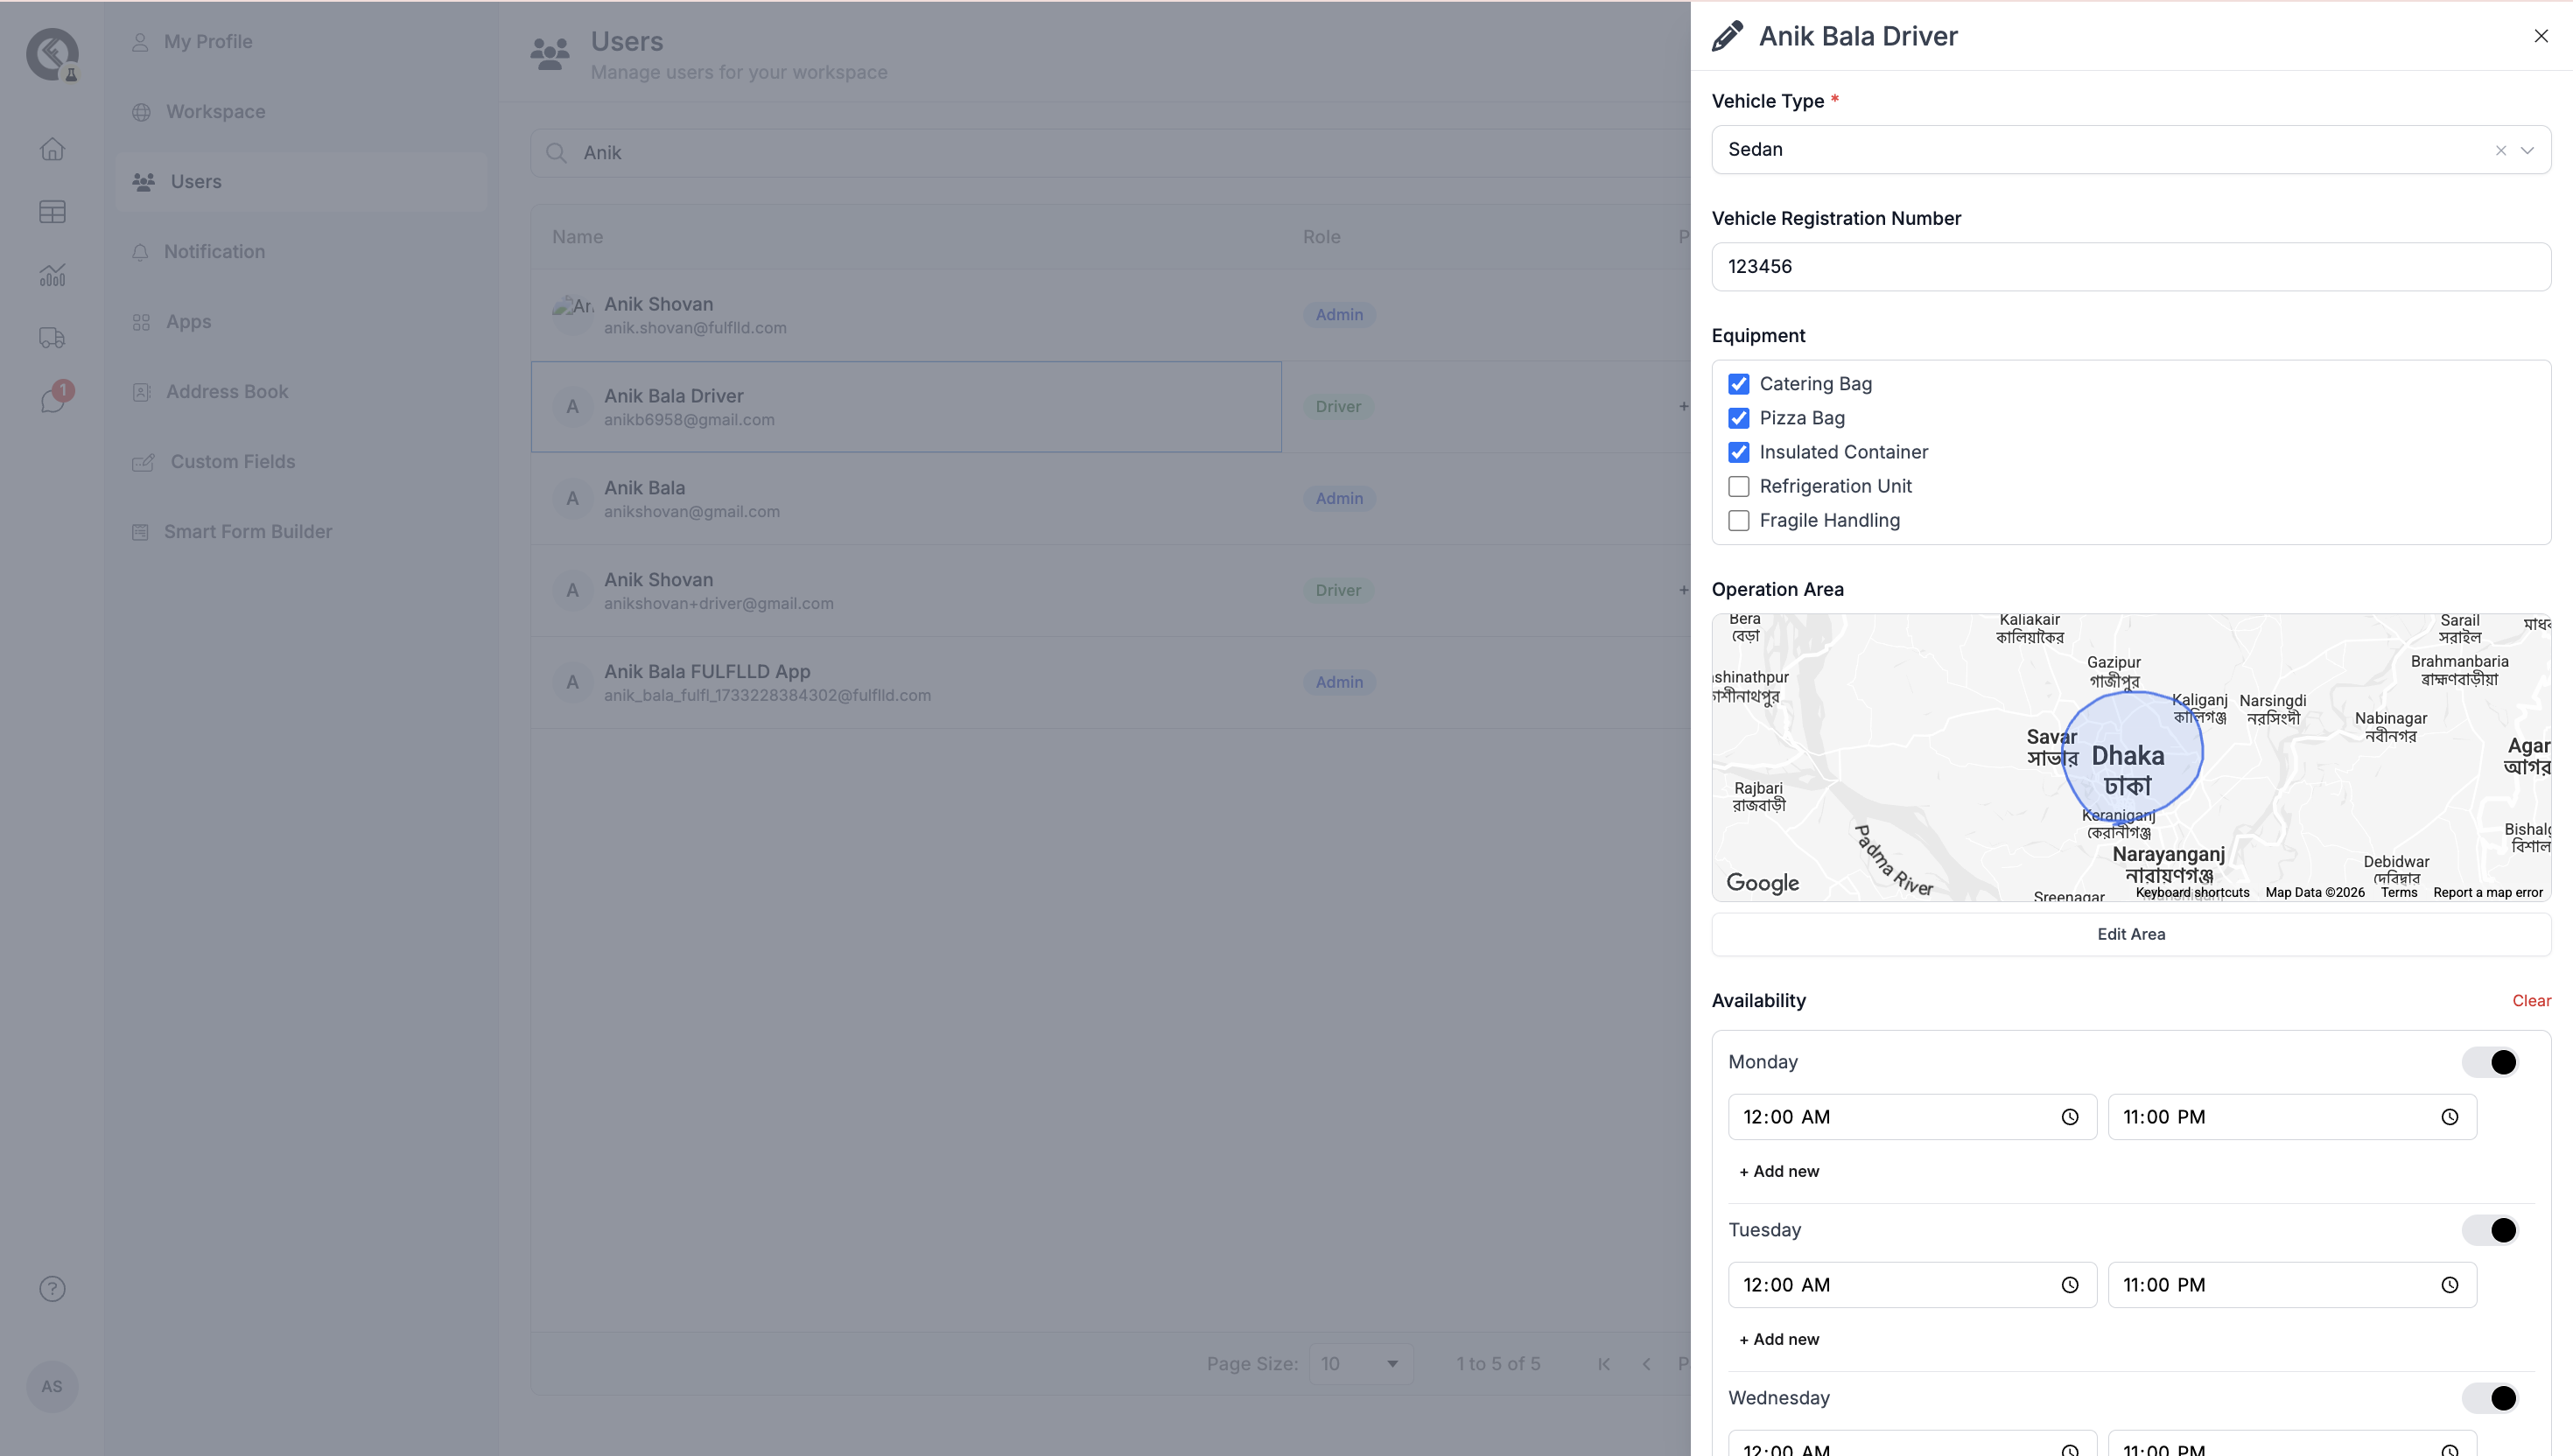
Viewing and Managing Driver Profiles (Web App)
Once the driver completes their profile, it becomes visible on the web app under Users. From here, dispatchers can view or edit a driver's working hours, vehicle type, registration number, equipment, and operating area on their behalf.
Drivers will start receiving order requests for orders that fall within their set availability, vehicle/equipment capability, and operating area.
Enabling Auto-Assignment (Workspace Settings)
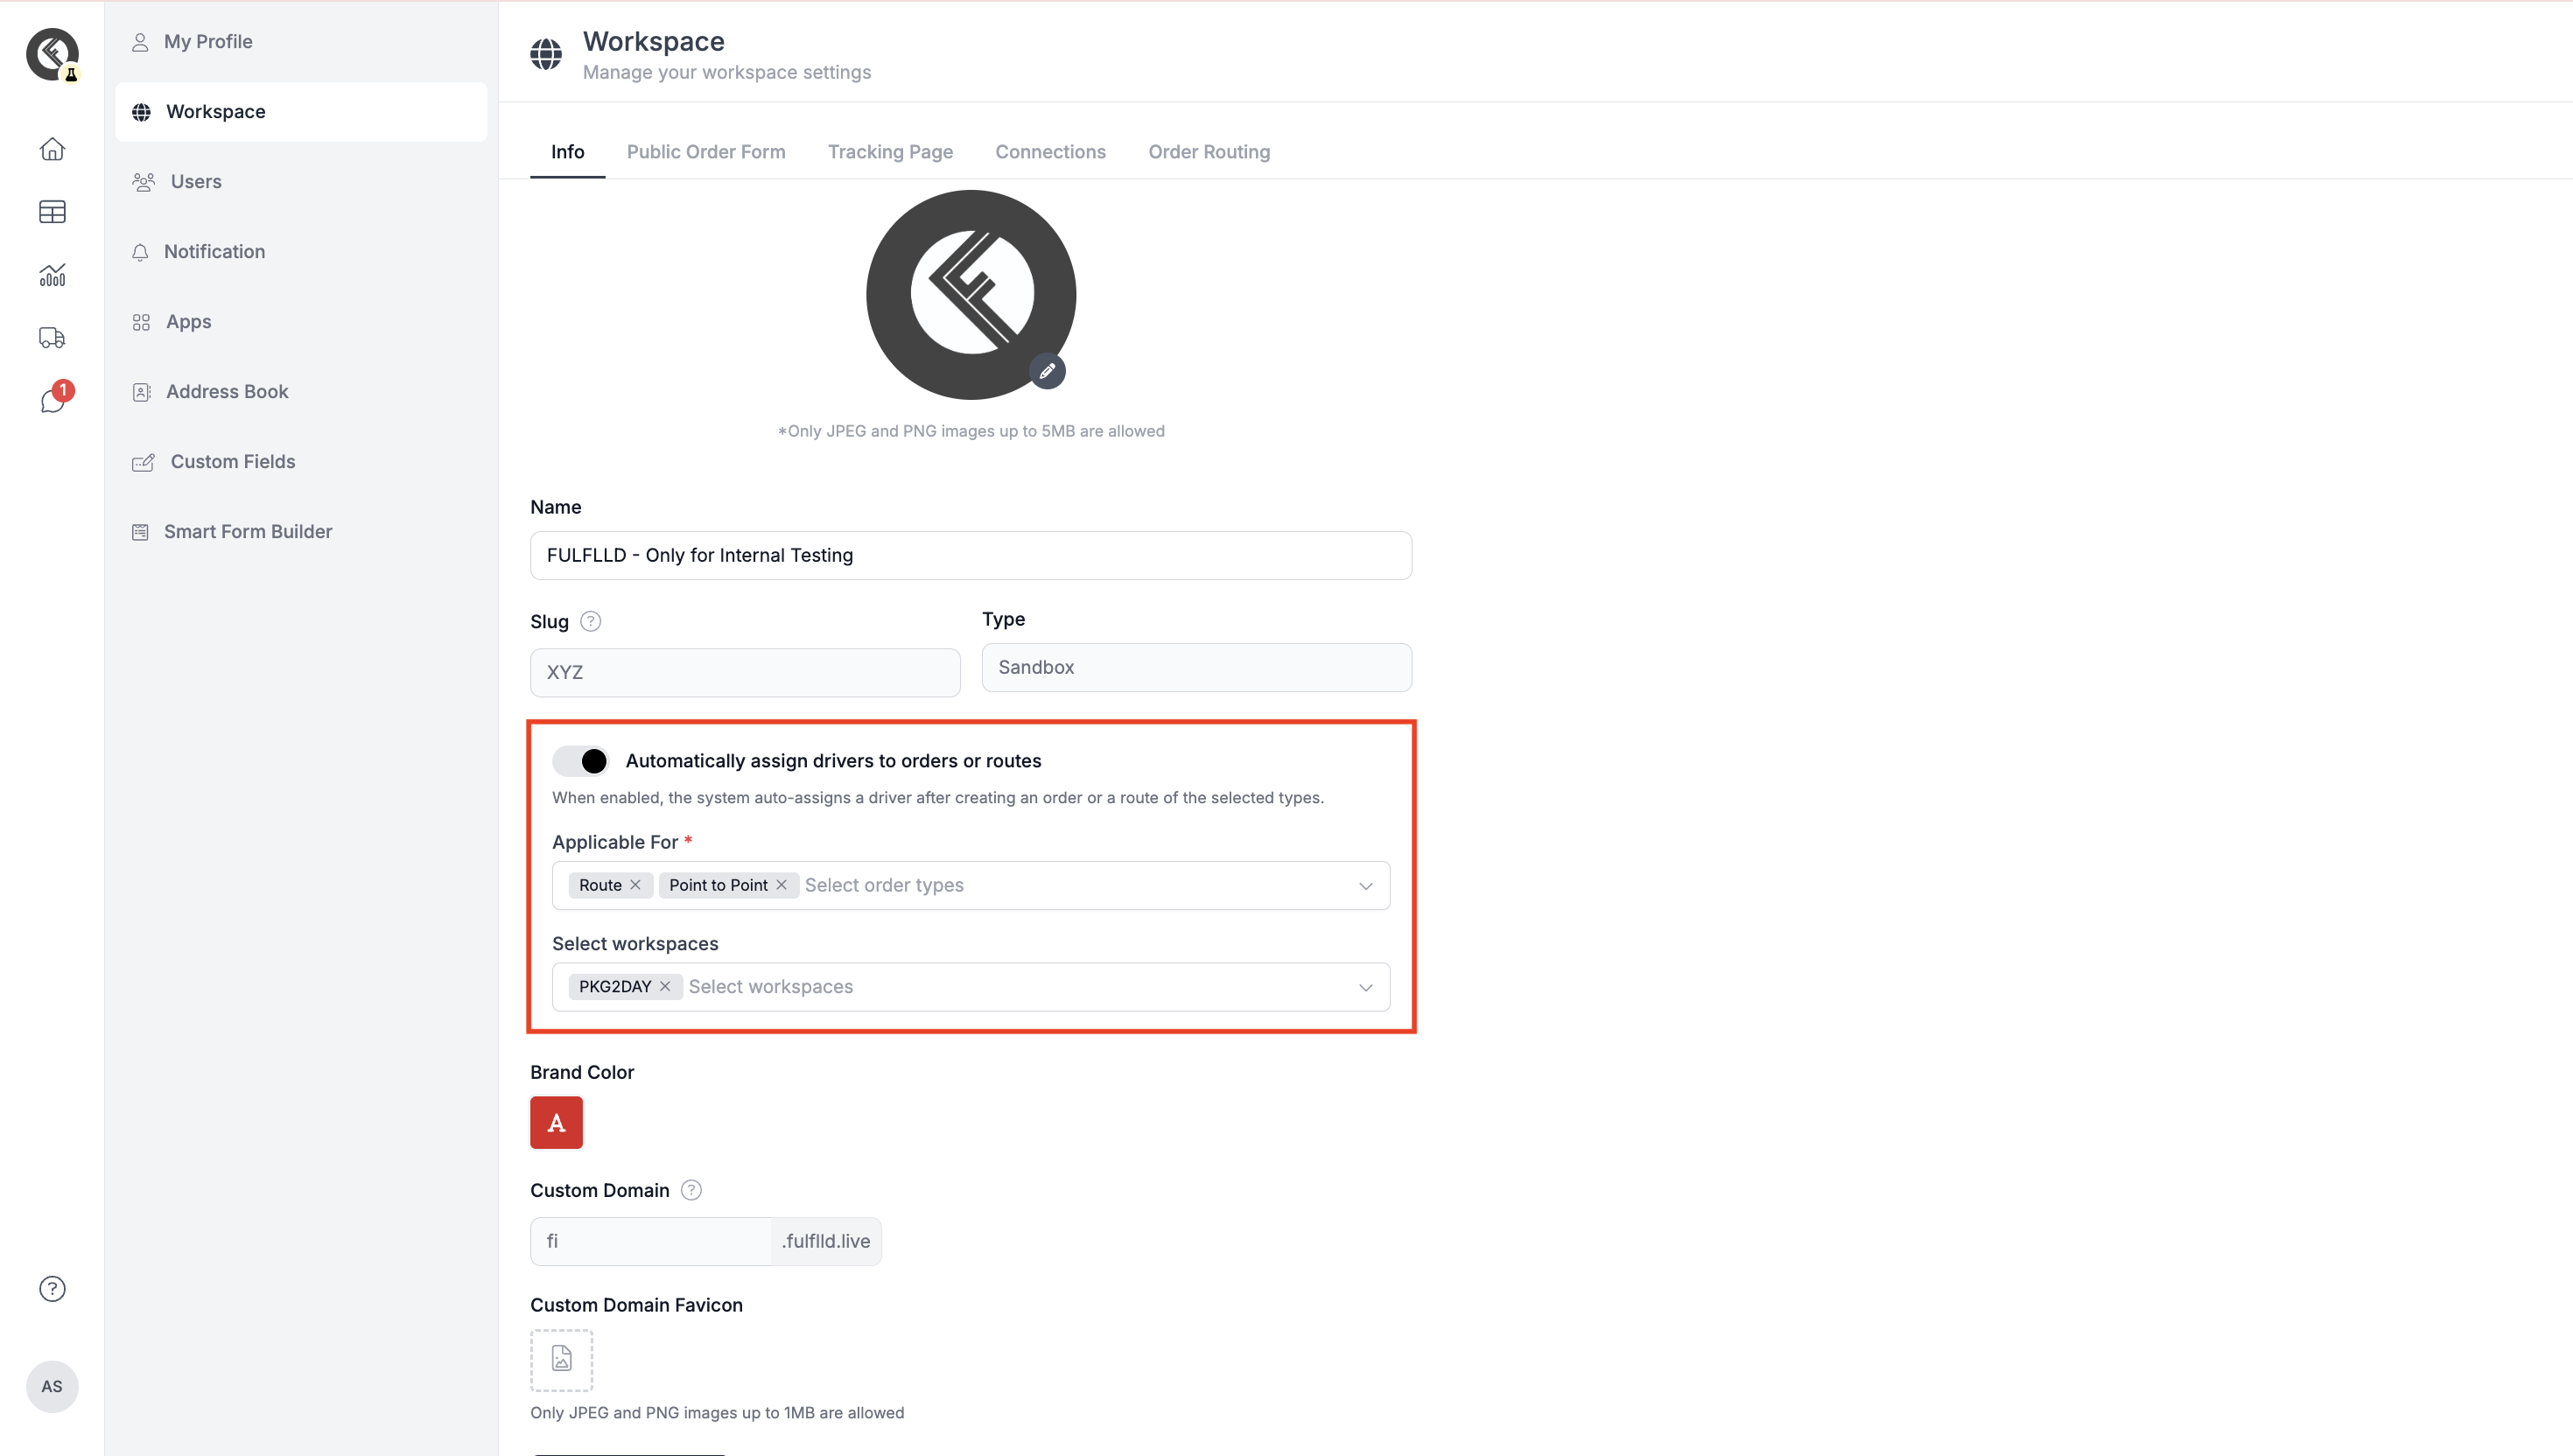
Once driver profiles are set up, auto-assignment can be turned on at the workspace level so that orders are assigned to eligible drivers automatically as soon as they're created. If left off, dispatchers assign orders manually from the order panel instead.
Go to Workspace Settings > Info and toggle on Automatically assign drivers to orders or routes. Then configure:
Applicable For — the order types auto-assignment should apply to (Route, Point to Point, or both)
Select workspaces — the workspace(s) this setting should apply to
How Auto-Assignment Works When You Create an Order
Step 1: Create the Order
Create a new order as usual from the web app by selecting a delivery type and entering pickup and drop-off details.
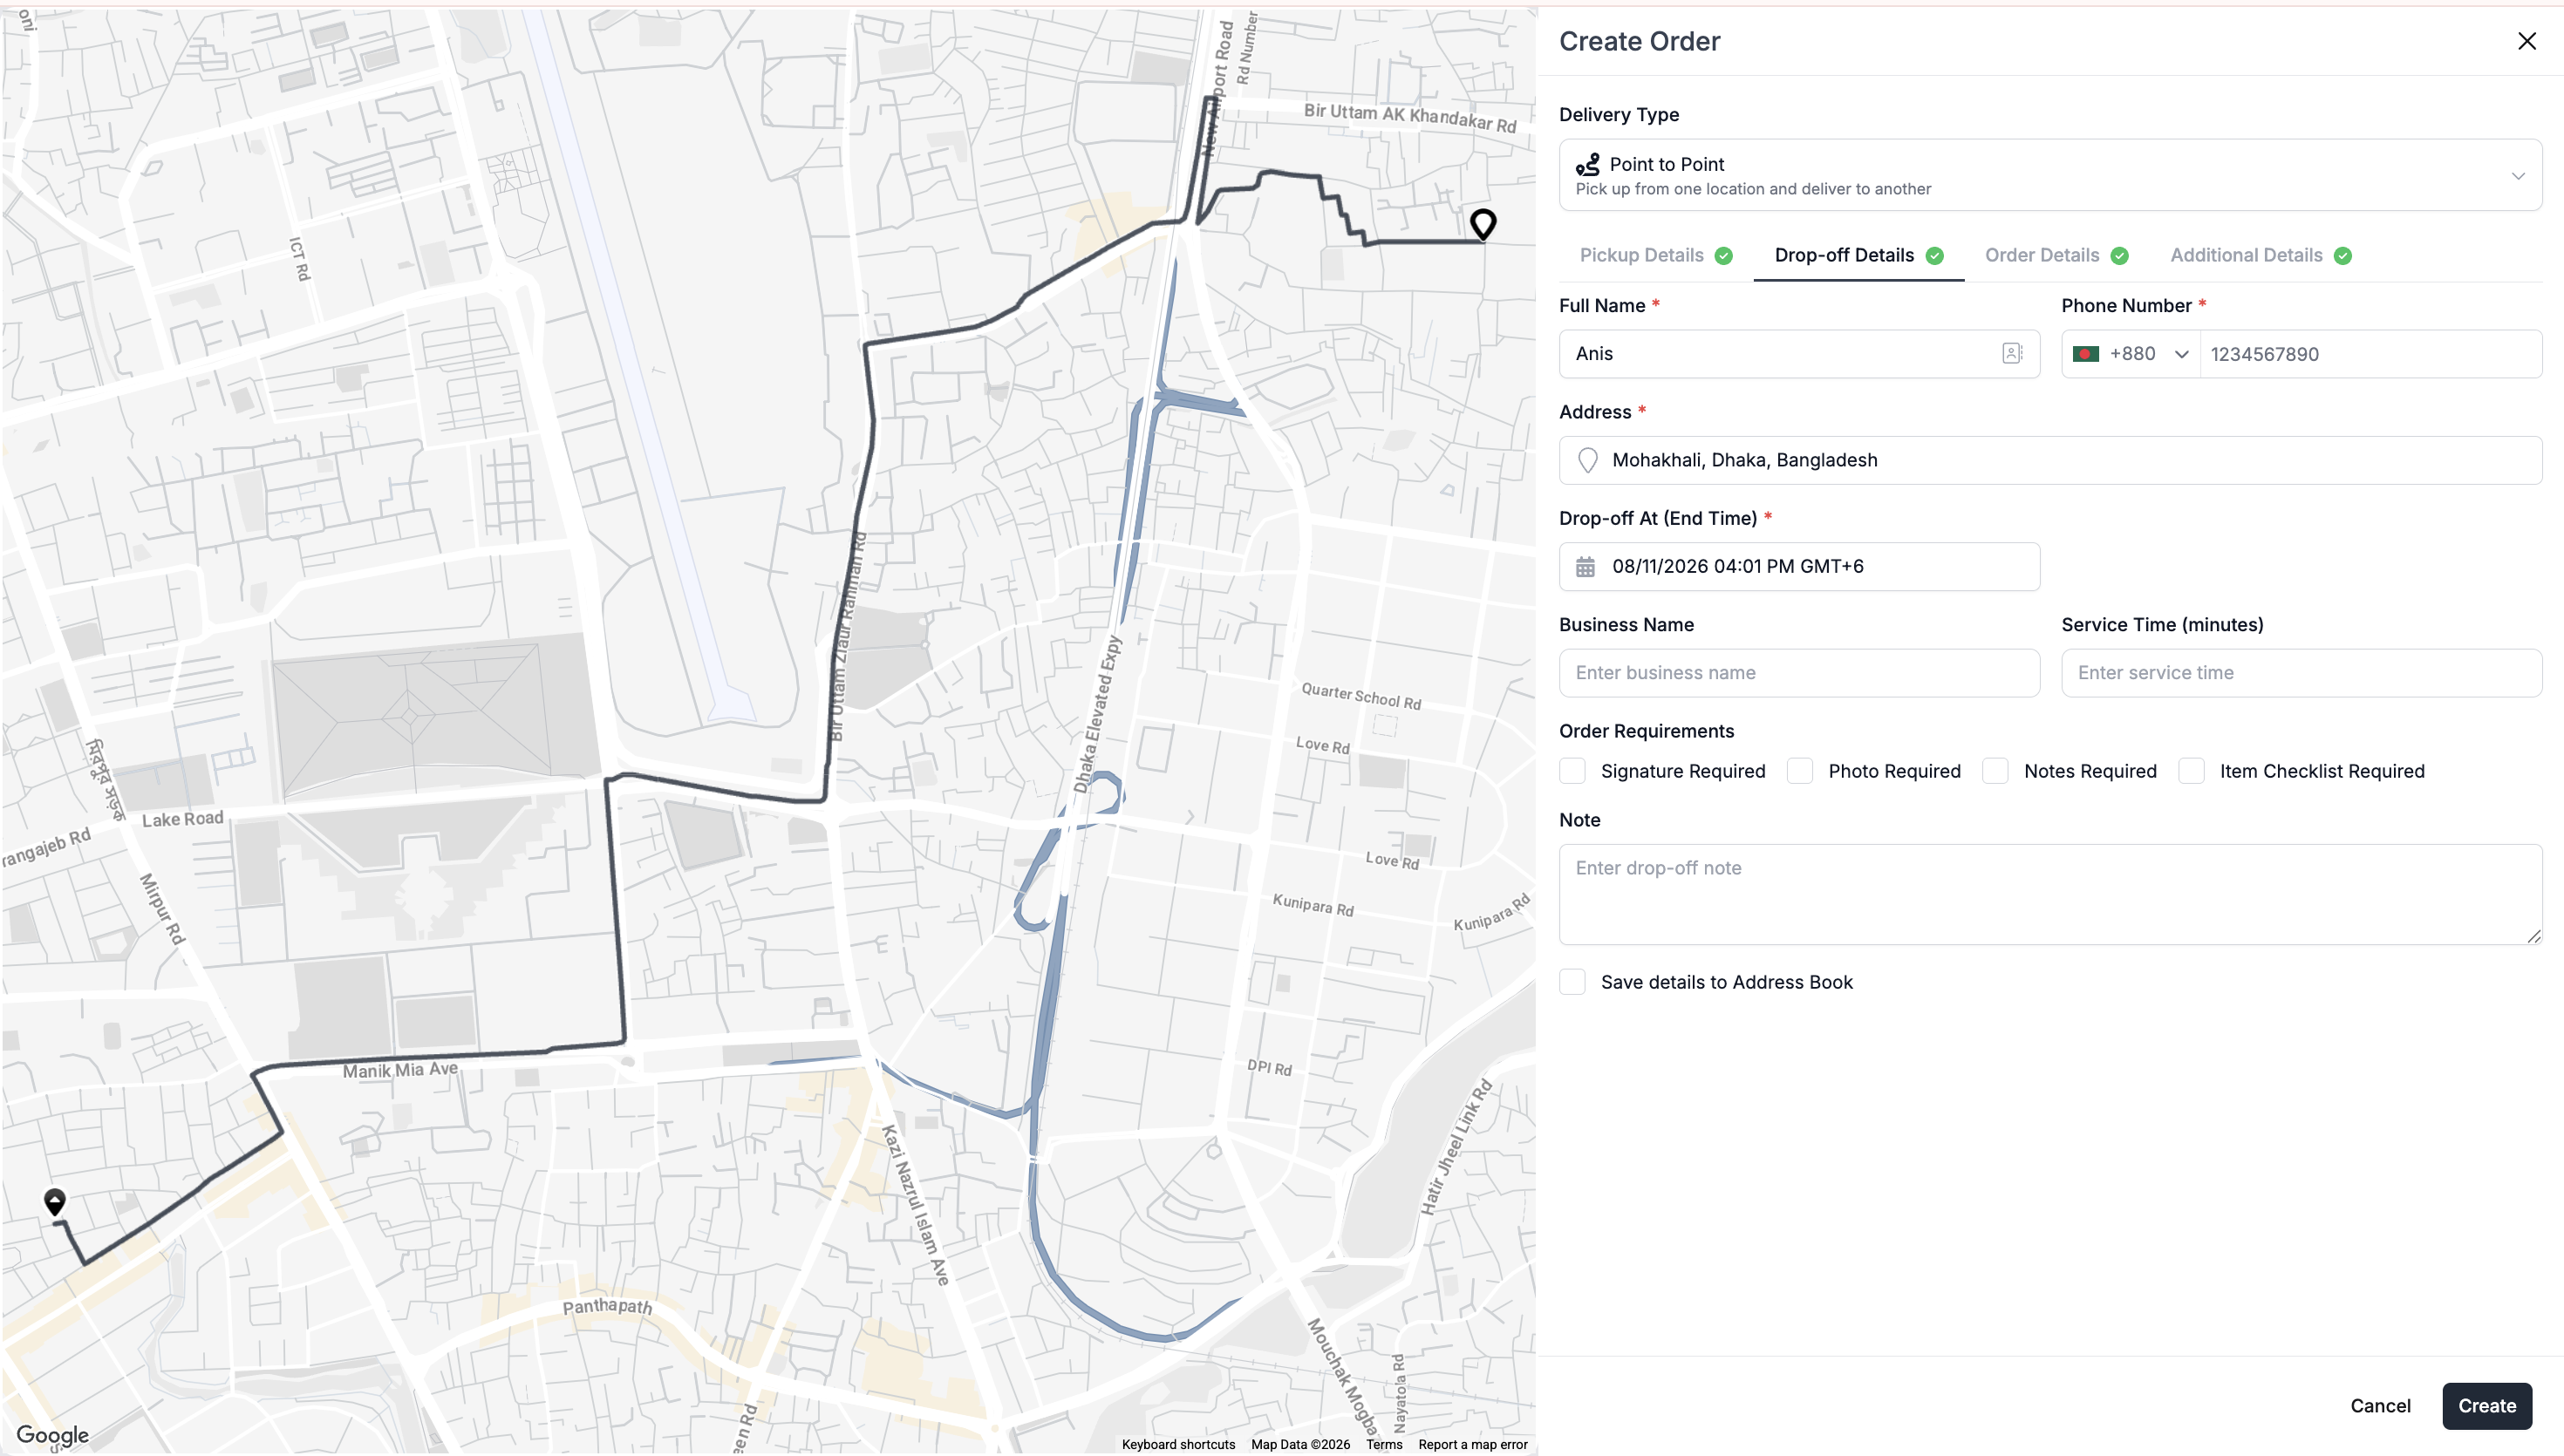
Step 2: The System Searches for Eligible Drivers
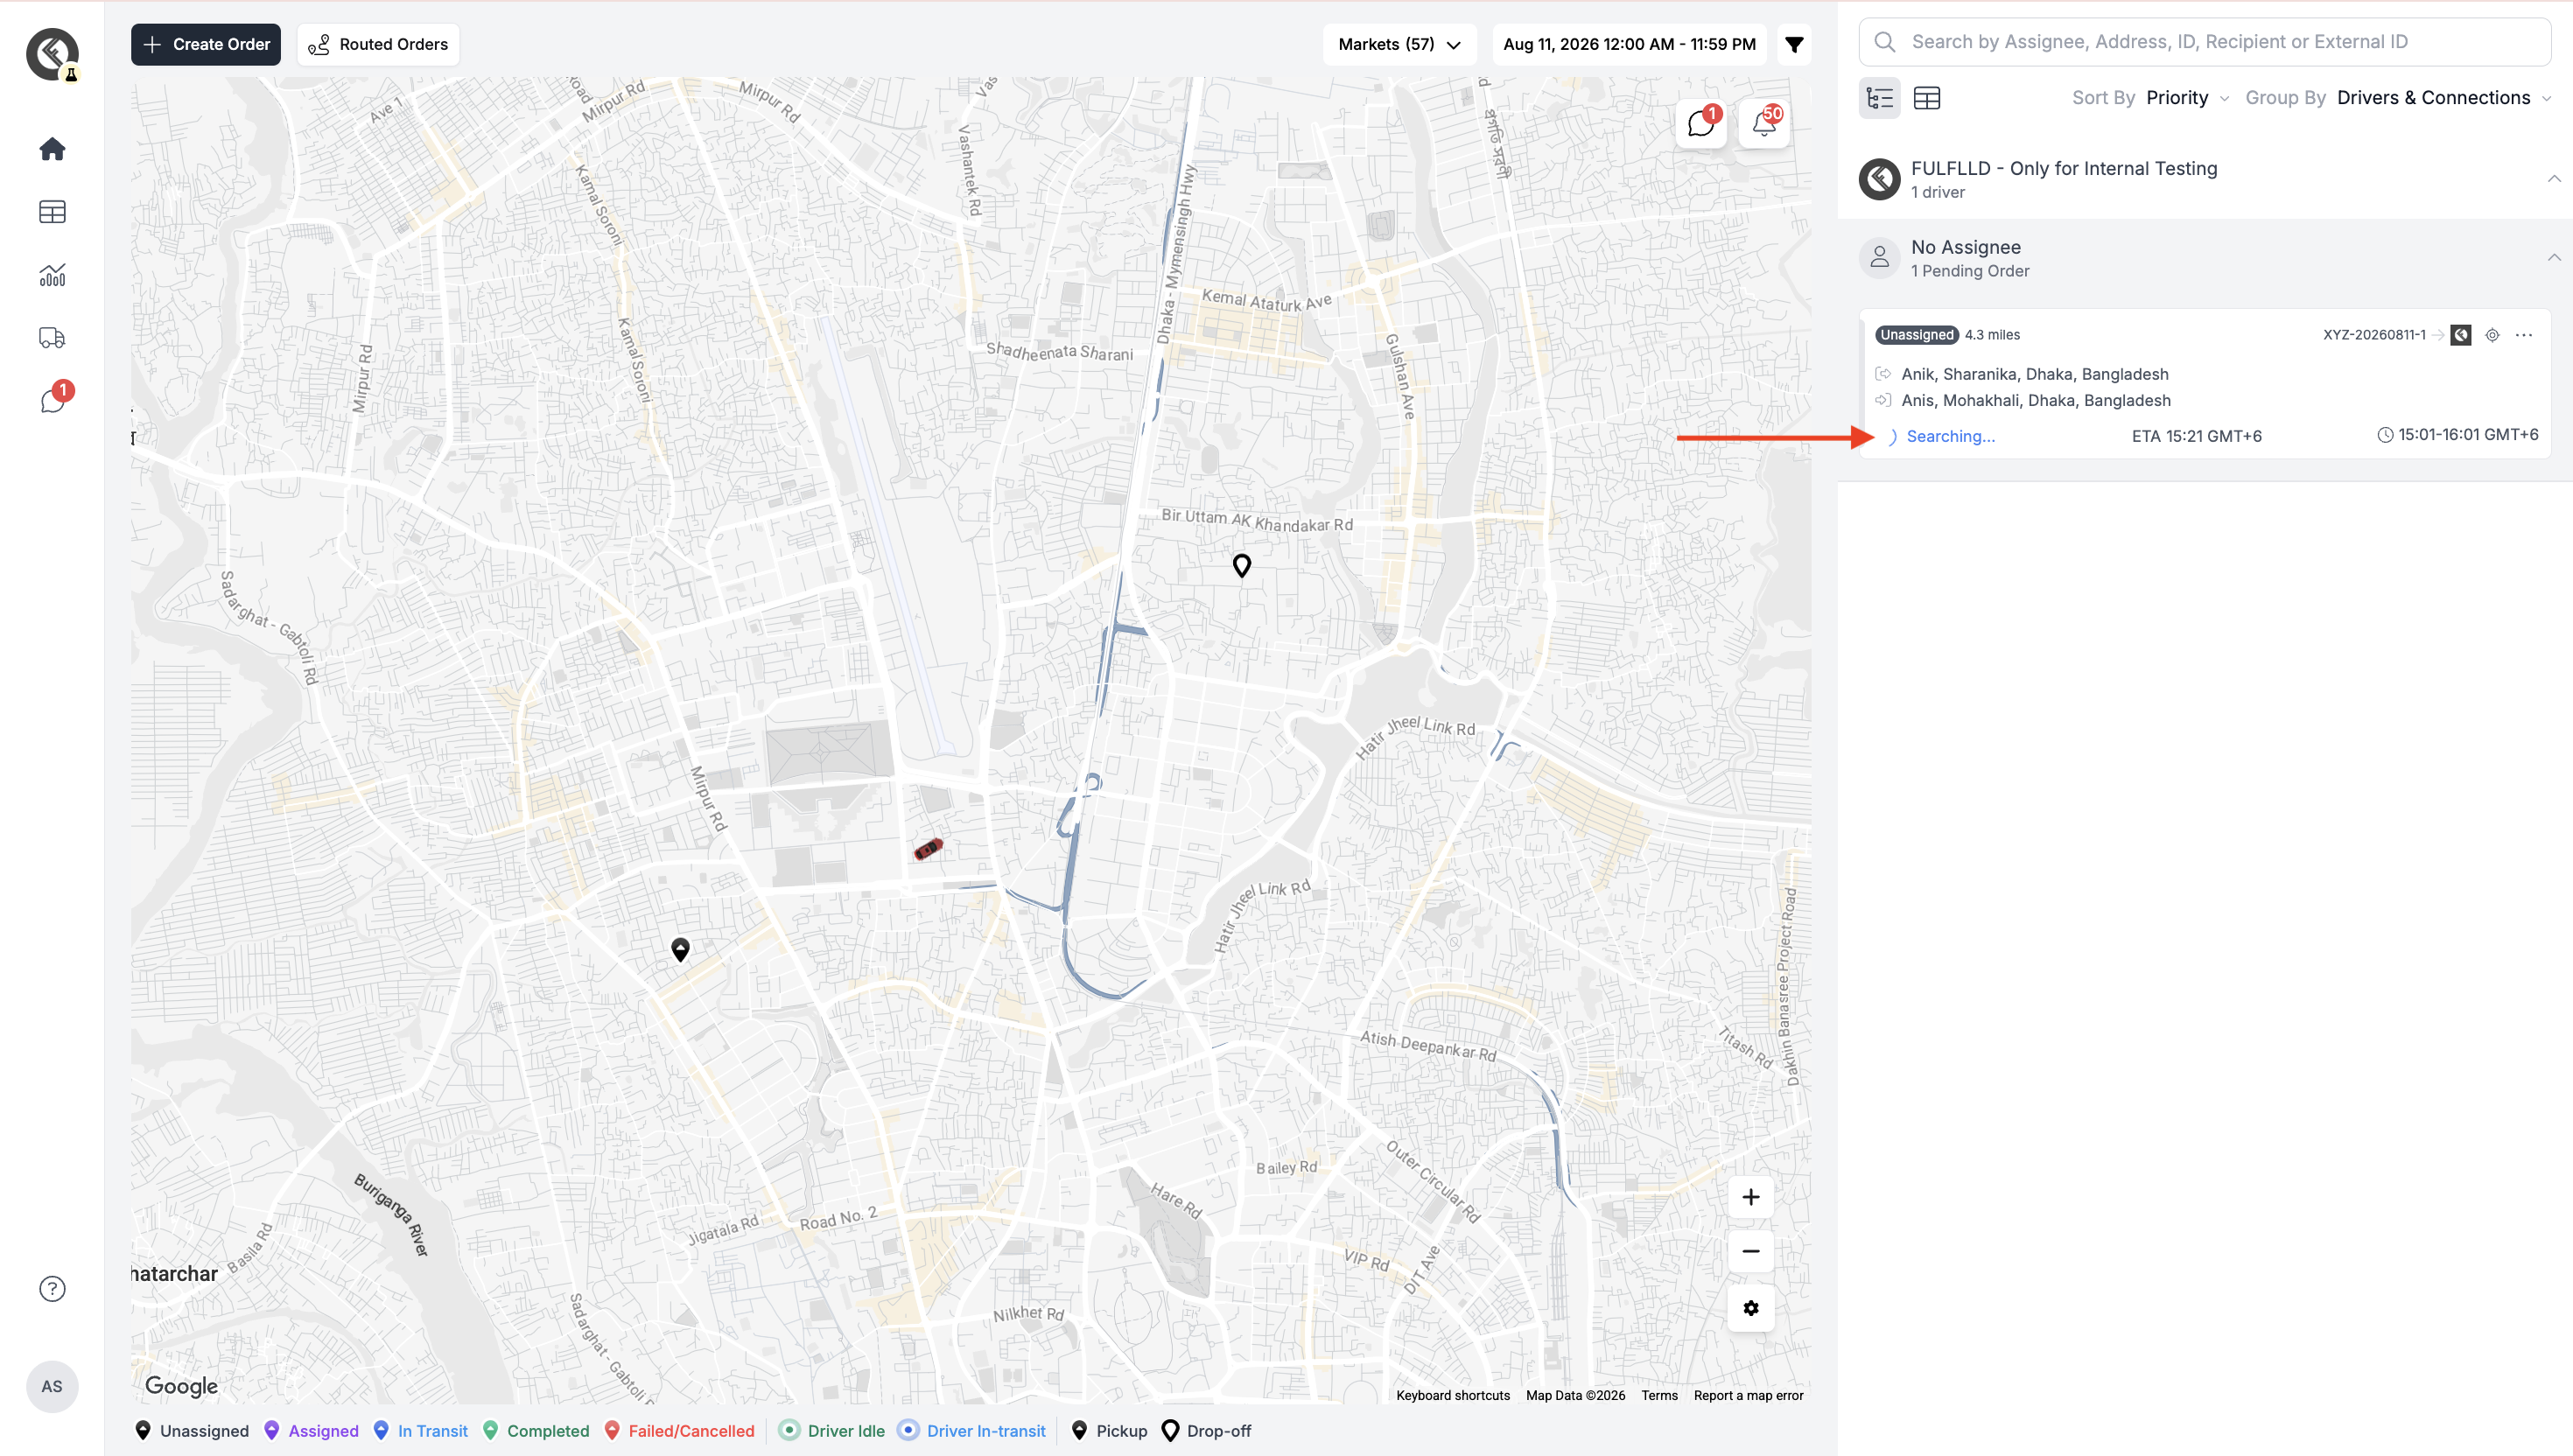
Once the order is created, it automatically starts searching for eligible drivers based on their availability, vehicle/equipment, and operating area. The order will show a Searching... status until a driver is found.
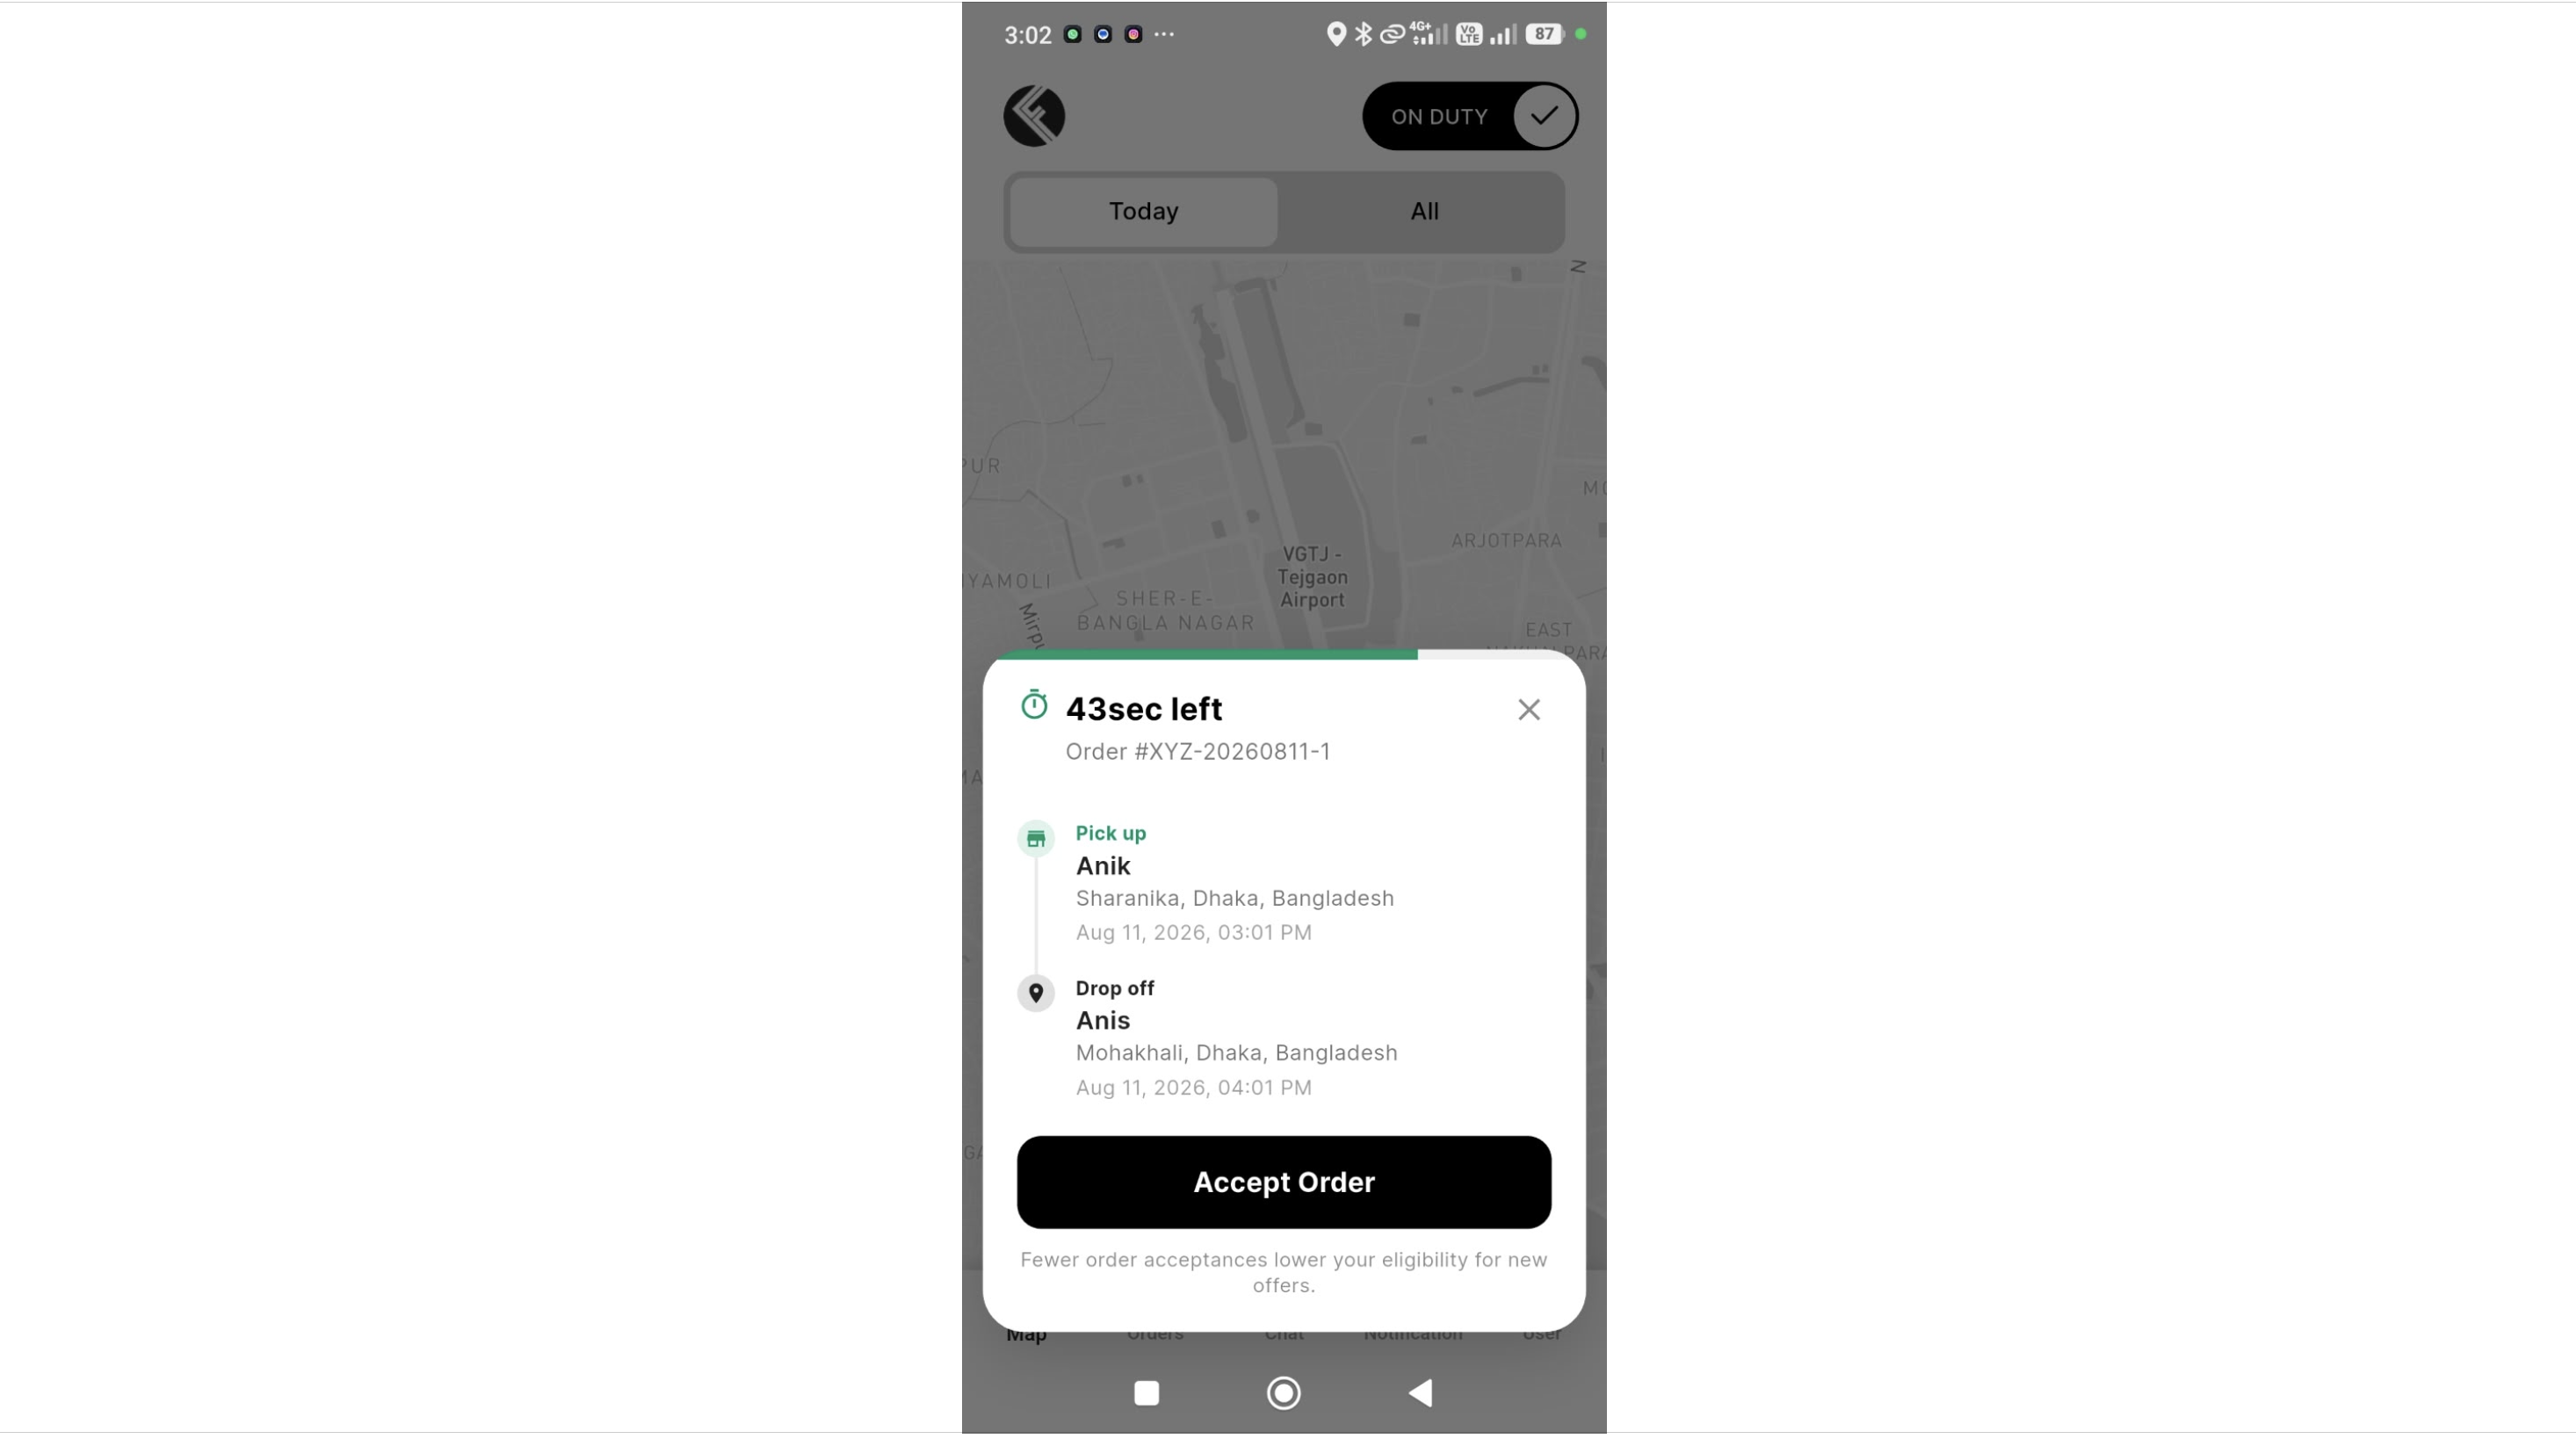
Step 3: The Driver Receives and Accepts the Request
The eligible driver receives the order request on their mobile app and has a limited time window to accept or reject it. Tapping Accept Order accepts the request; tapping the X button in the top corner rejects it.
Step 4: The Order Is Assigned to the Driver
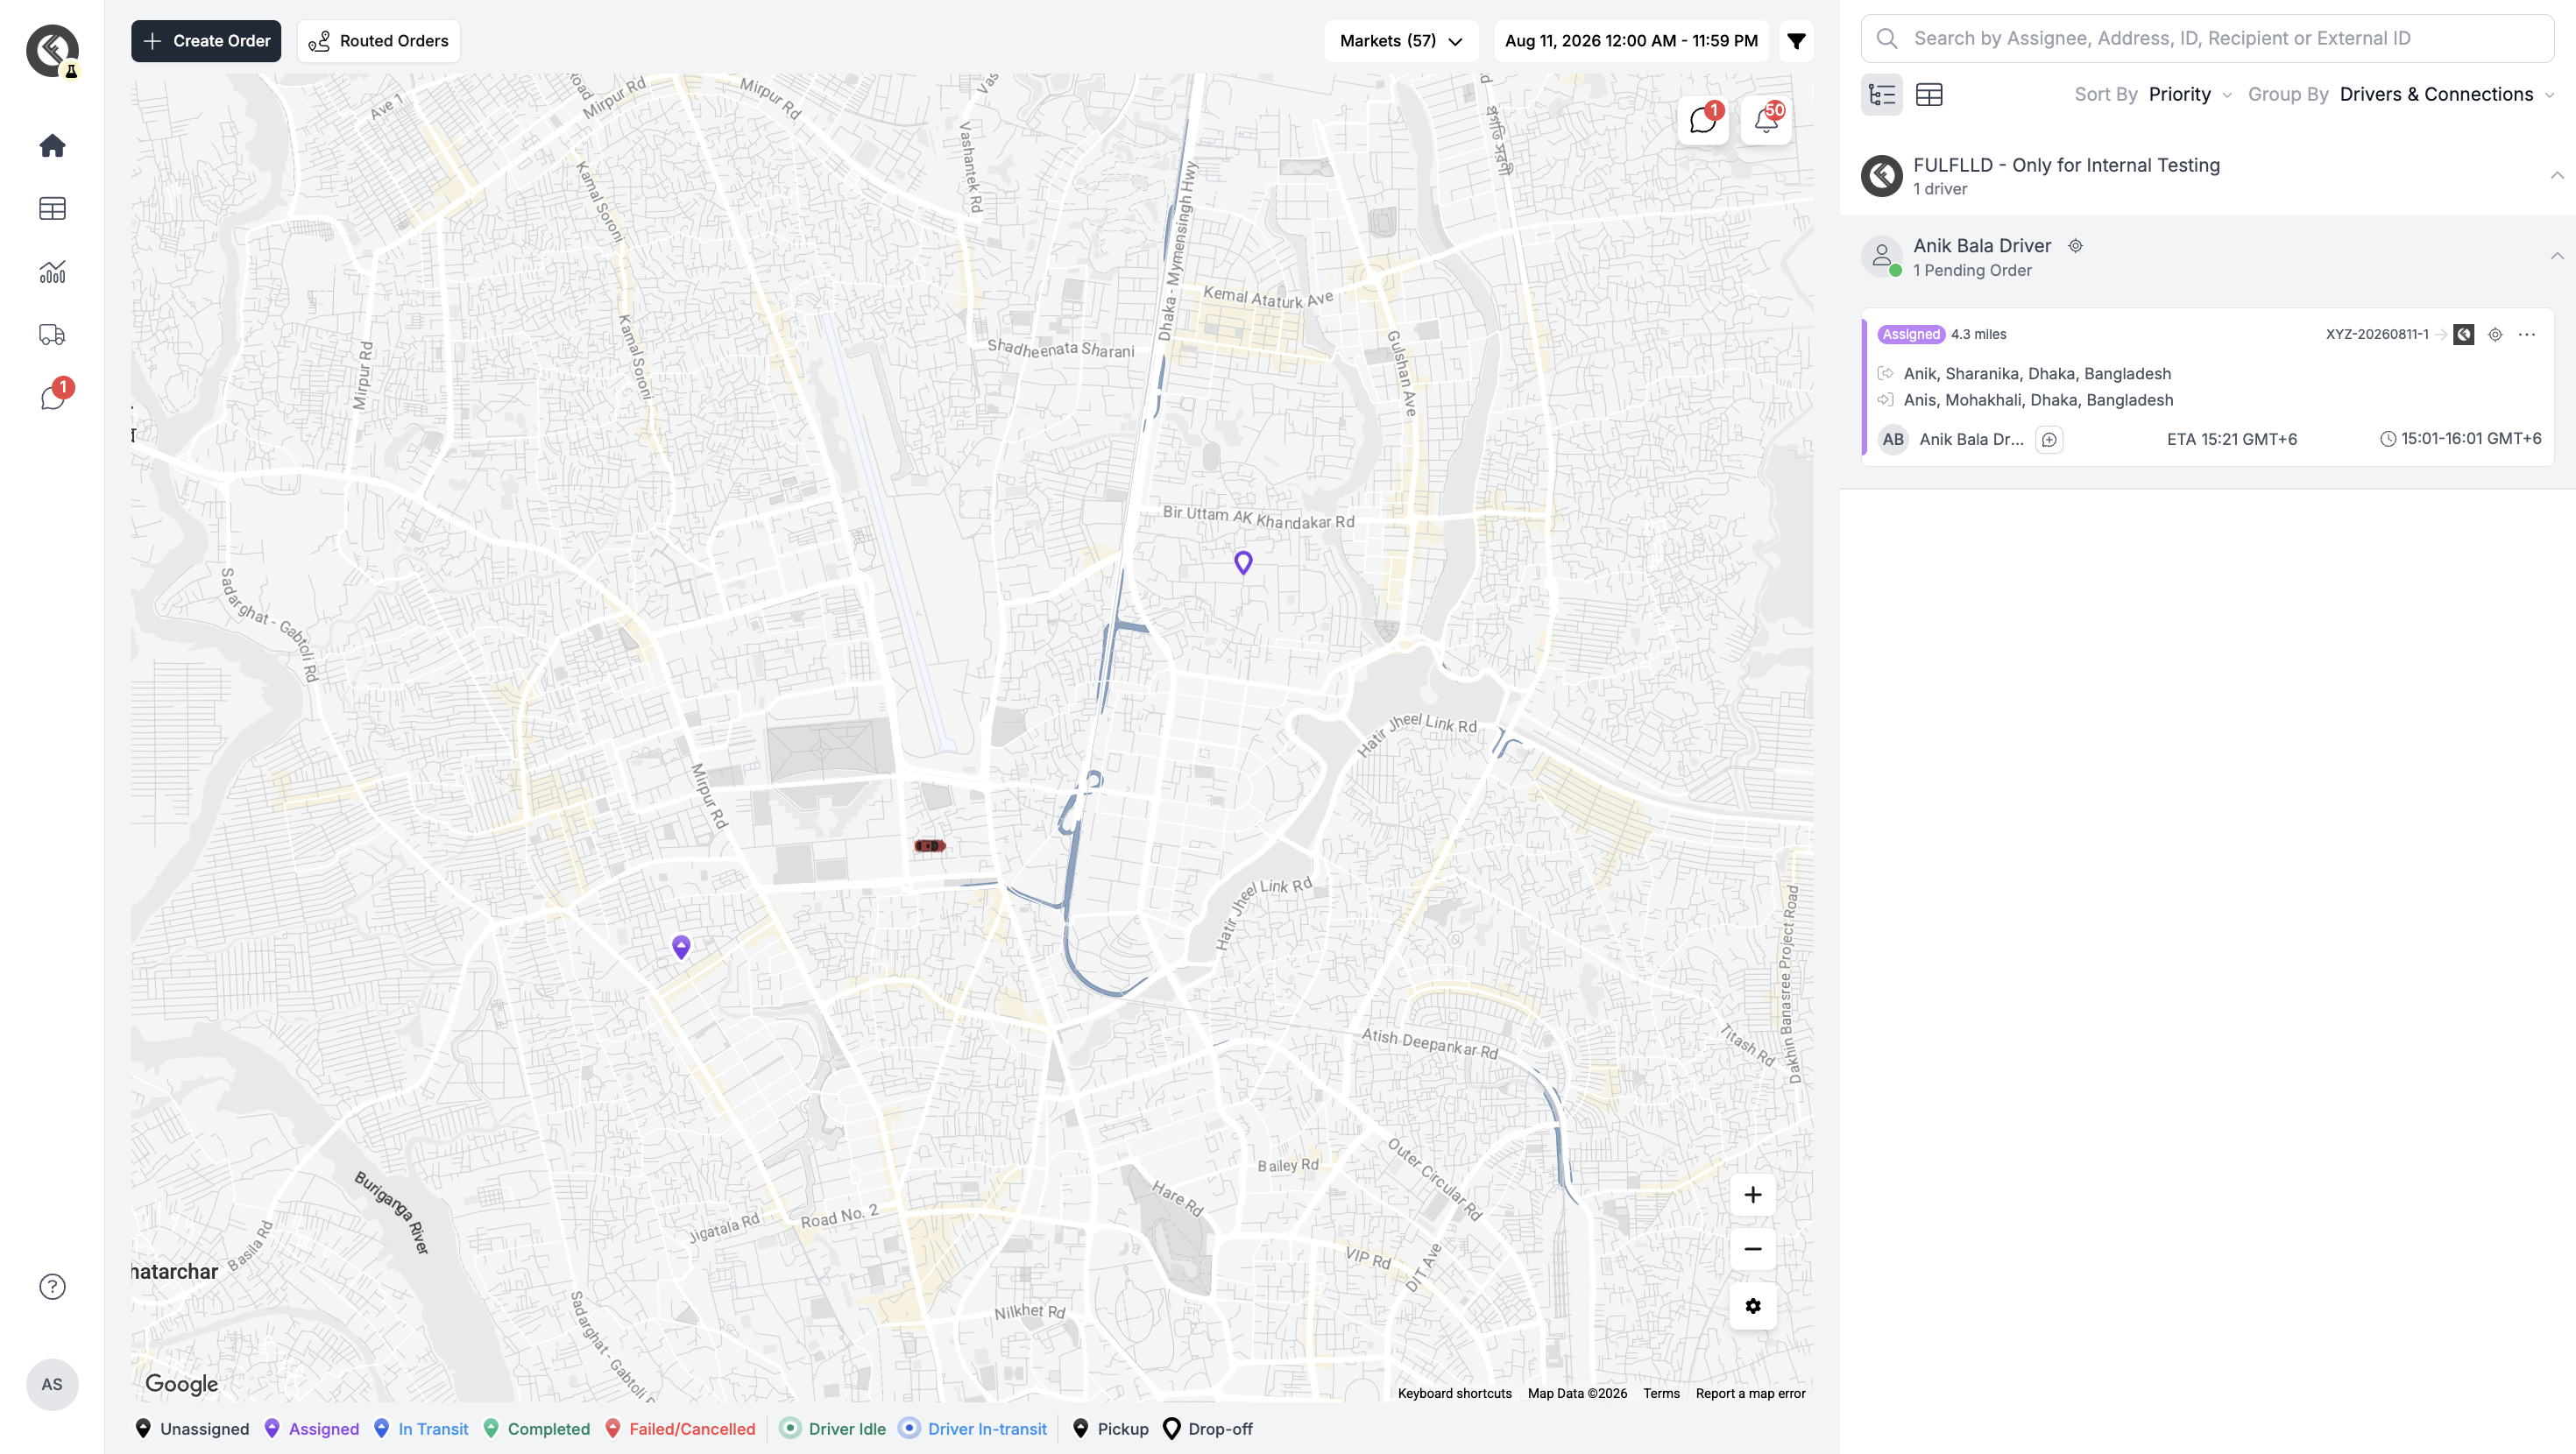
Once the driver accepts, the order is automatically assigned to them and the order status updates accordingly on the dispatcher's map and order list.
Manually Triggering Auto-Assignment
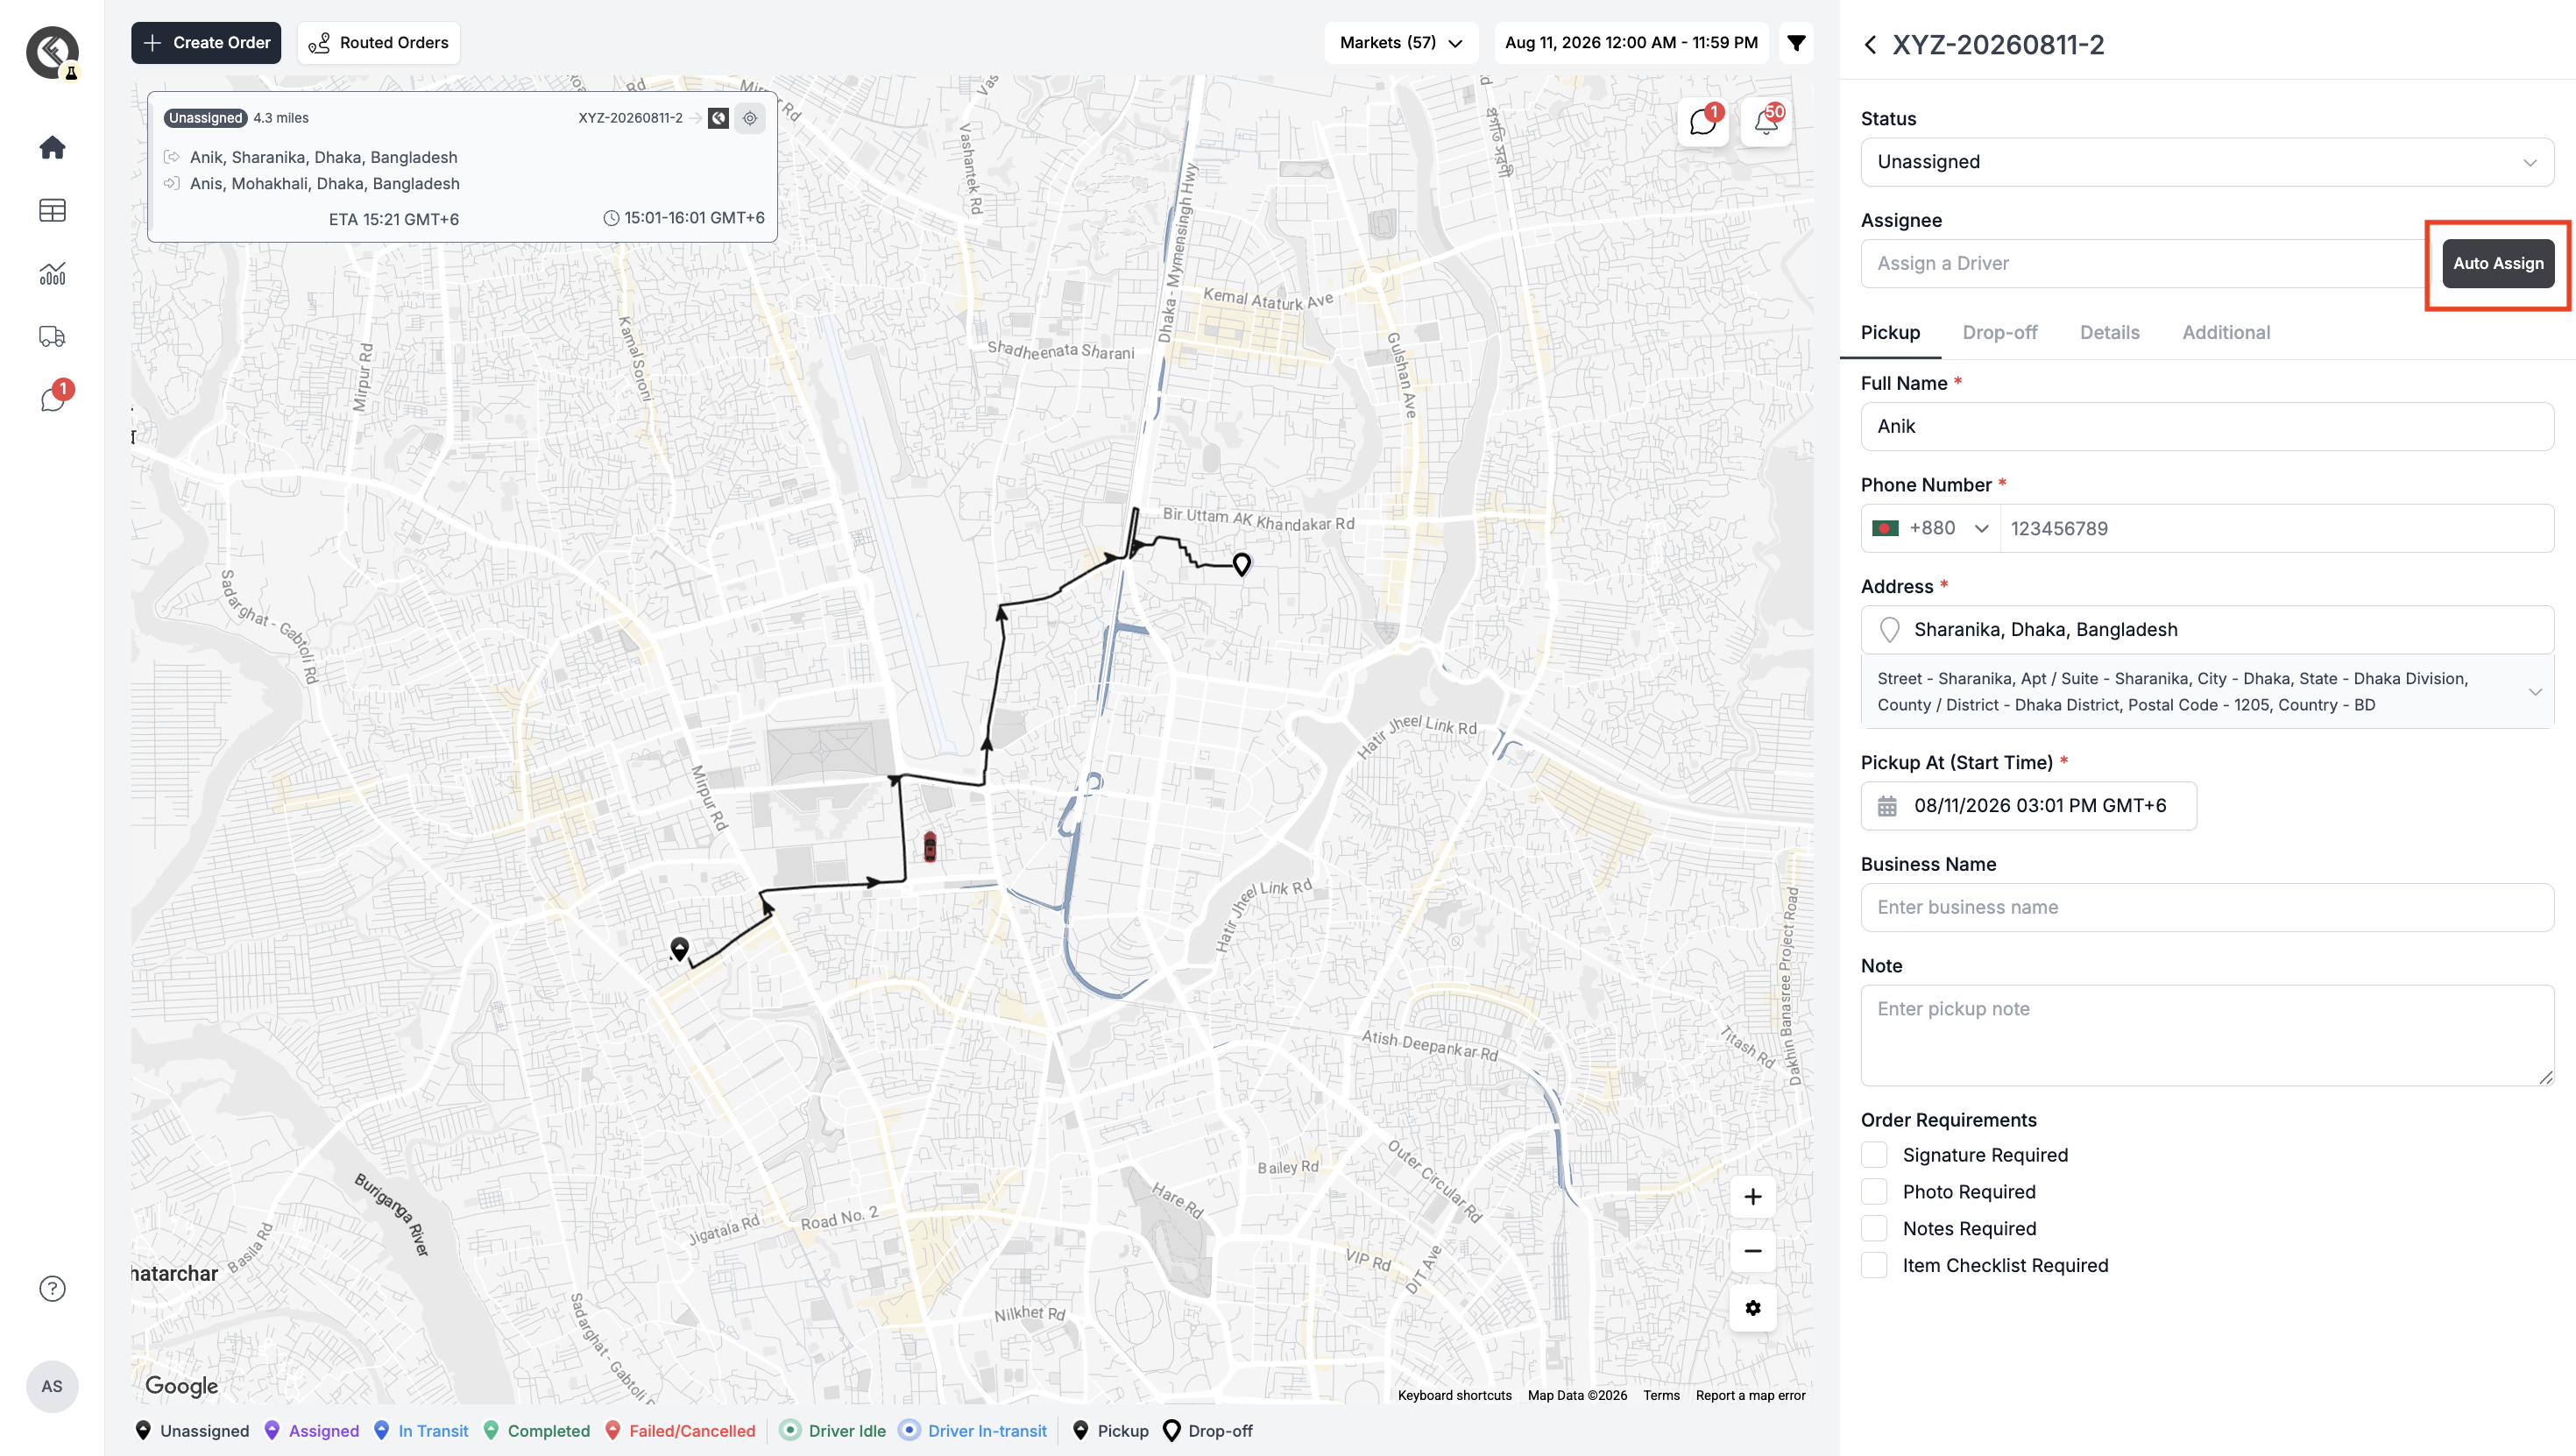
If auto-assignment is not enabled at the workspace level, dispatchers can still trigger it on a per-order basis. Open the order's edit panel and click Auto Assign to have the system search for and request an eligible driver for that specific order.
Important Notes
- Driver profiles should be completed immediately after account creation to ensure auto-assignment works correctly for that driver.
- Drivers can only be auto-assigned orders that fall within their set working hours, vehicle/equipment capability, and drawn operating area.
- Auto-assignment can be configured for specific order types (Route, Point to Point) and specific workspaces from Workspace Settings.
- If auto-assignment is disabled at the workspace level, dispatchers can still trigger it manually on individual orders using the Auto Assign button.
- Drivers have a limited time window to accept or reject an order request; unanswered or rejected requests may be routed to the next eligible driver.
- Frequent rejections can lower a driver's eligibility for future order offers.
Updated about 2 months ago