Bulk Route Optimization: Create Multiple Routes Instantly
Bulk Route Optimization allows you to create multiple optimized delivery routes at once using a bulk order sheet. Instead of manually creating and optimizing routes one by one, this feature generates complete route plans within seconds based on your uploaded order data.
With Bulk Route Optimization, you can:
- Upload a bulk order sheet and instantly preview all orders
- Automatically generate optimized routes with minimal effort
- Manage, adjust, and fine-tune routes directly from the optimization panel
- Move orders between routes
- Assign drivers and rename routes before finalizing
- Identify unoptimized orders and place them manually
How to Use Bulk Route Optimization
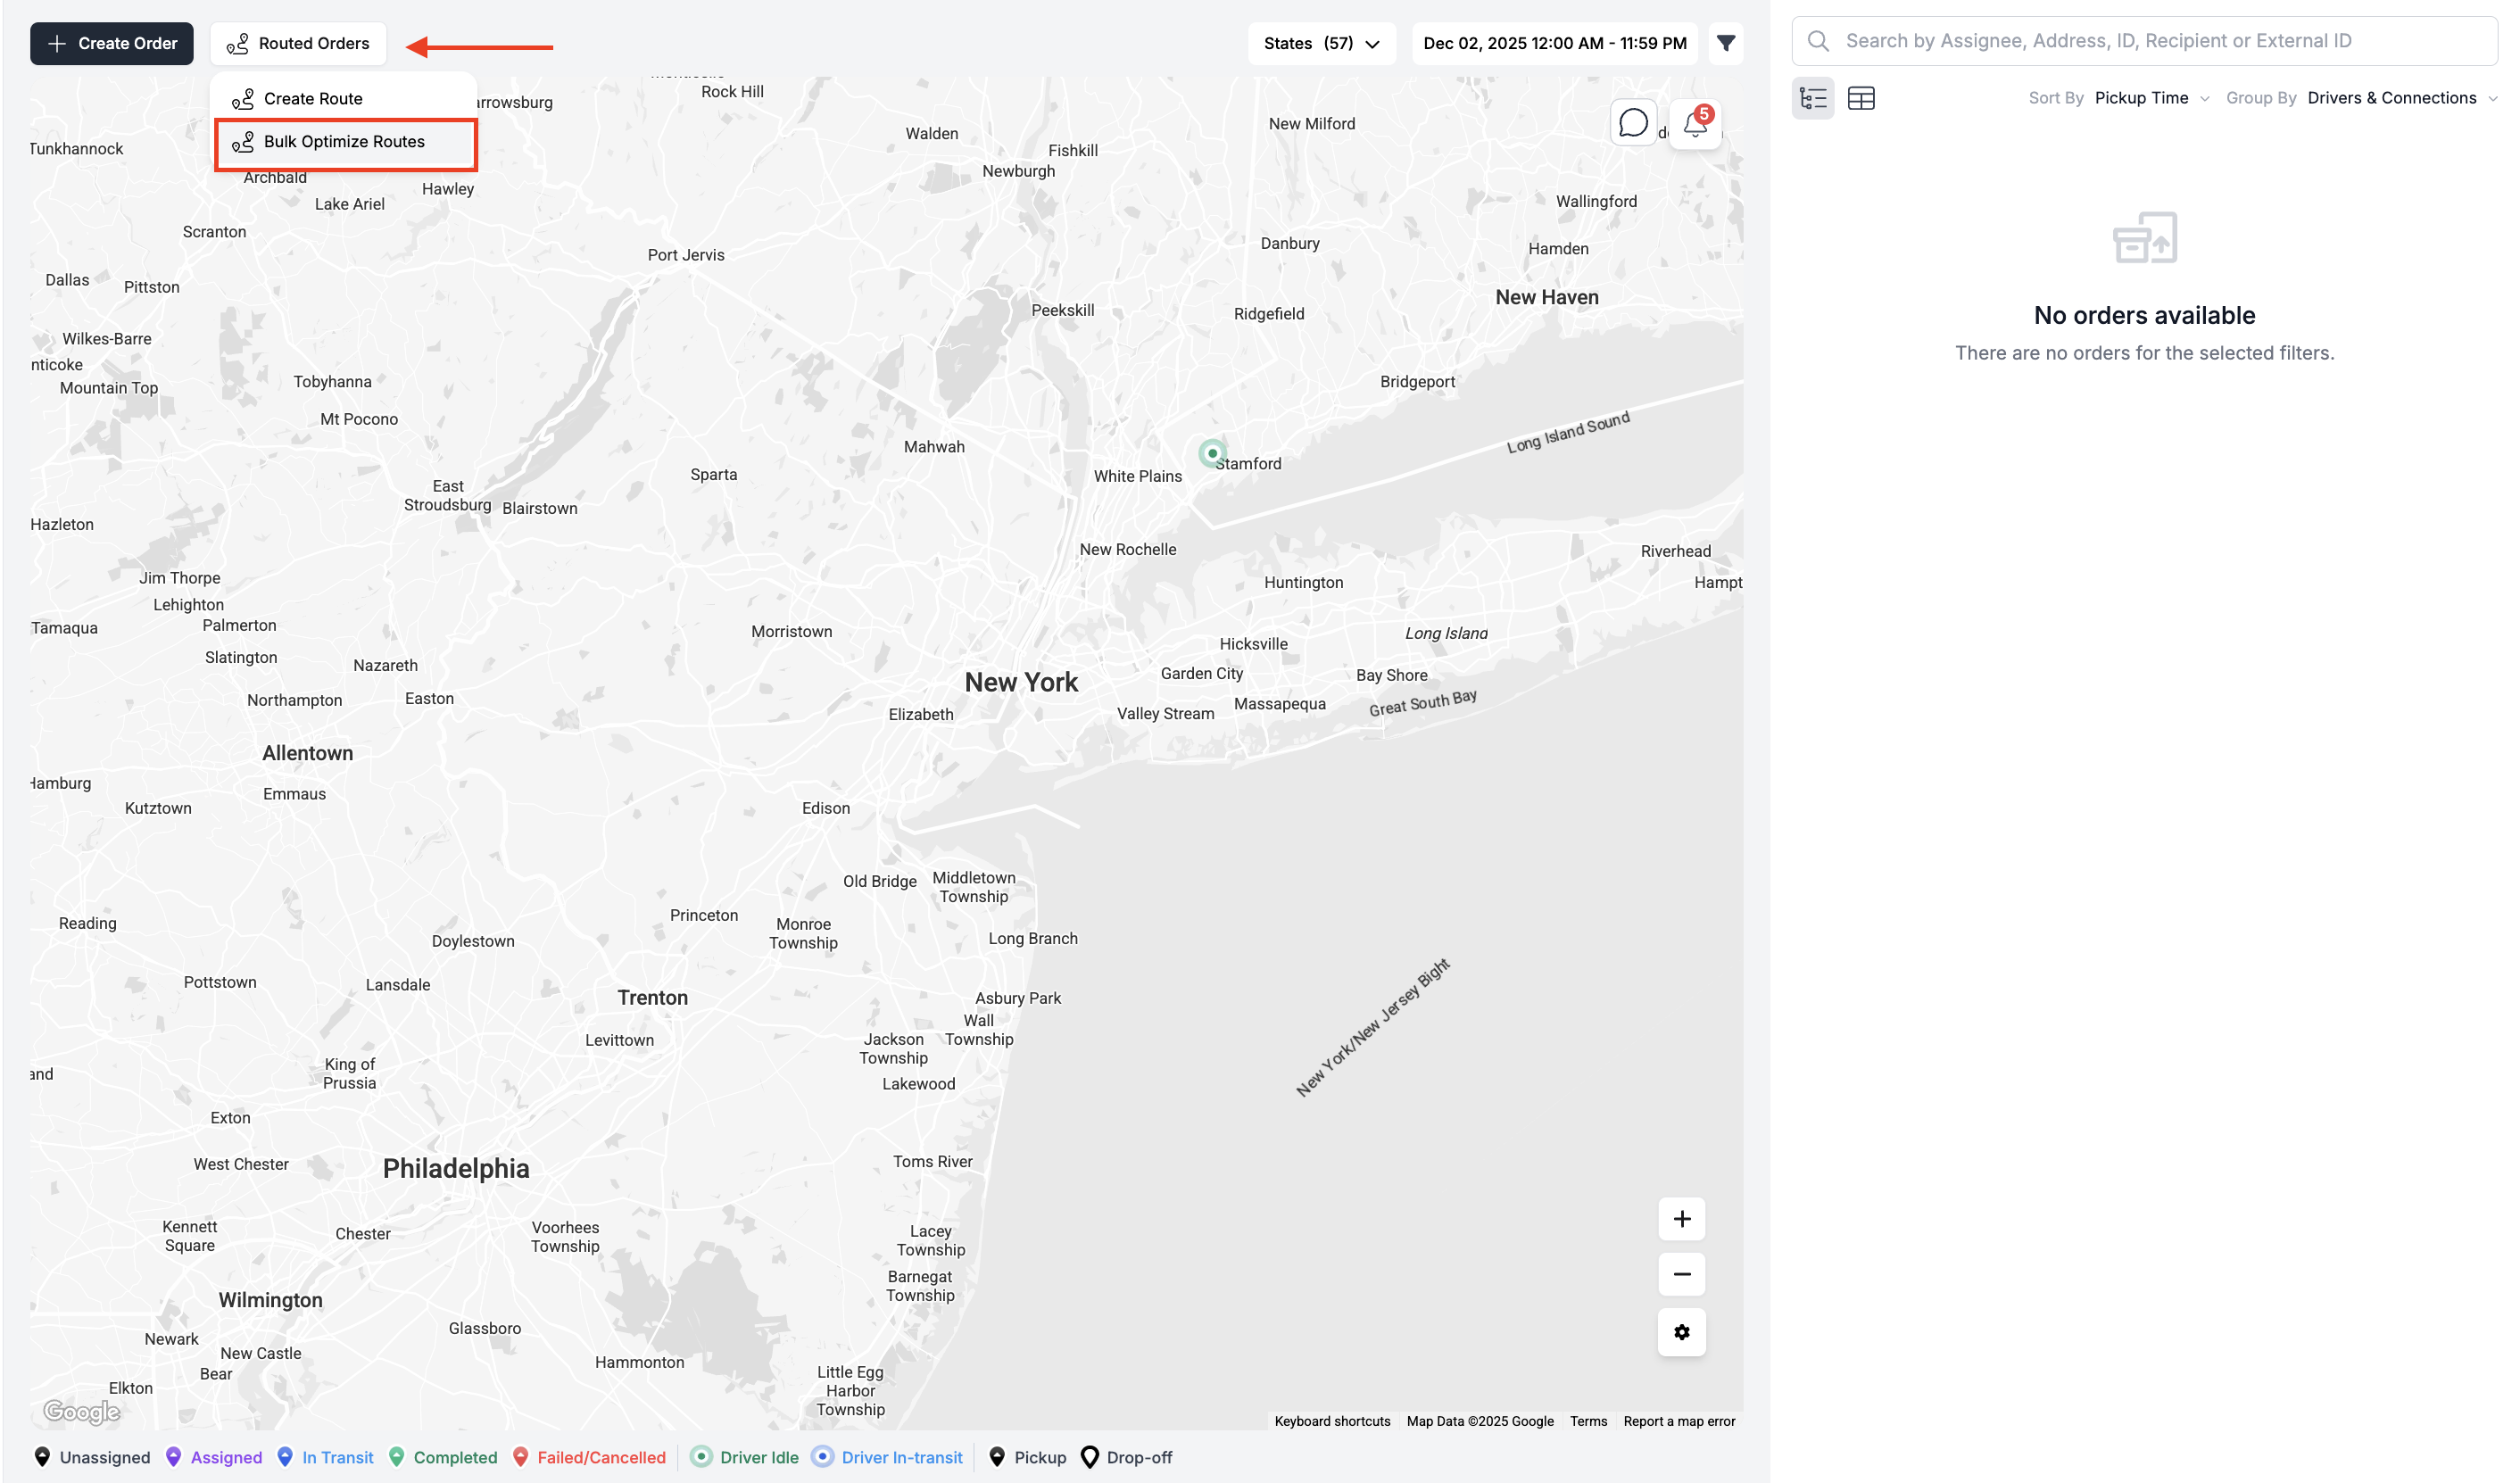
Step 1: Open the Bulk Route Optimization Panel
From the Dispatch Page, click Routed Orders and choose Bulk Optimized Routes from the dropdown. This will open the main panel where you can begin the process.
Step 2: Select Optimization Type & Upload Your Sheet
Choose between One Pickup → Multiple Drops or Multiple Pickups → One Drop. Then upload your bulk order sheet using the uploader.
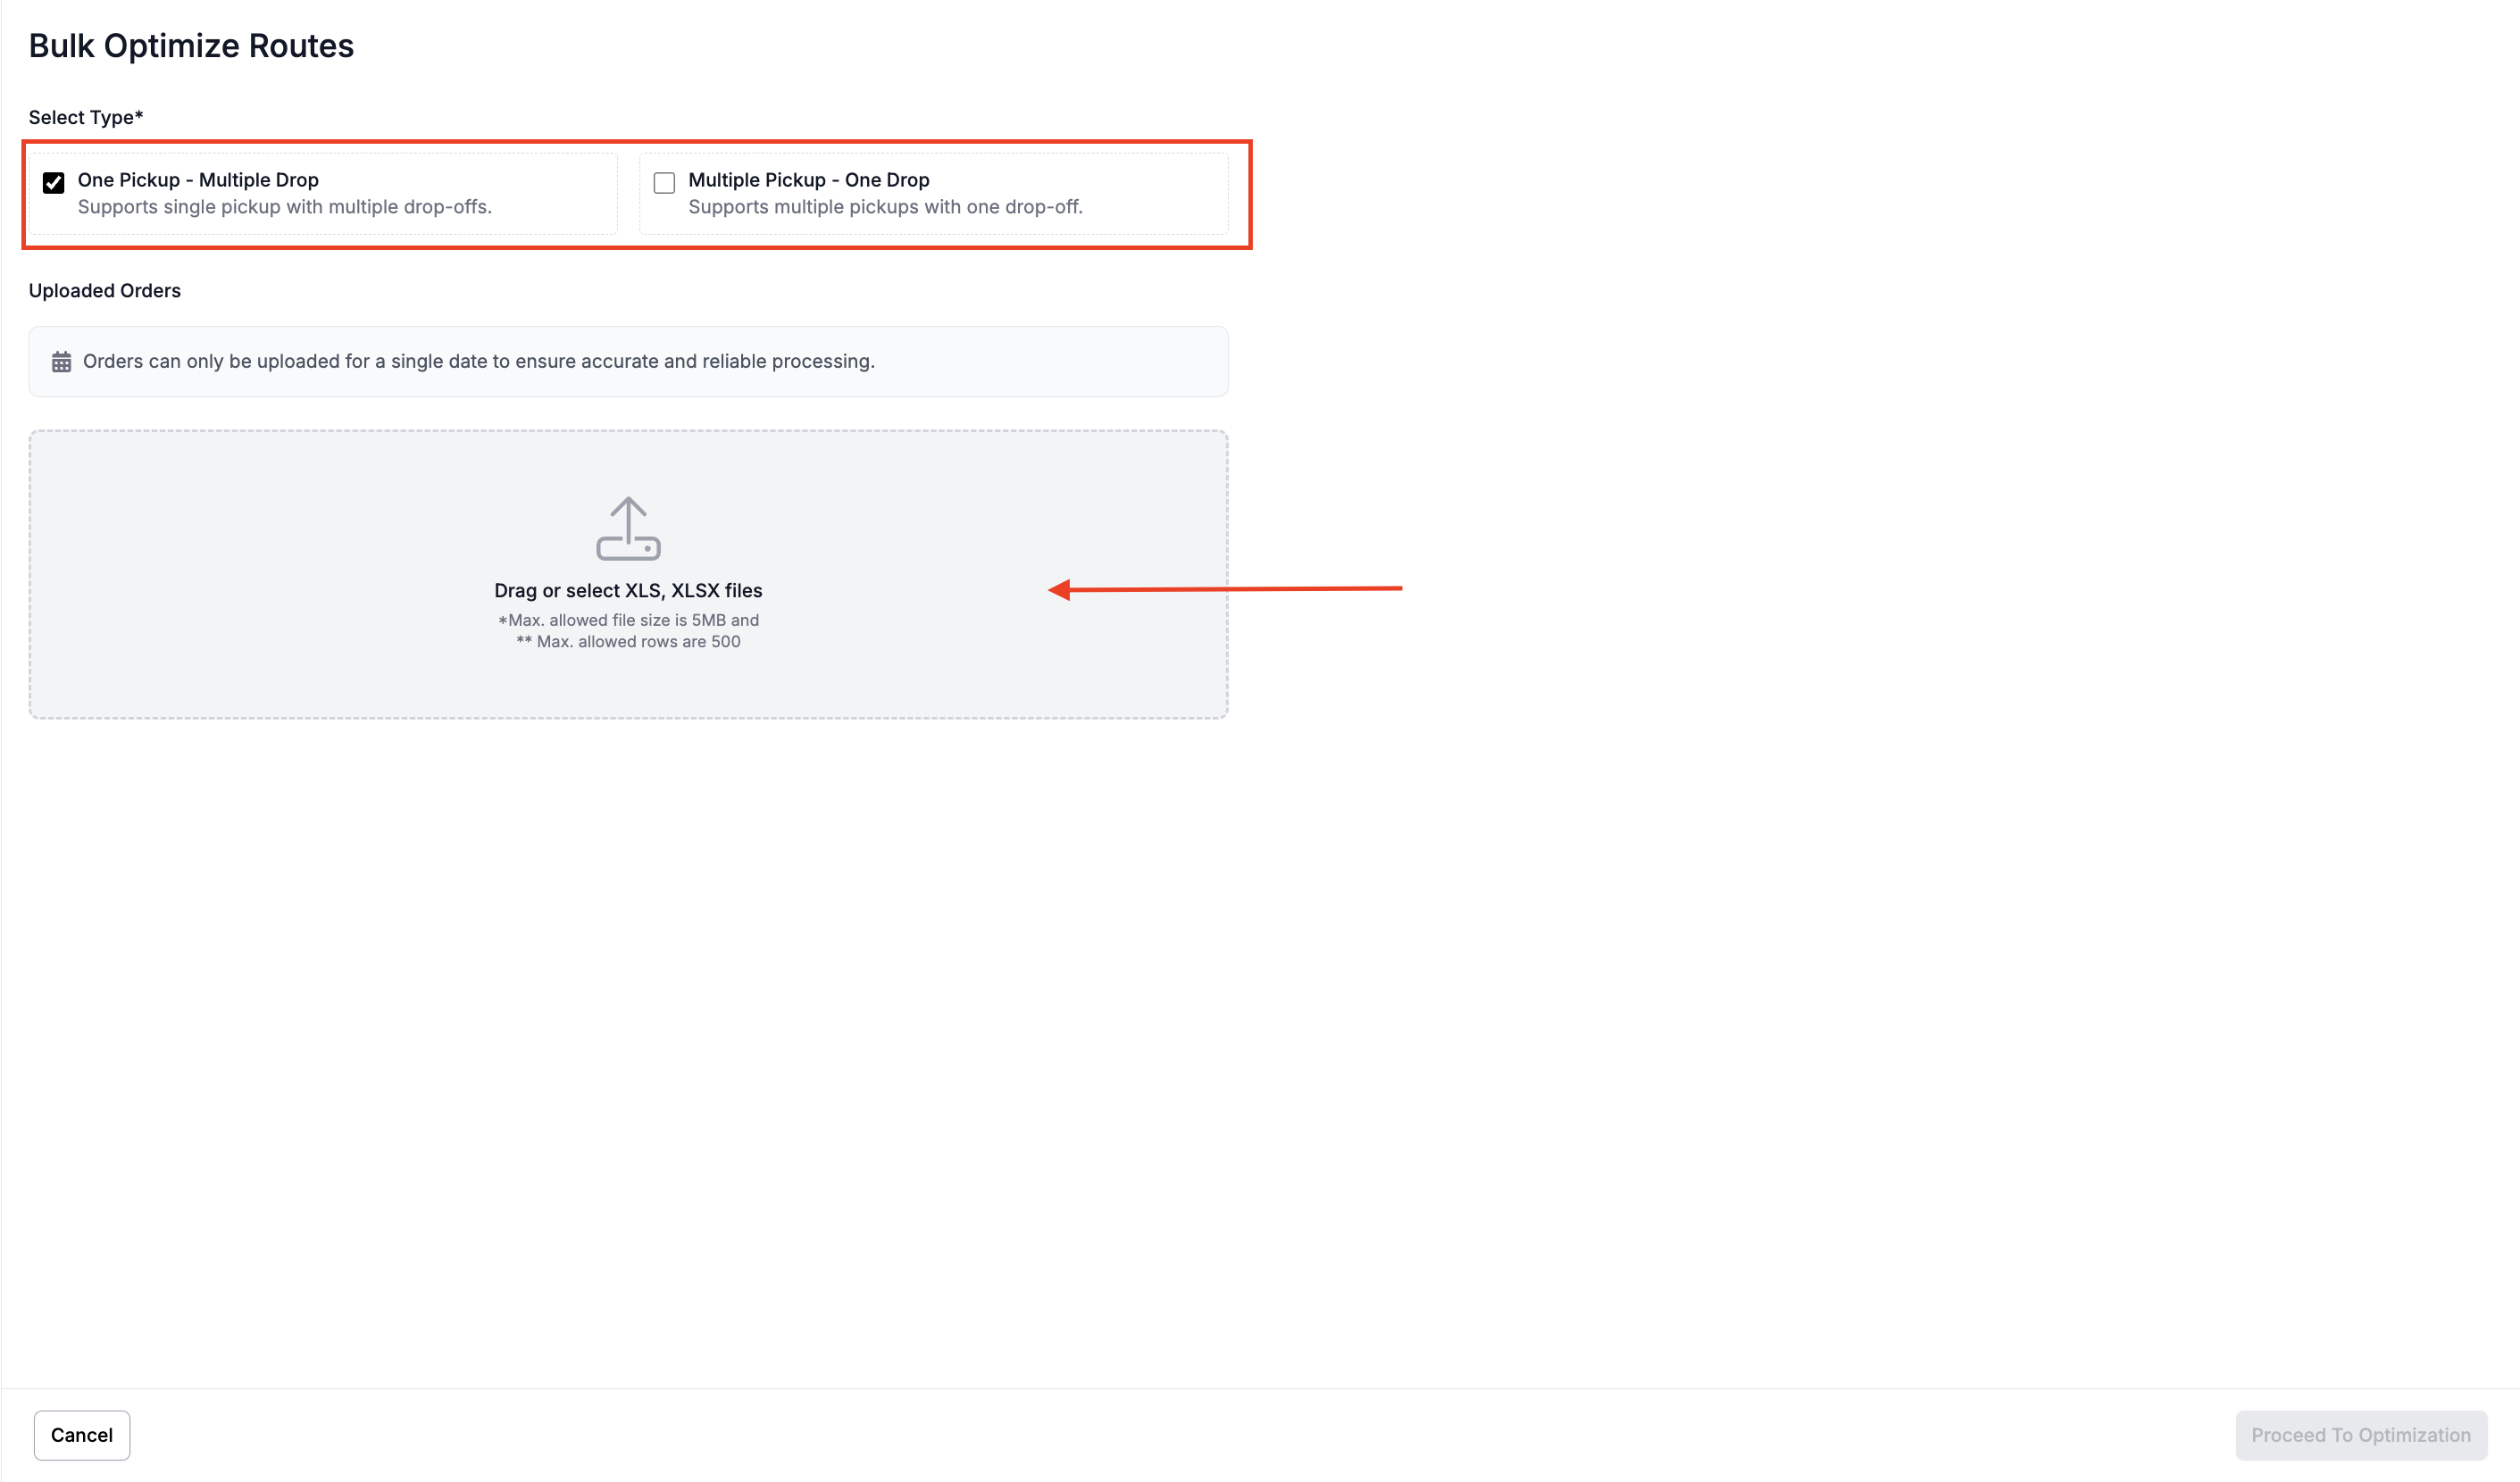
Once the file is processed, the system will display a preview of the orders along with any errors that you can edit on the spot.
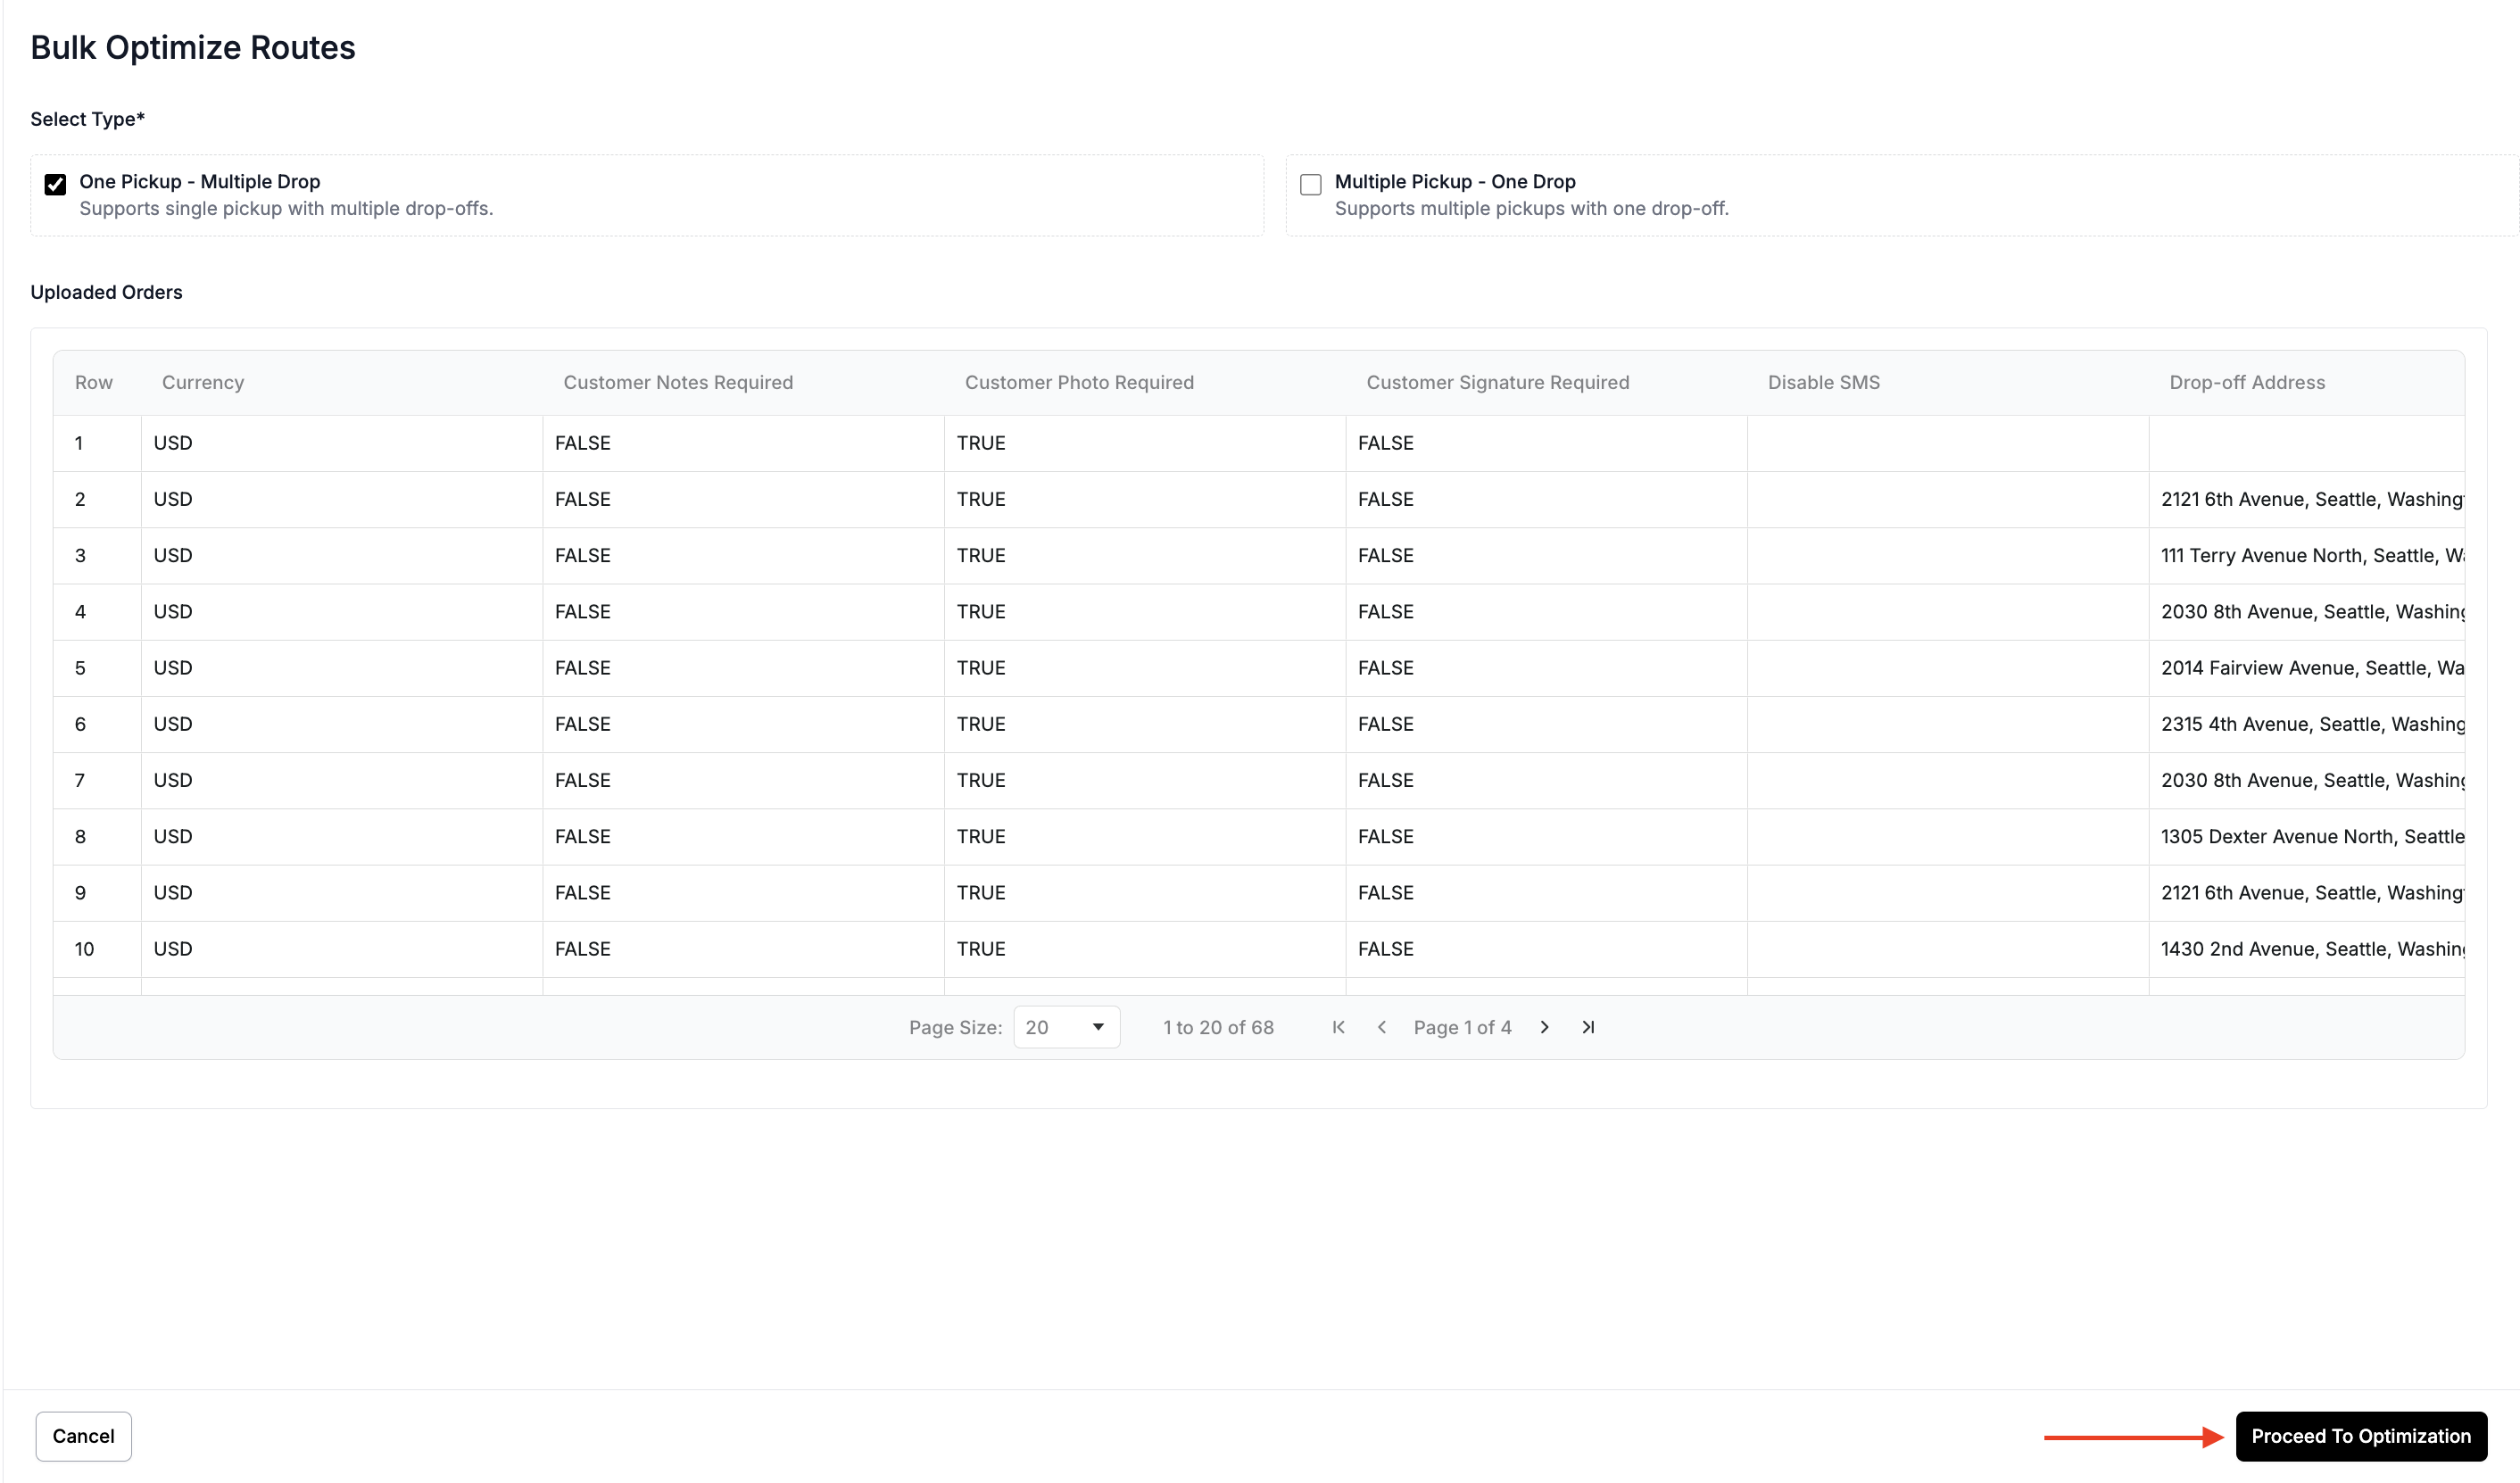
Click Proceed to Optimization when you're ready.
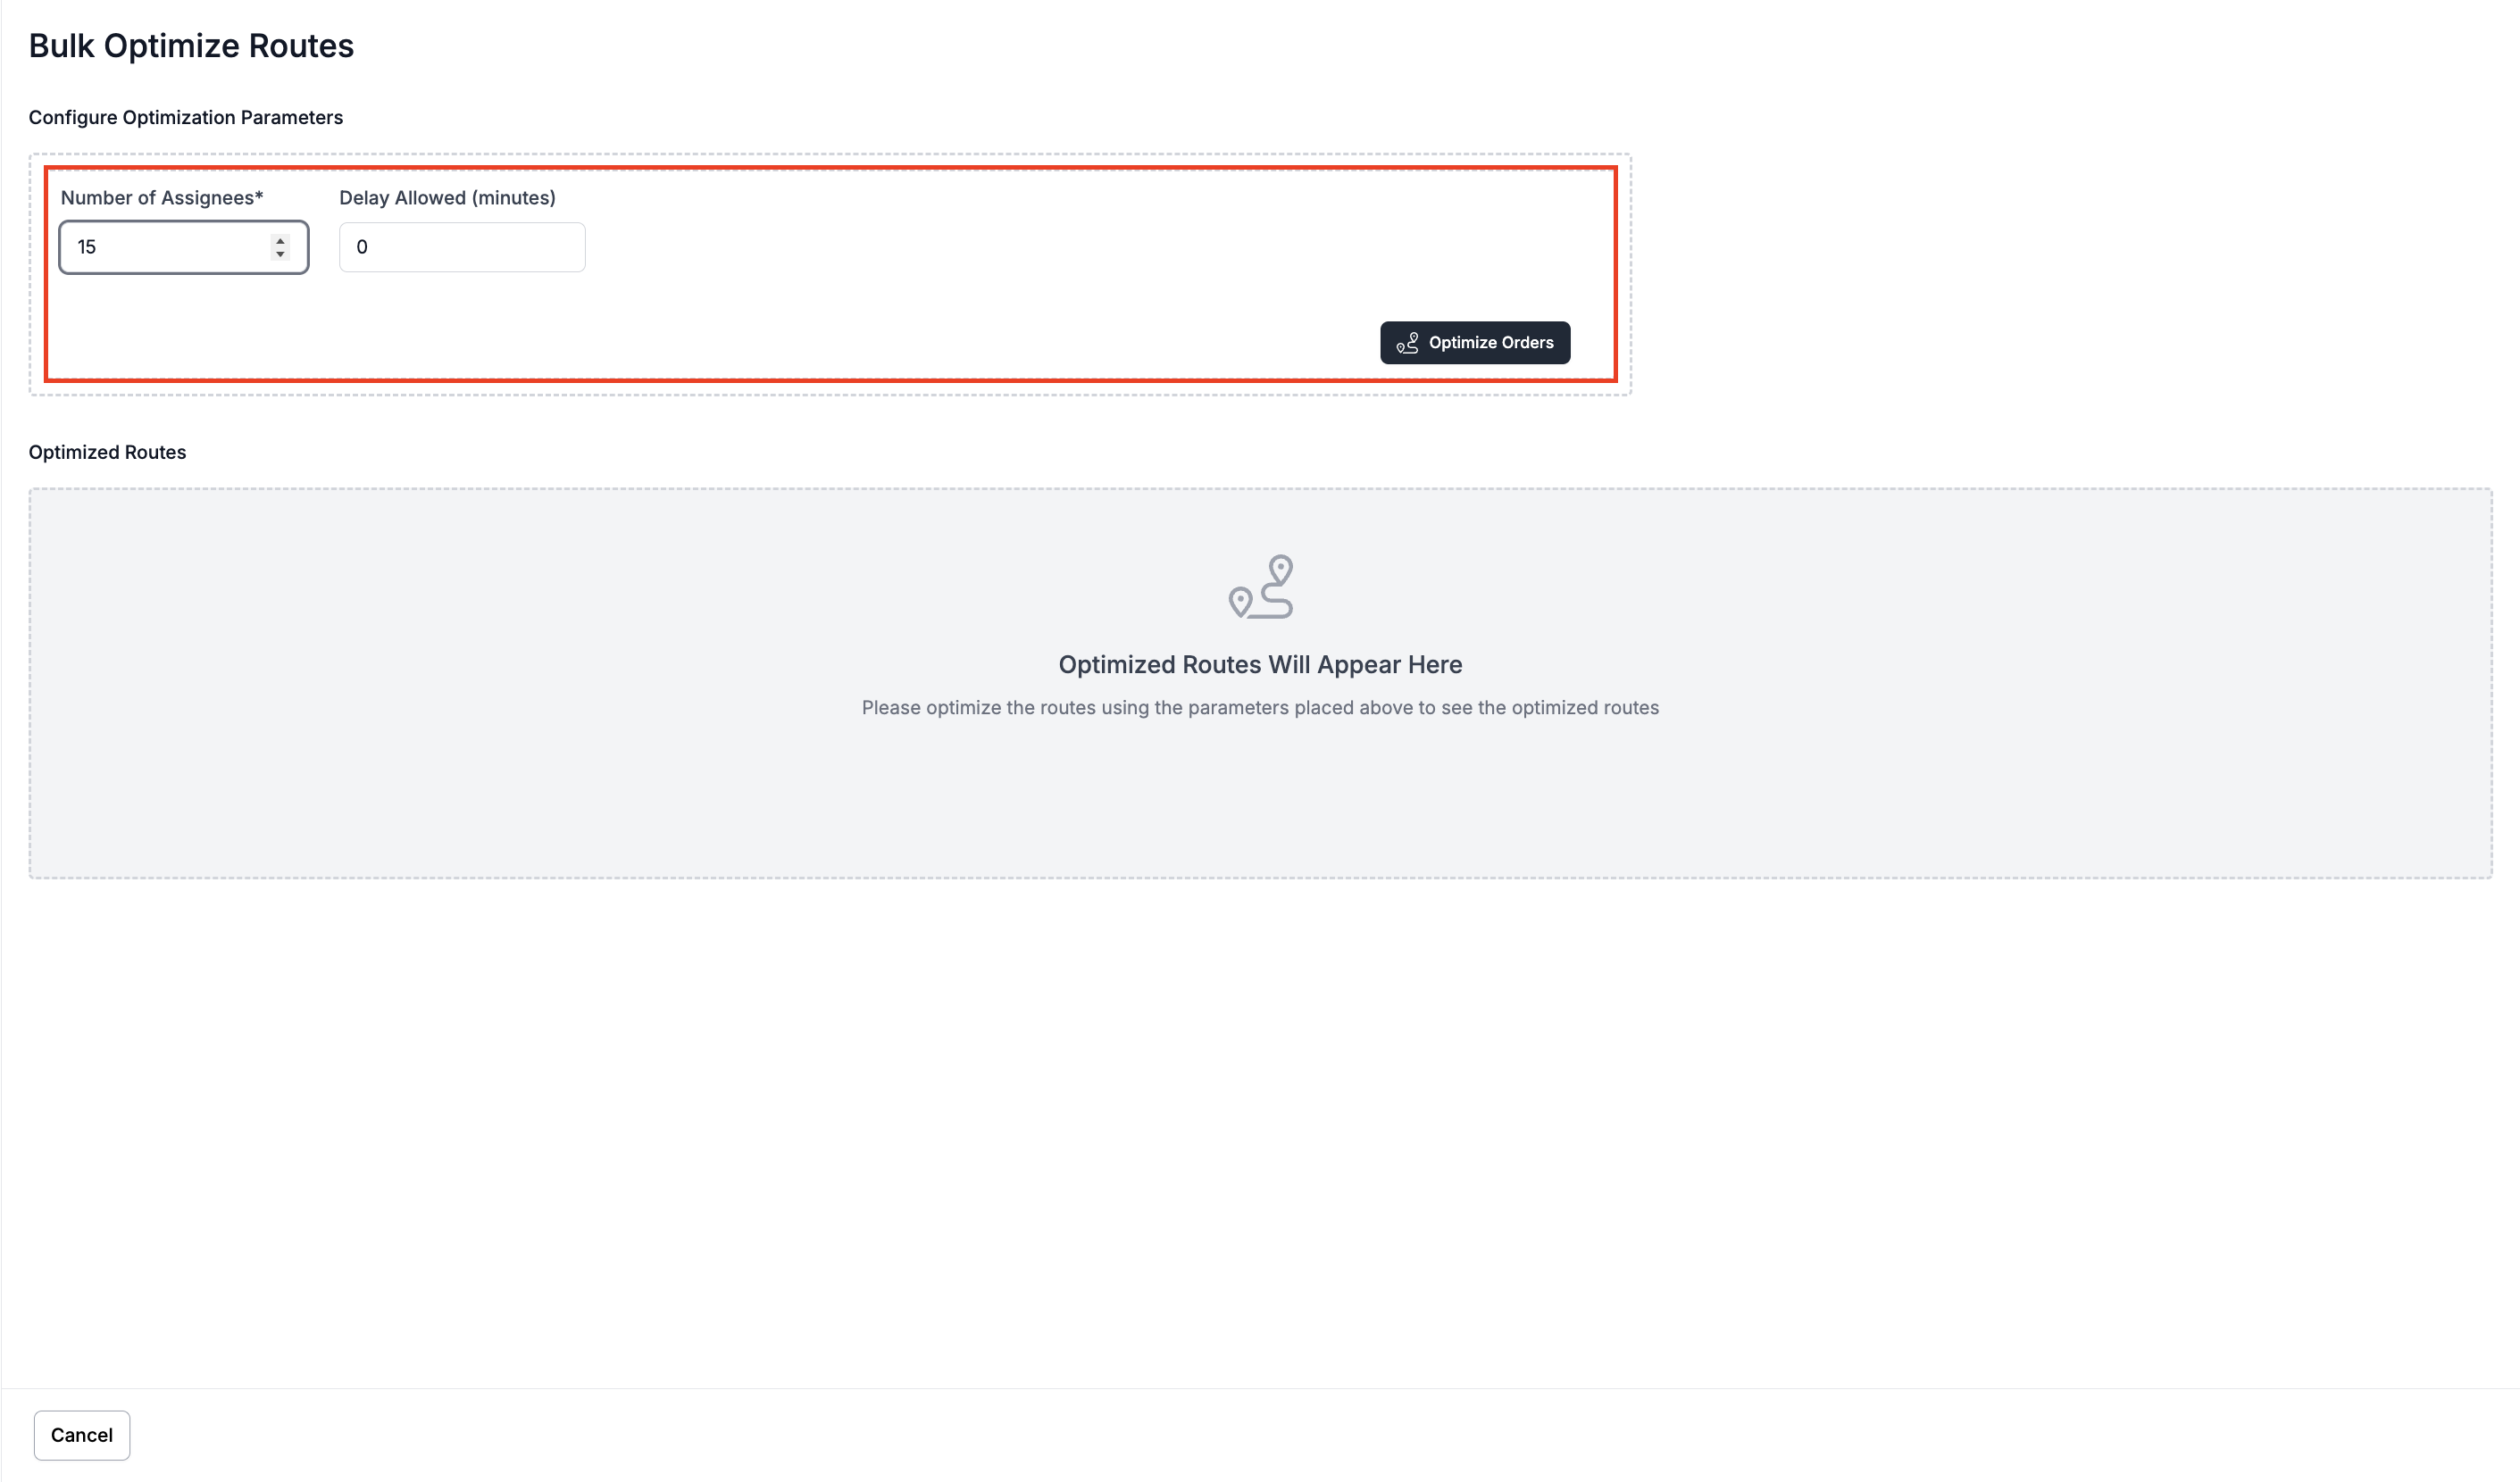
Bulk Optimization Screen
Once you proceed, you will be taken to the Bulk Optimized Routes Optimization Screen, where you can configure optimization parameters.
Step 3: Configure Optimization Settings
On the optimization screen, adjust two parameters: the number of assignees and the allowed delay. After setting these values, click Optimize Orders to generate routes.
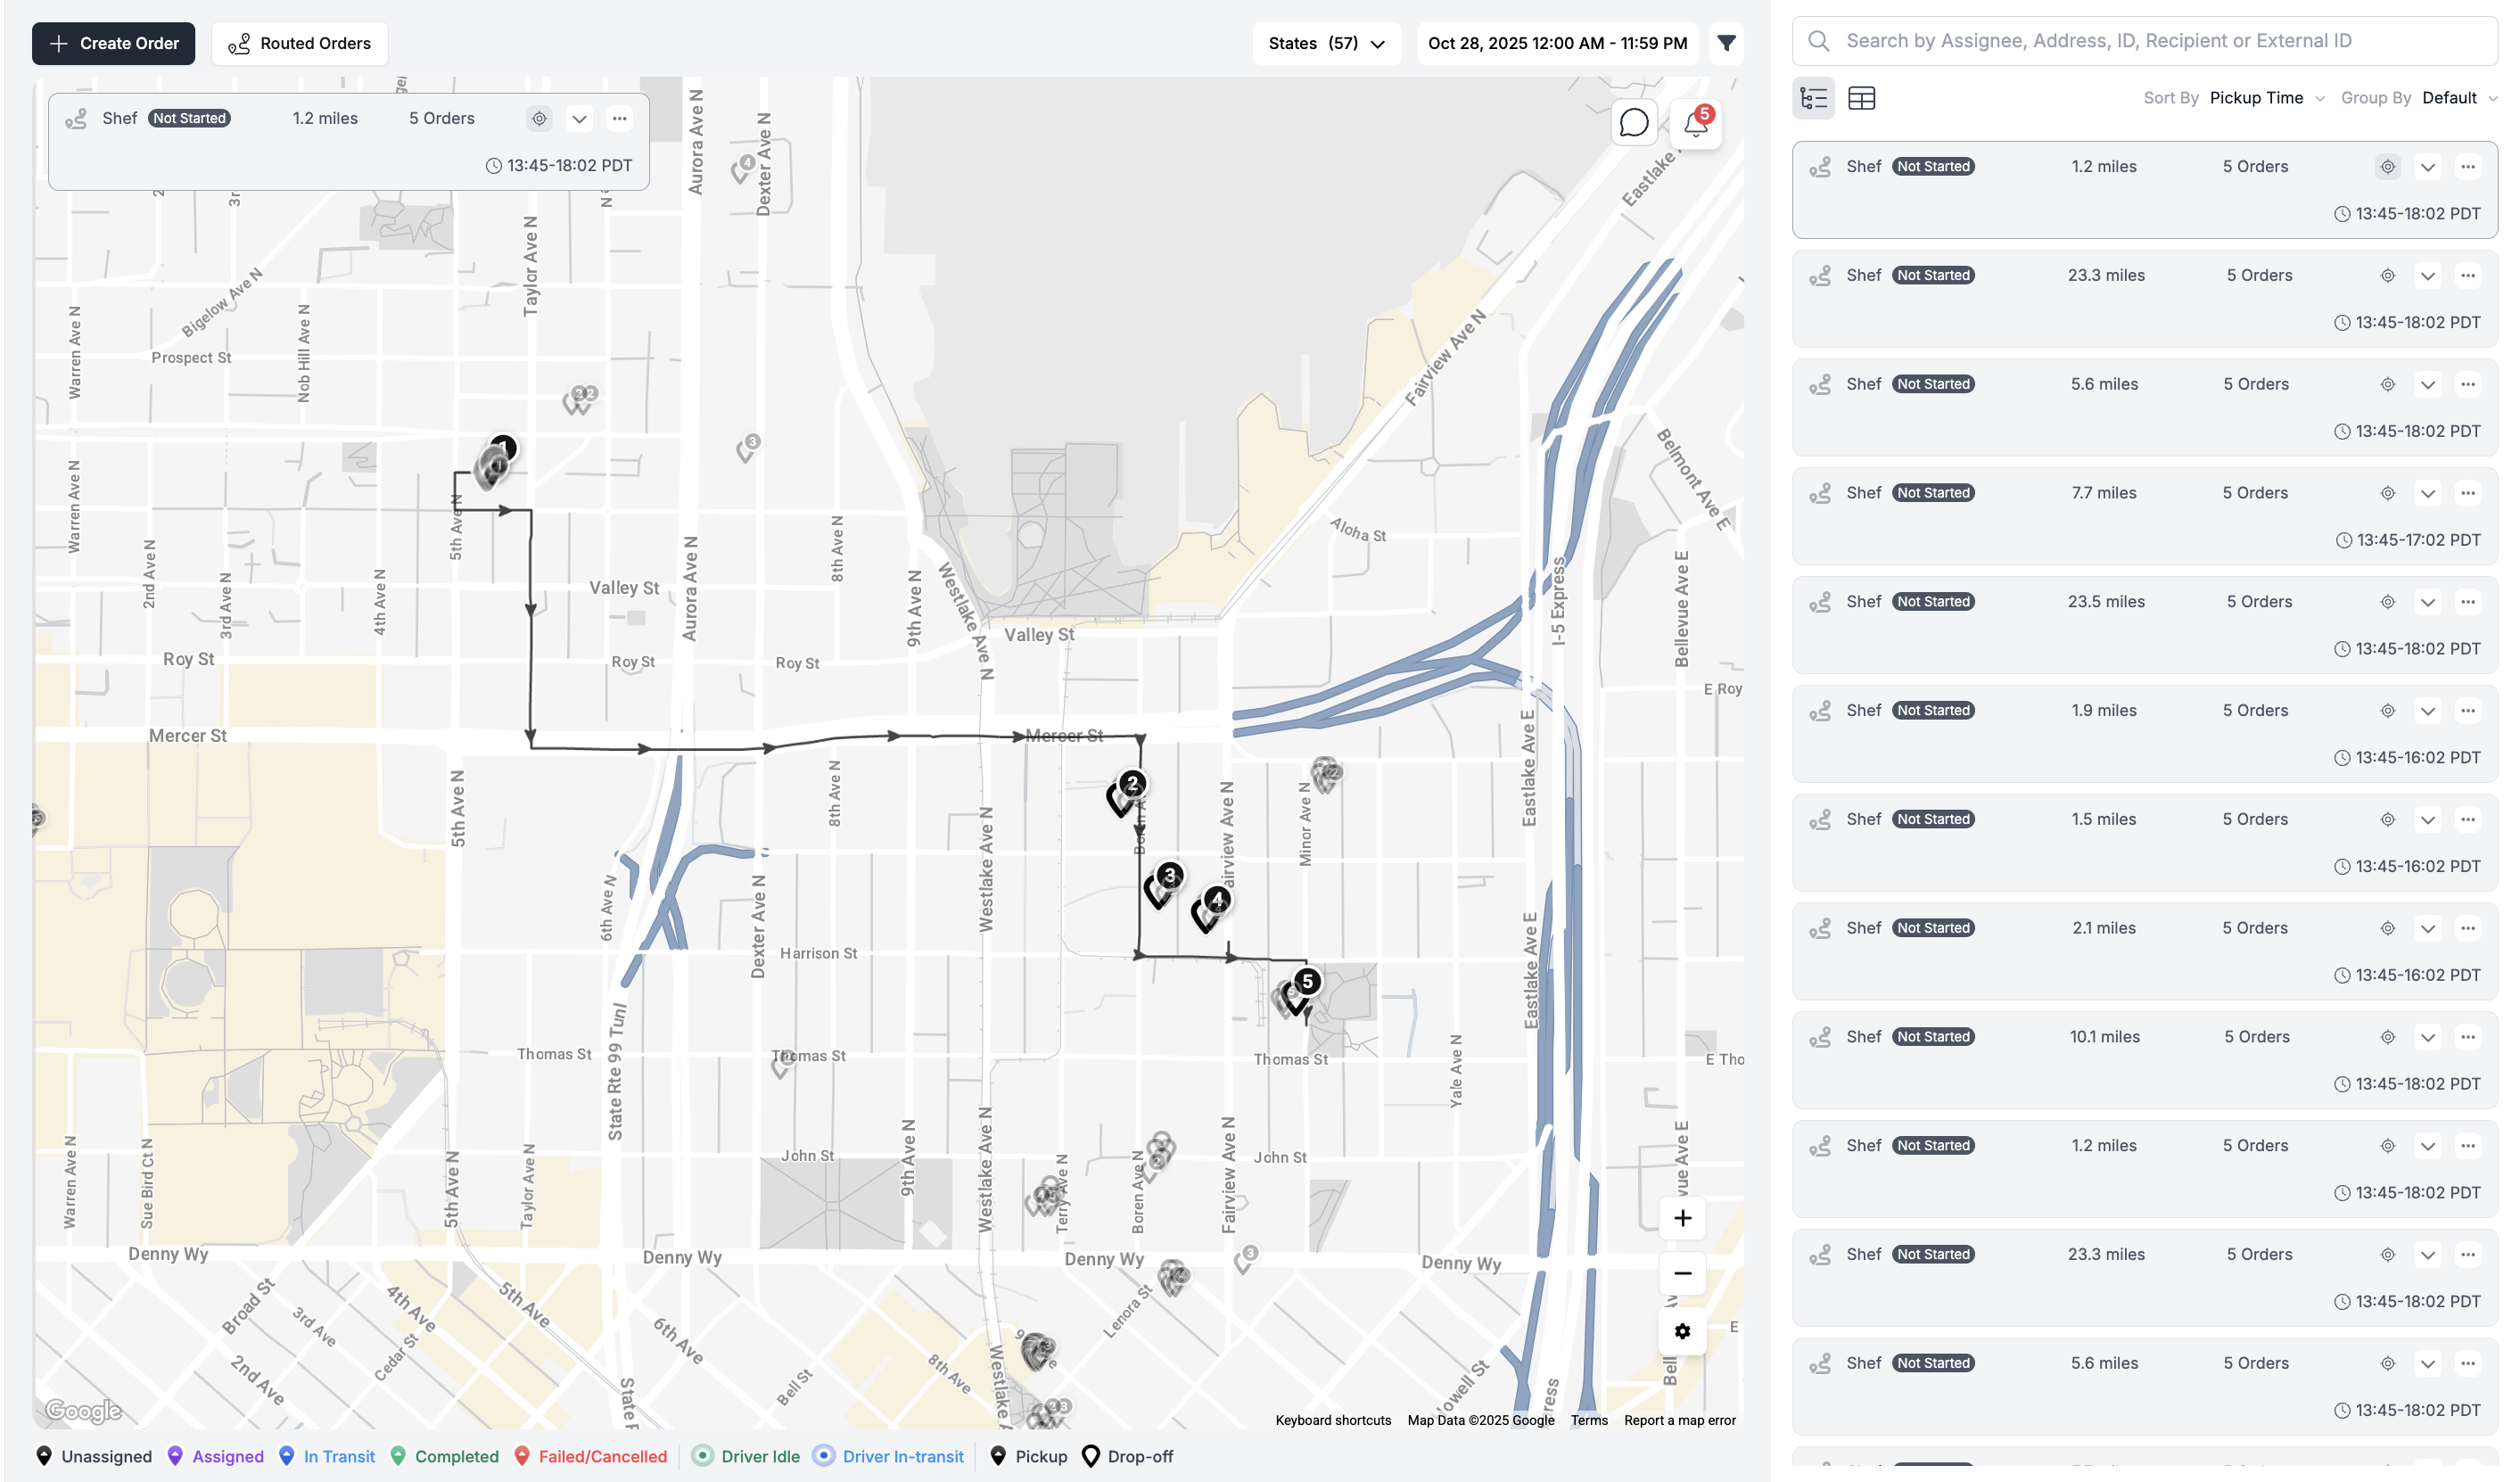
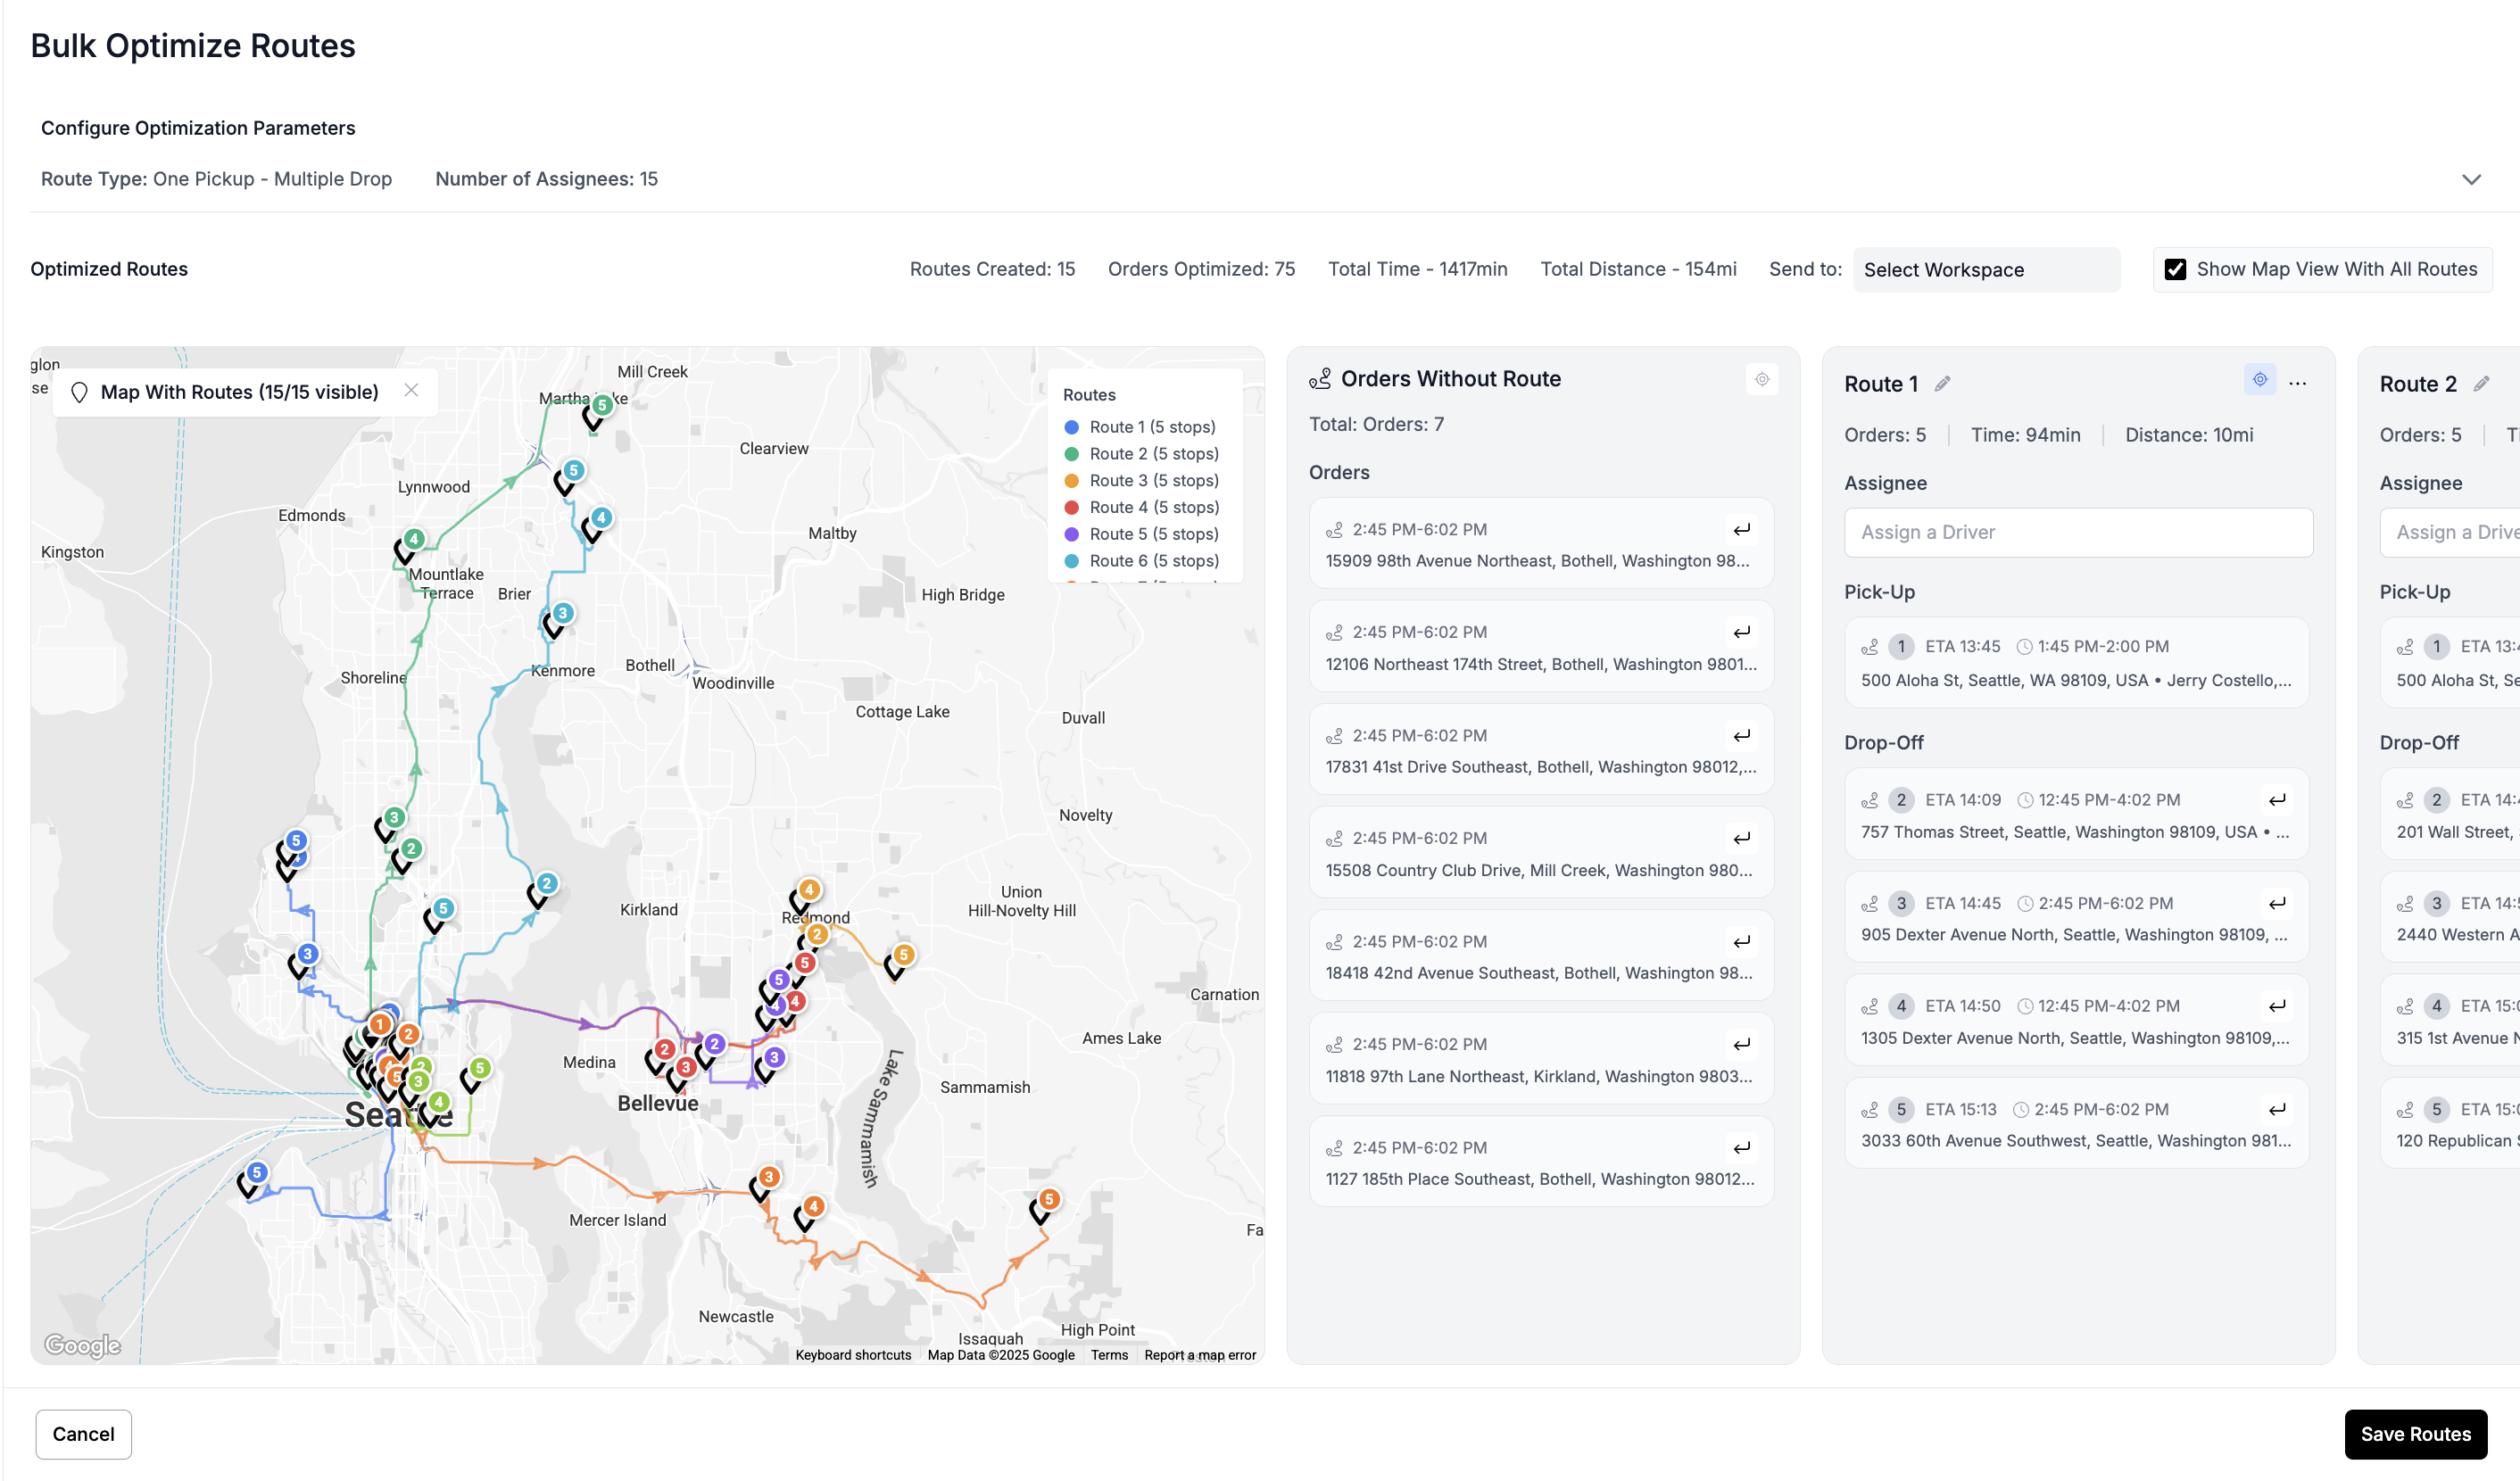
Step 4: View the Generated Routes
When optimization completes, the panel will display all routes along with an overview of each route’s total distance and time. You can highlight individual routes on the map or view all routes together. A separate list titled "Orders Without Route" will show orders that are not optimized.
Step 5: Manage Unoptimized Orders
Unassigned orders appear under Orders Without Route. Clicking the target icon highlights their locations on the map, and selecting any marker takes you directly to that order in the panel.
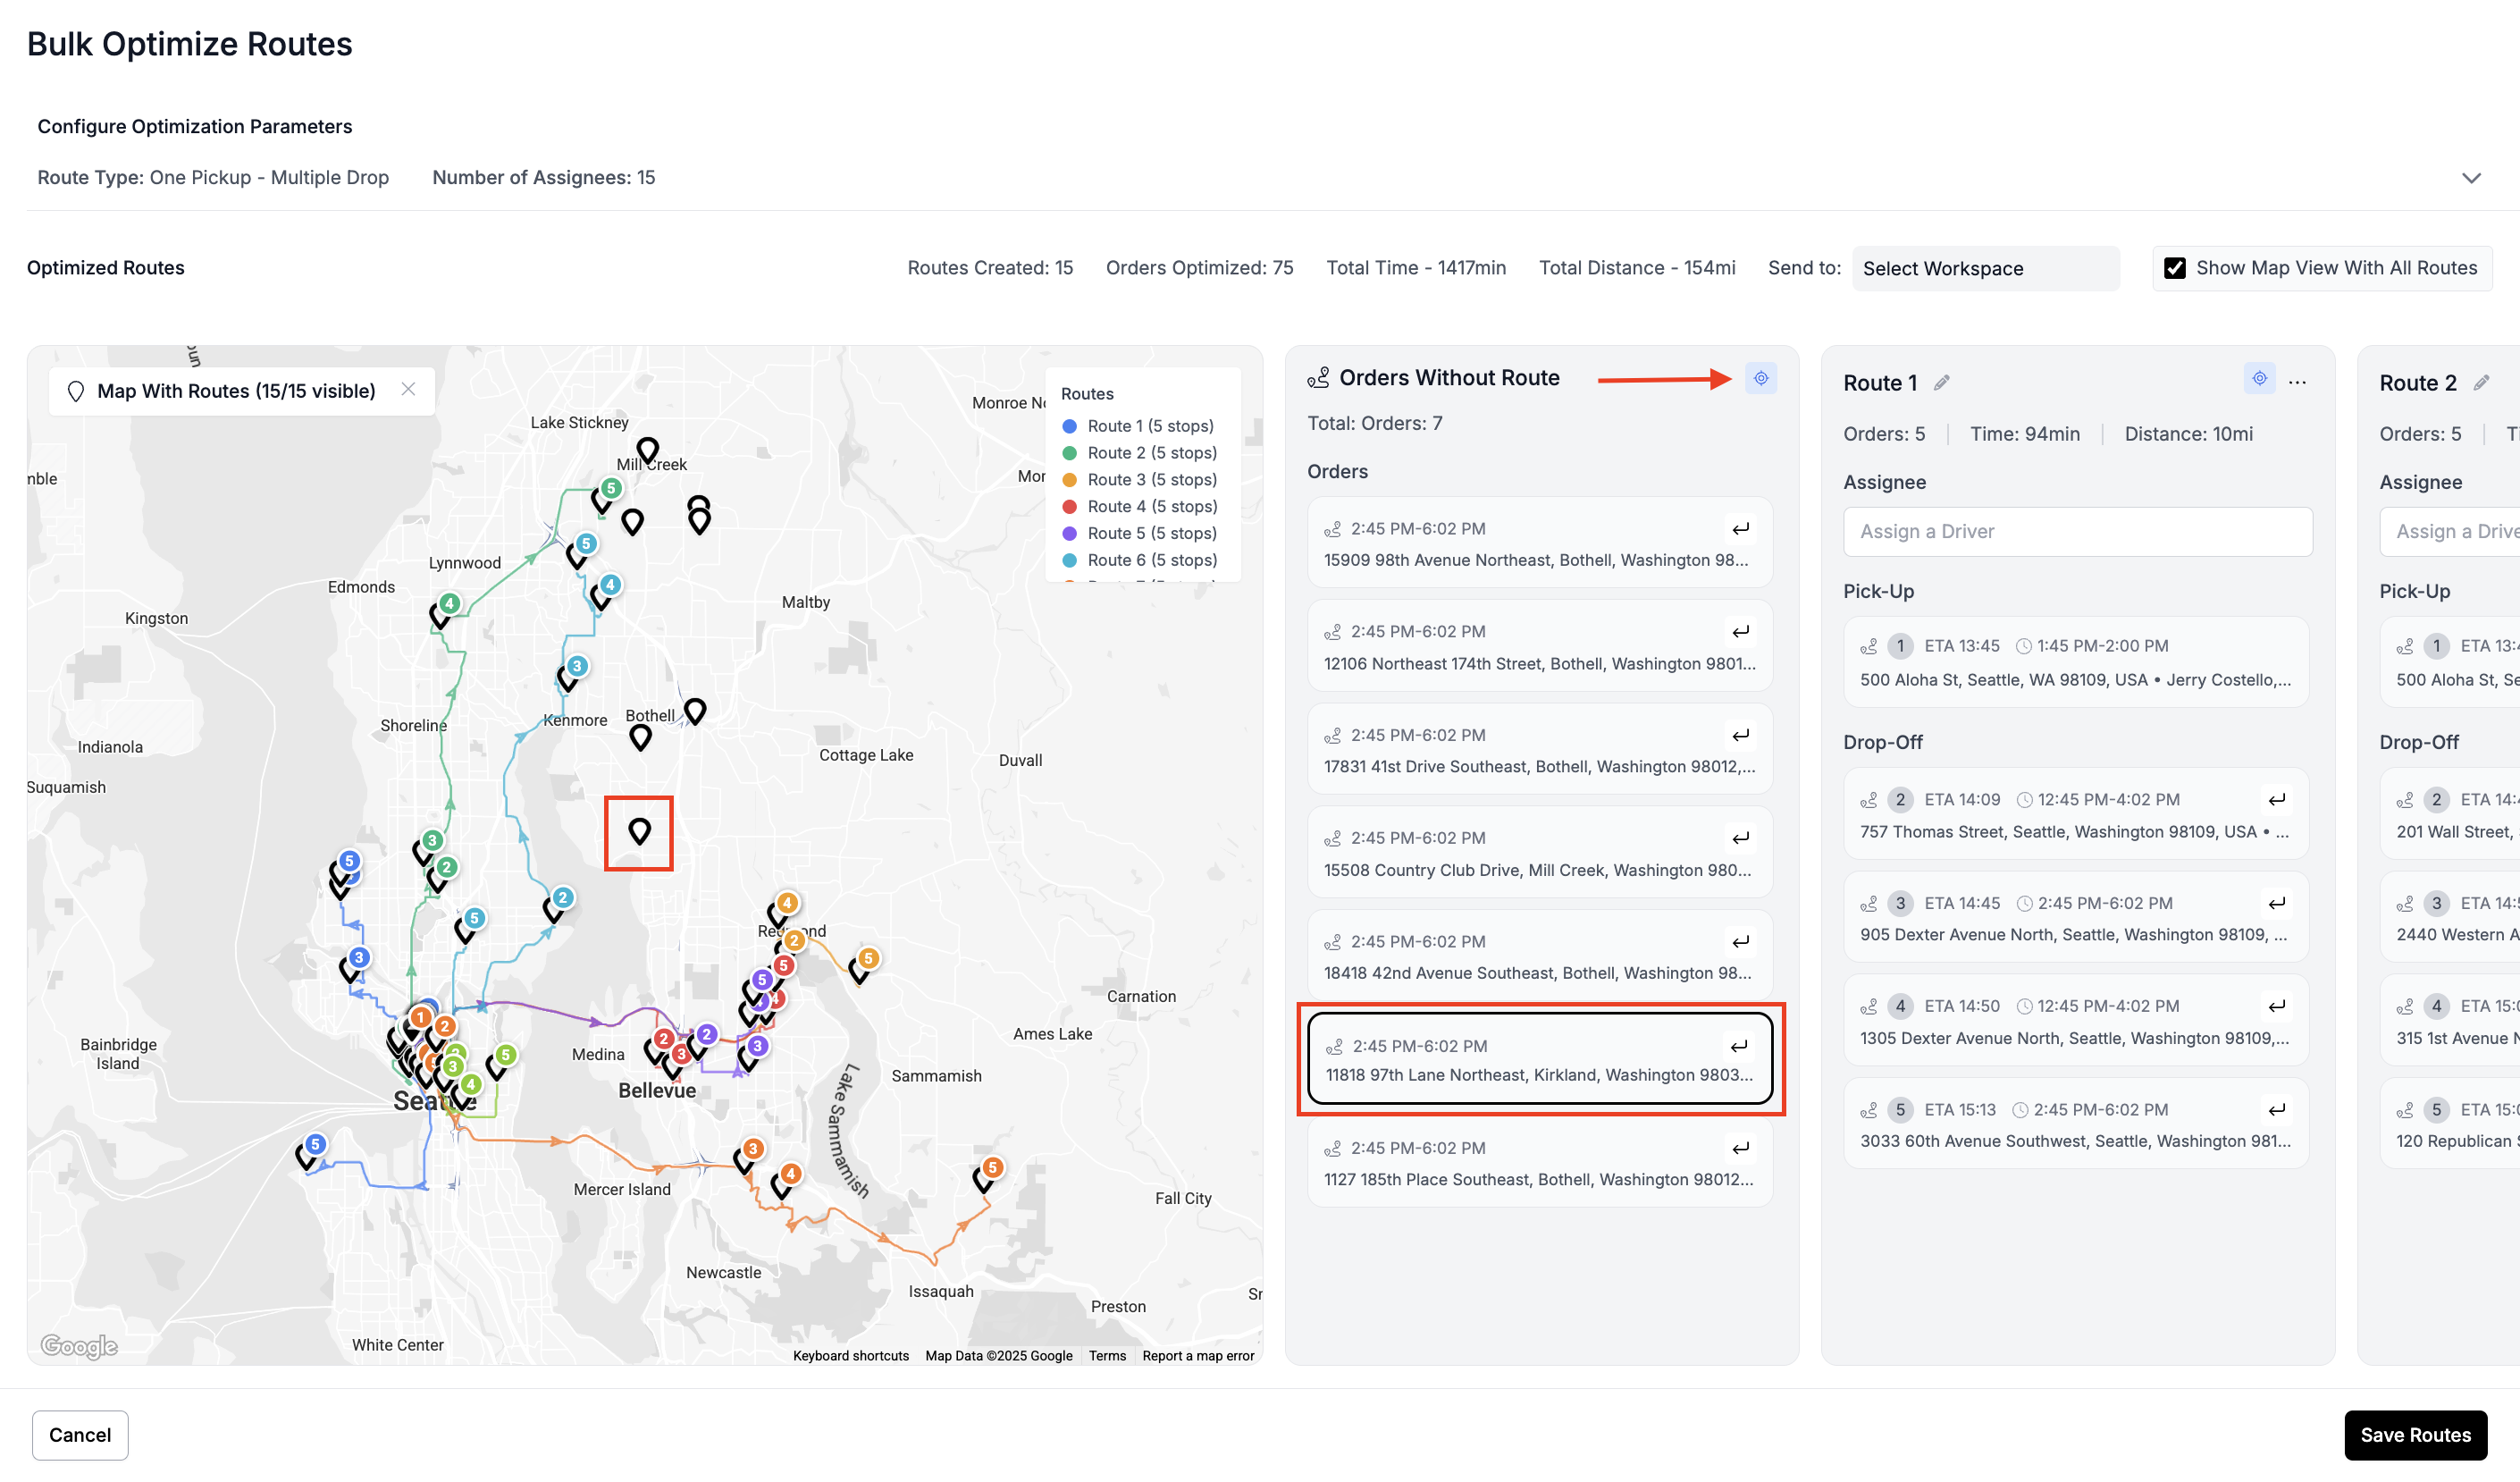
Step 6: Move Unassigned Orders to Routed/Between Routes
To adjust your routes, click a marker on the map and locate it in the route list. Once located, click on the arrow on the order card to choose the destination route. The order will move immediately. This allows you to refine routes manually before finalizing.

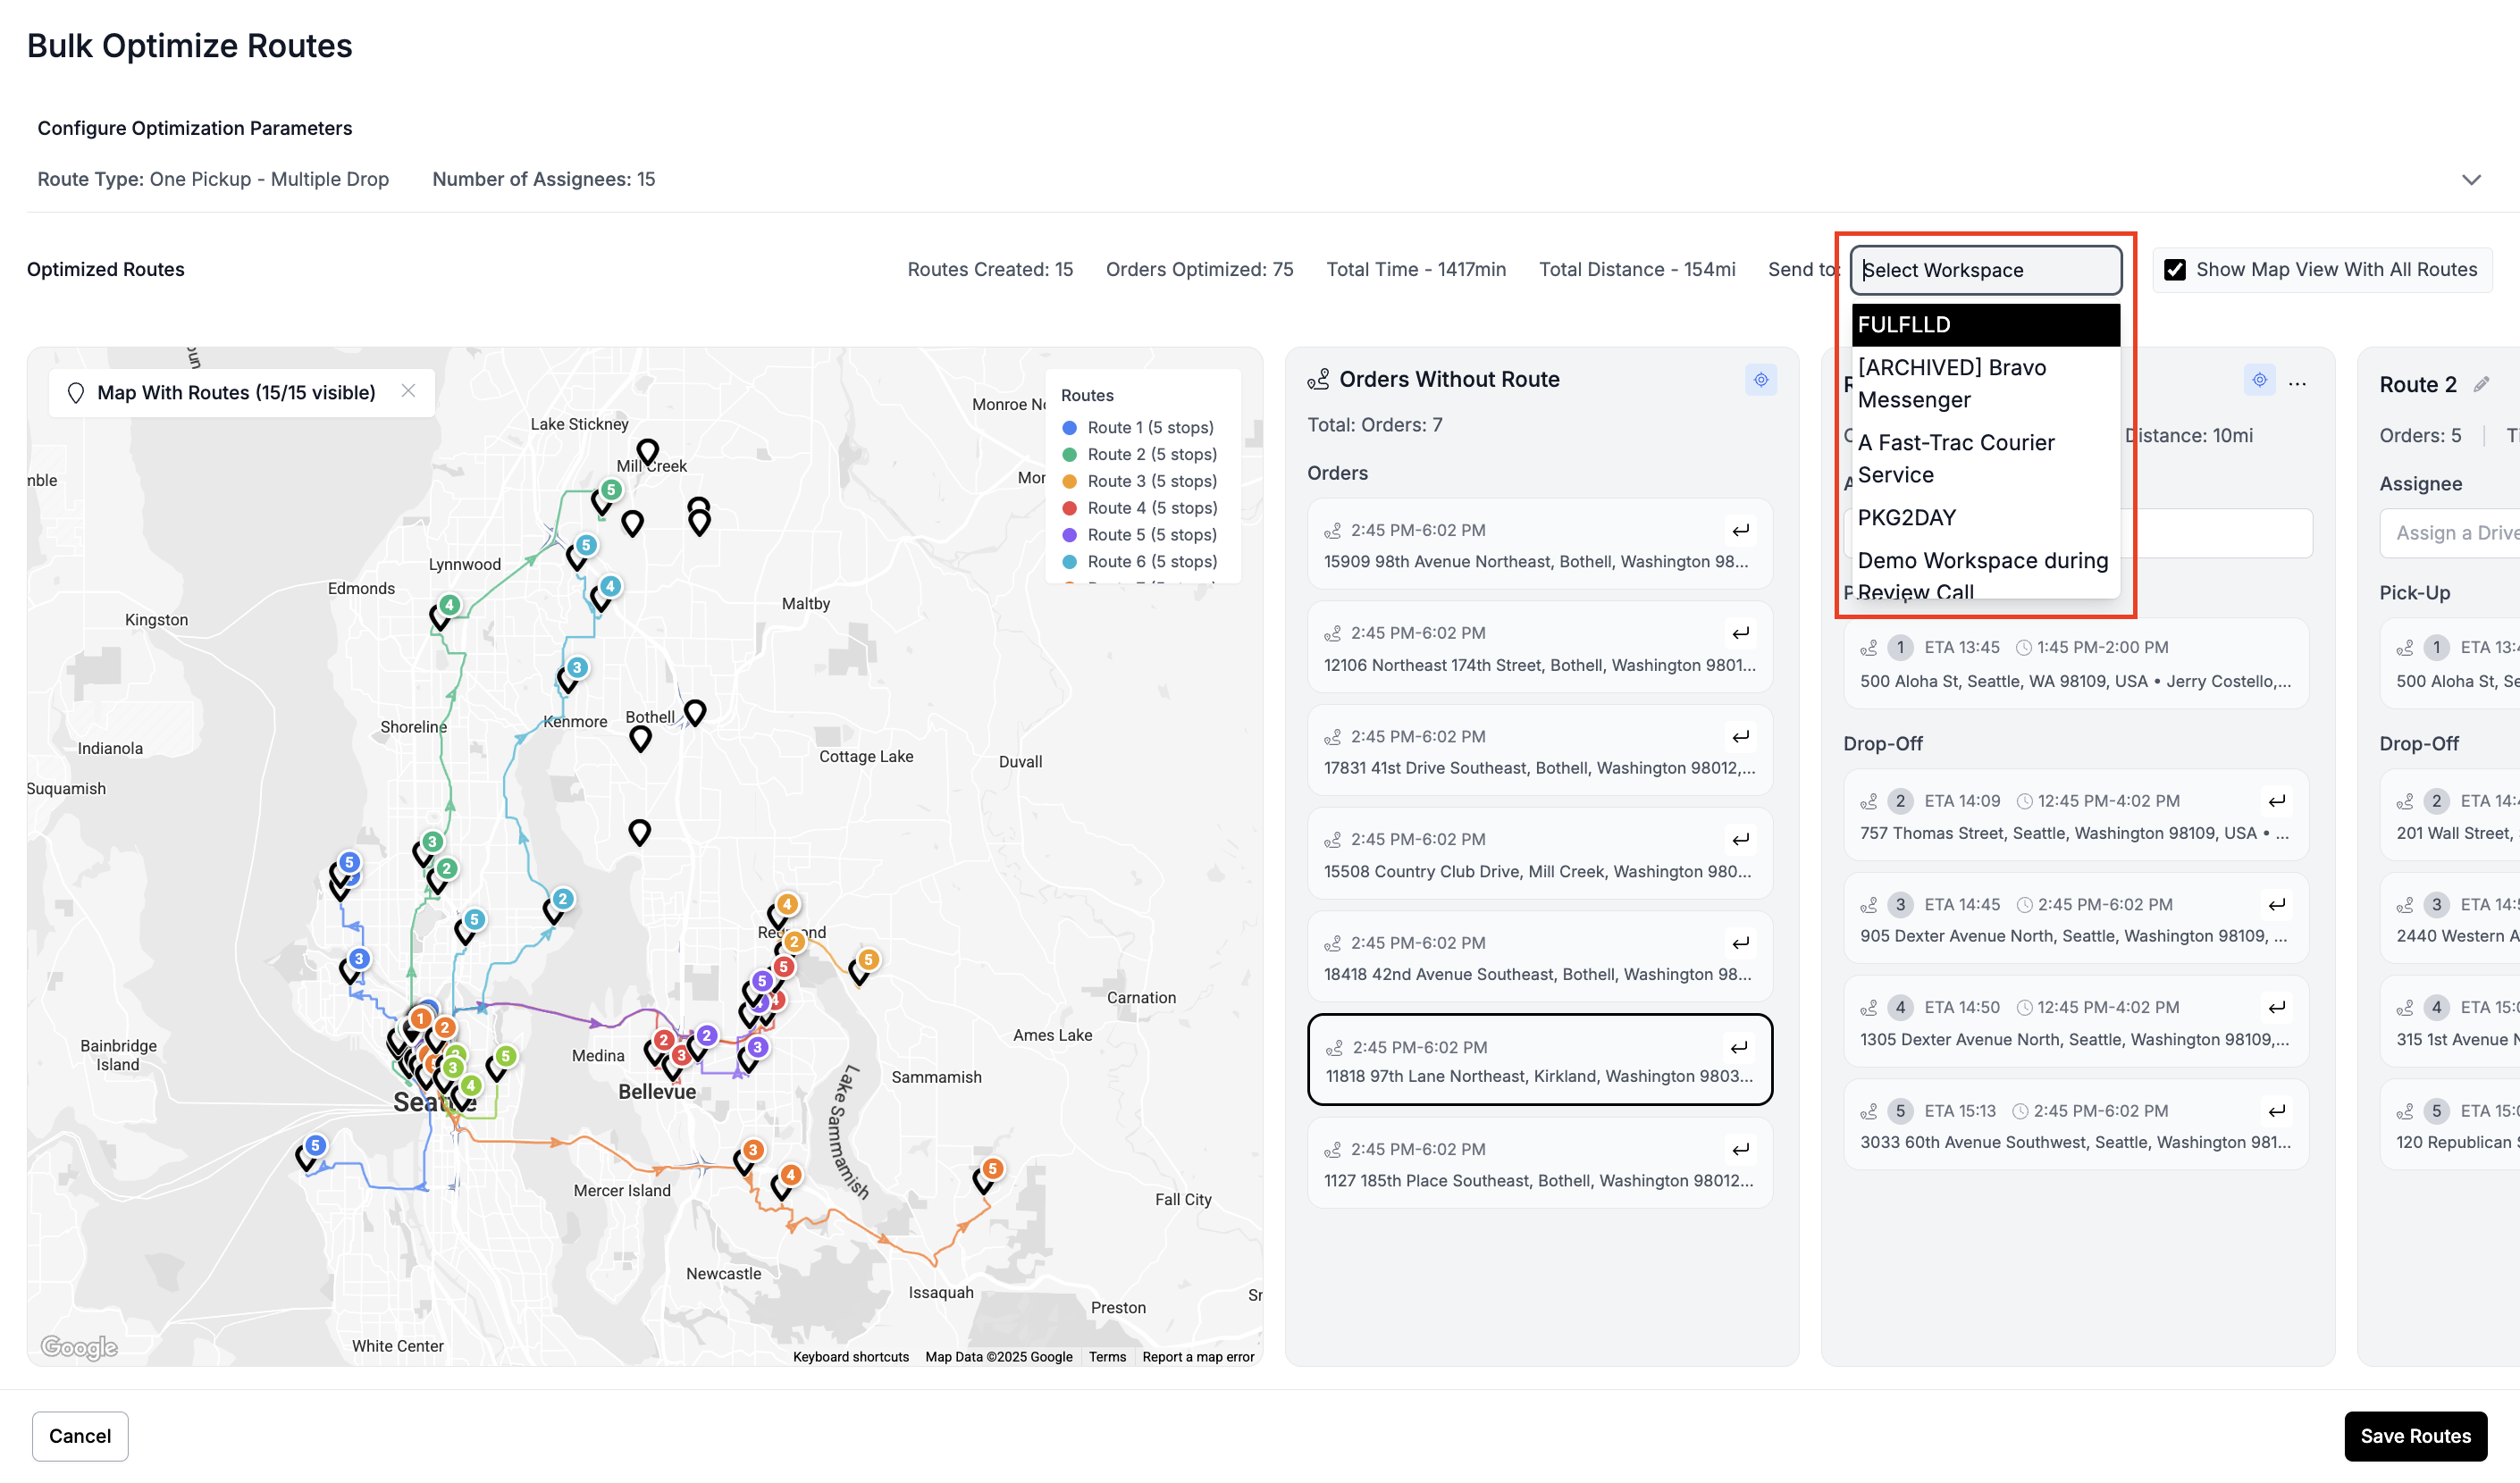
Step 7: Send Routes to Connected Workspace (if required)
If you want to share these routes with another connected workspace. In the Select Workspace box, choose the connected workspace you want to send the routes to.
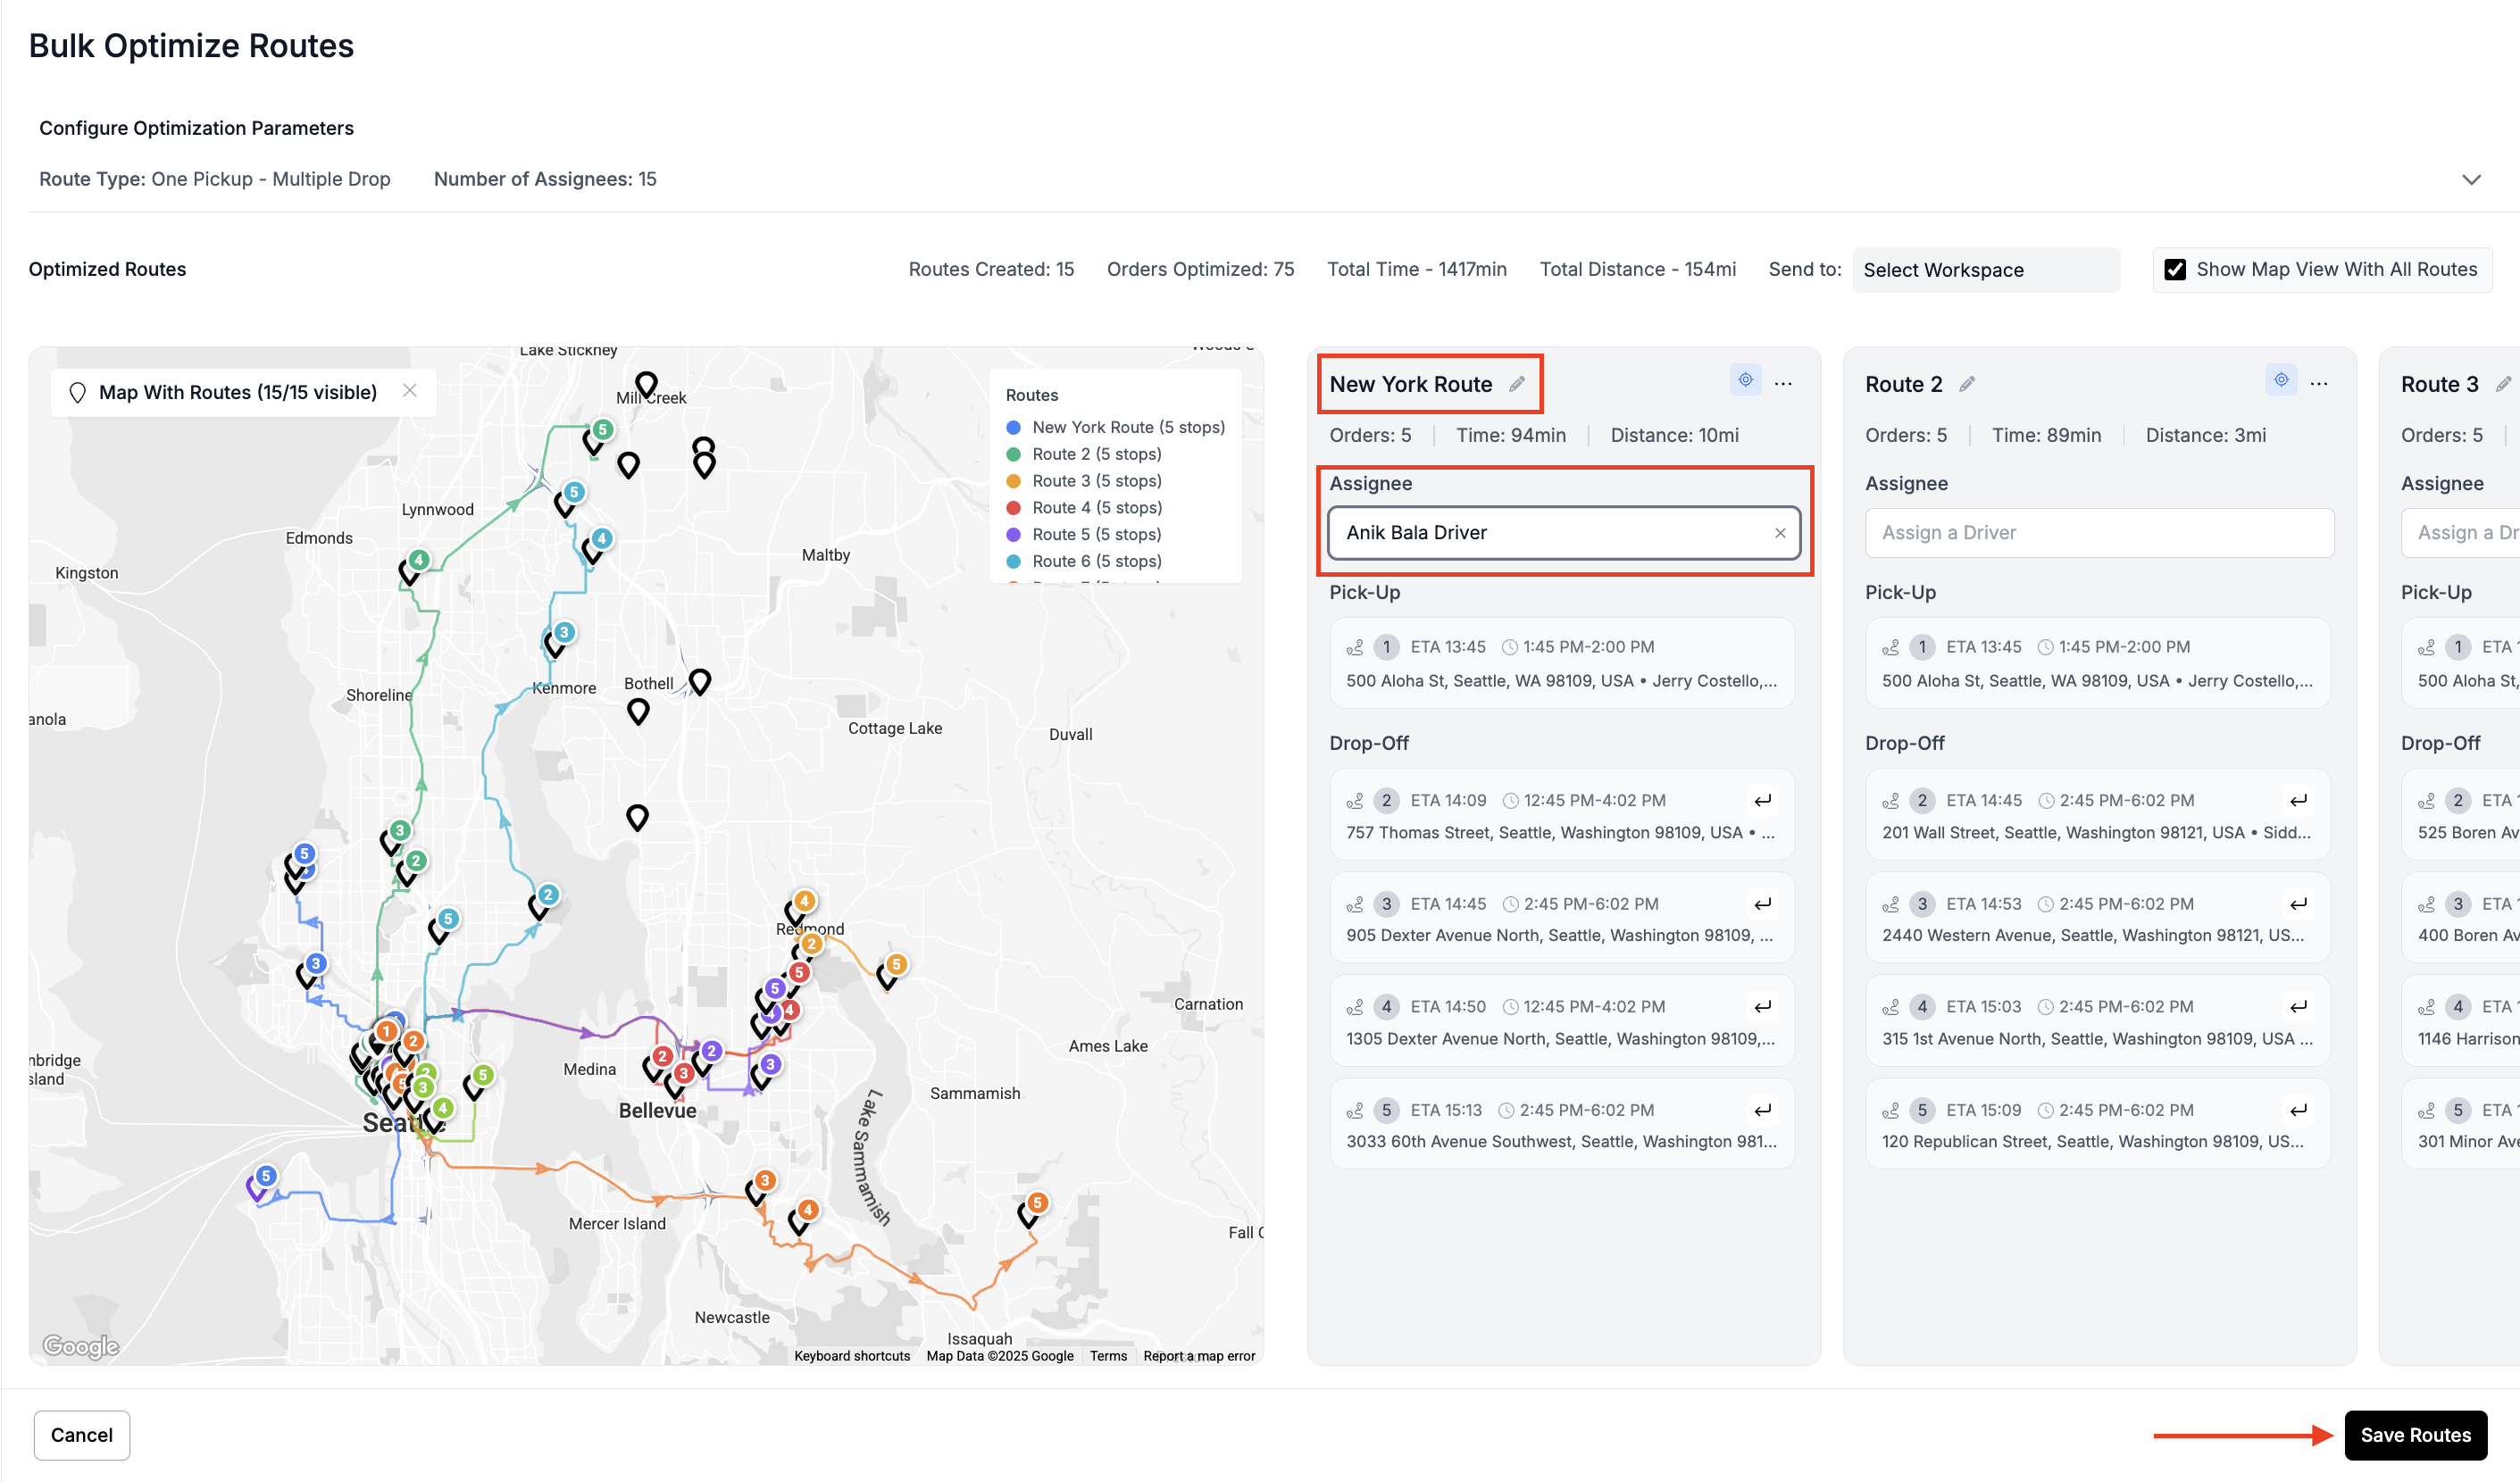
Step 8: Change Route Names and Assign Drivers
Before saving, you can rename routes and assign drivers. When everything looks correct, click Save Routes.
Step 9: View the Routes on the Dispatch Page
Once you save the routes, they should appear on the dispatch page.