
Bulk Route Optimization: Review & Dispatch Routes
Bulk Route Optimization helps you create multiple optimized routes in one go, instead of manually creating routes one by one. By simply uploading a sheet with your orders, the system intelligently groups and optimizes them into efficient routes based on your selected parameters.
This is especially useful when you’re handling high order volumes and need a faster, smarter way to plan deliveries.
In this article, you will learn how to:
- Upload orders for bulk route optimization
- Configure optimization parameters
- Run and monitor route optimization
- Review and manage optimized routes
- Handle unassigned or unoptimized orders
Step-by-Step: Bulk Route Optimization
-
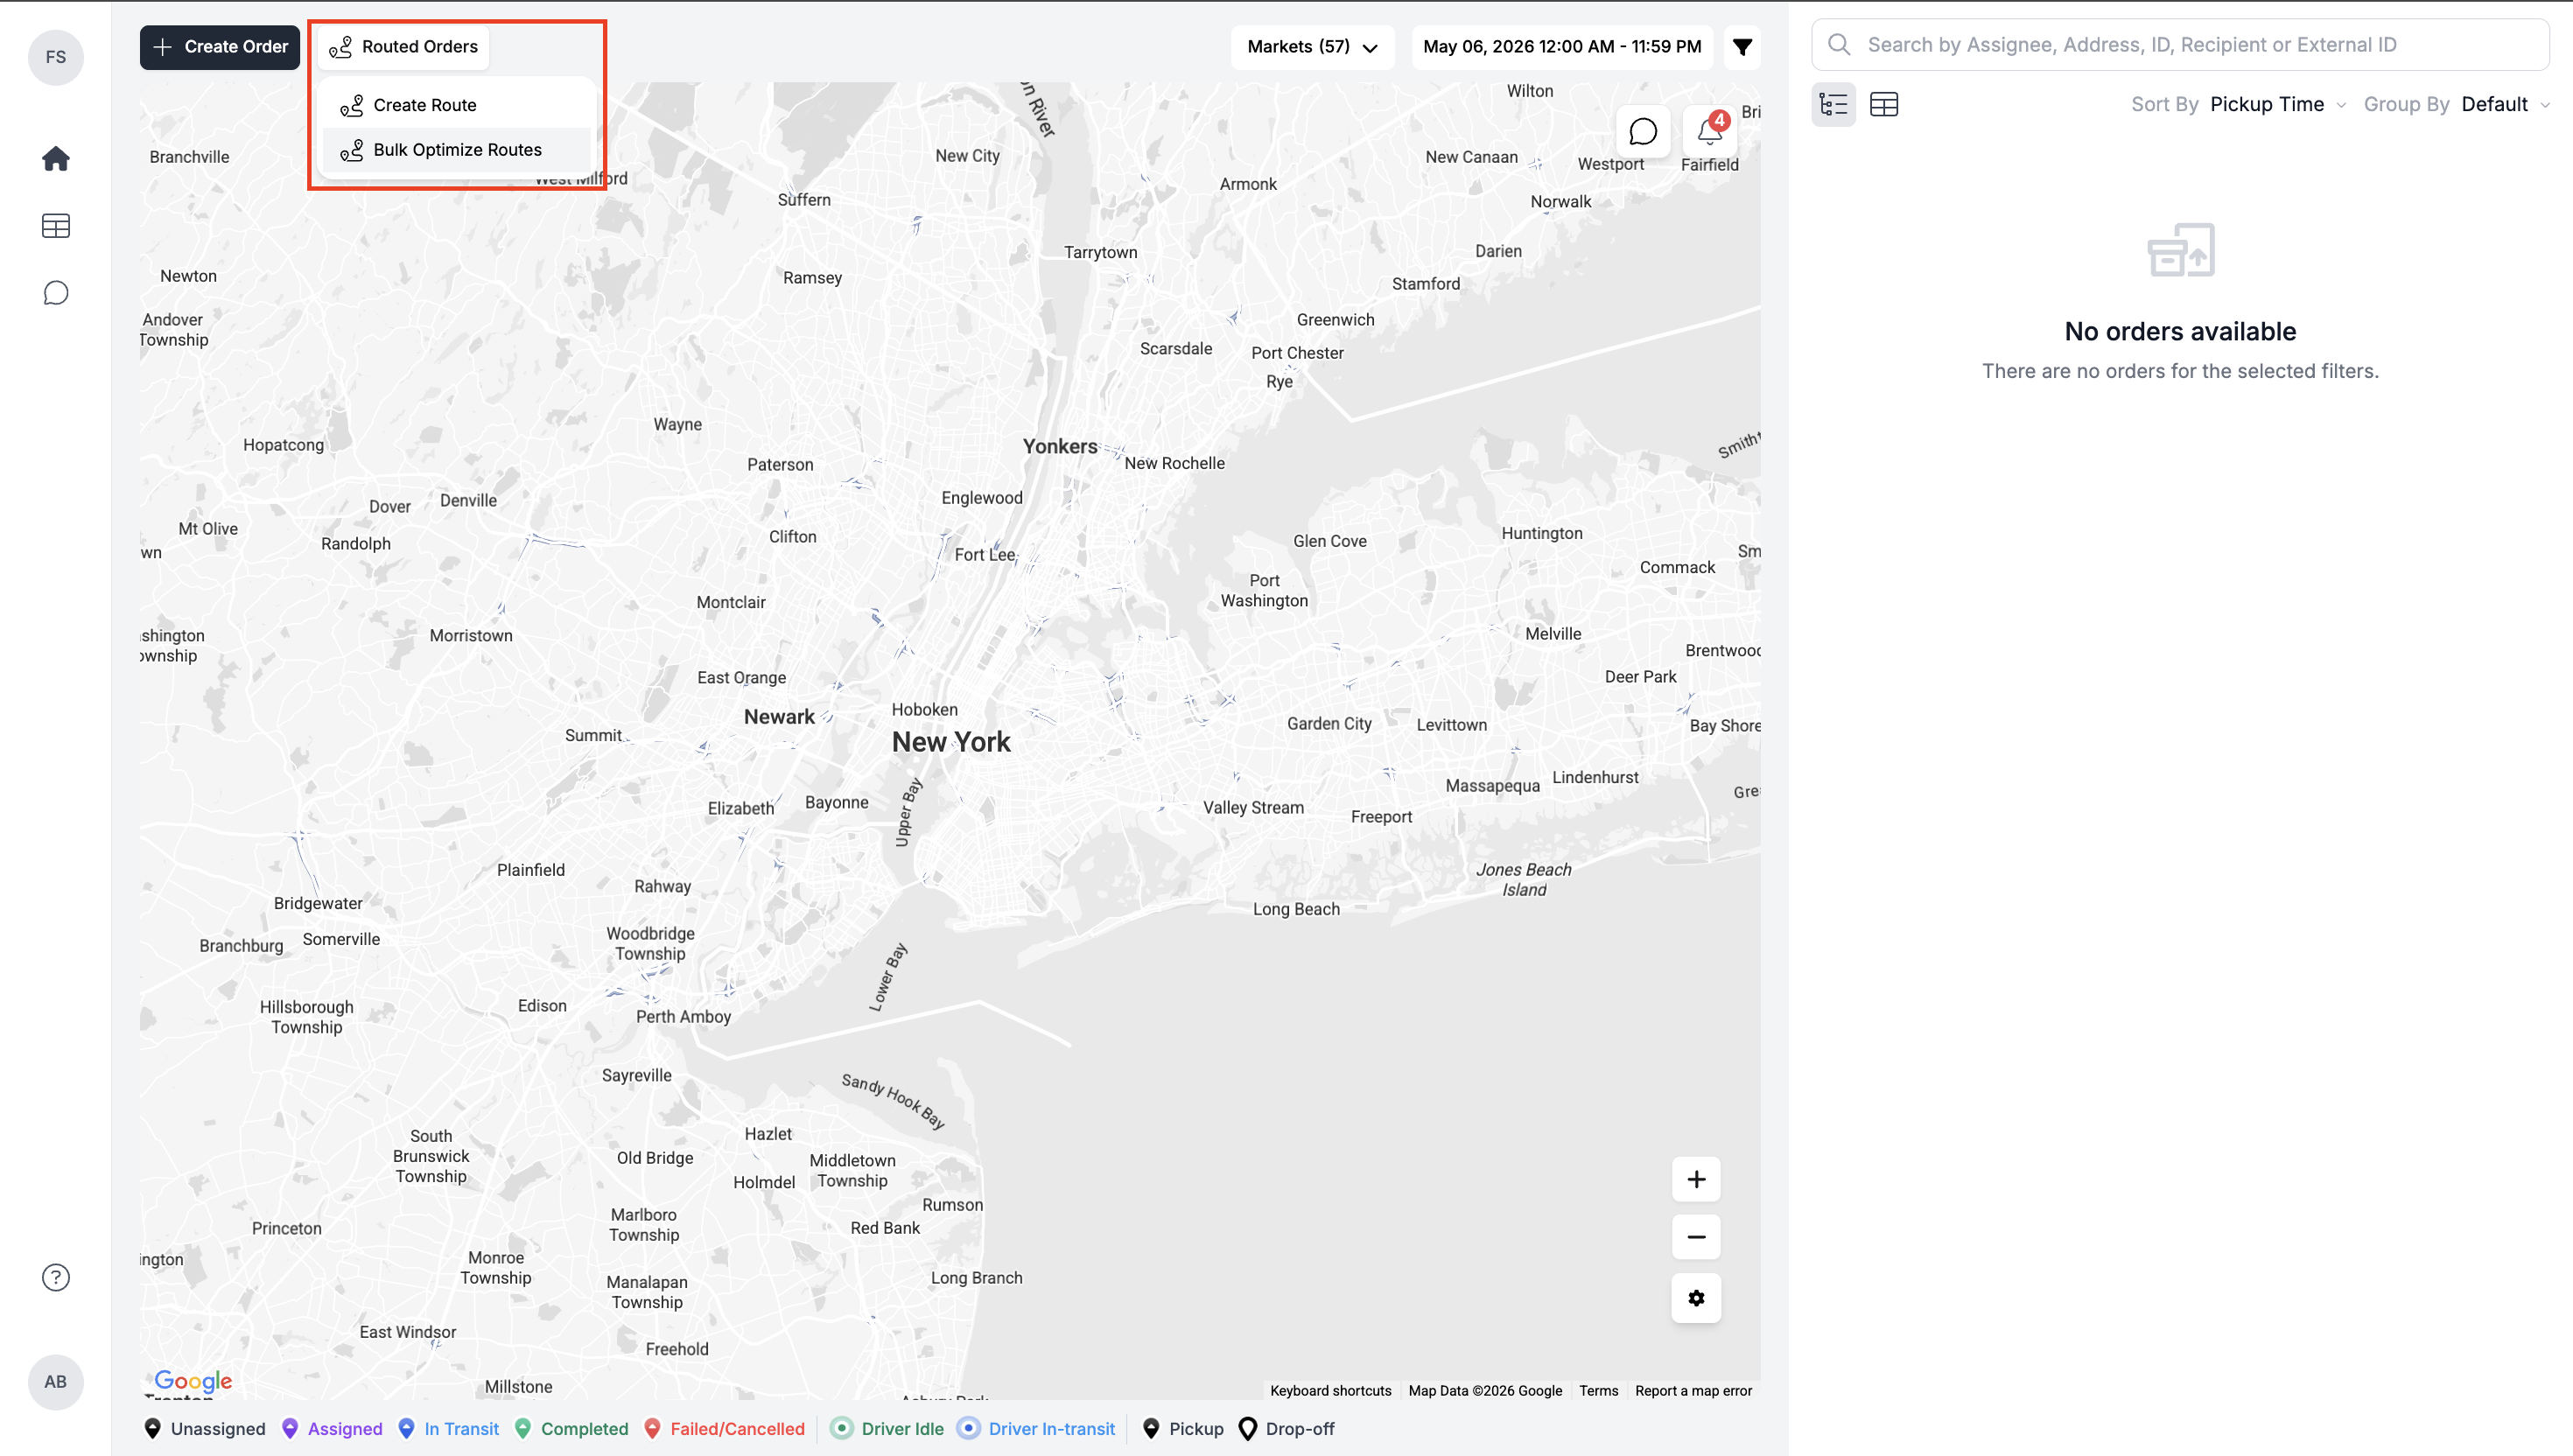
Go to Routed Orders from the top navigation, click on Bulk Optimized Routes from the dropdown.
-
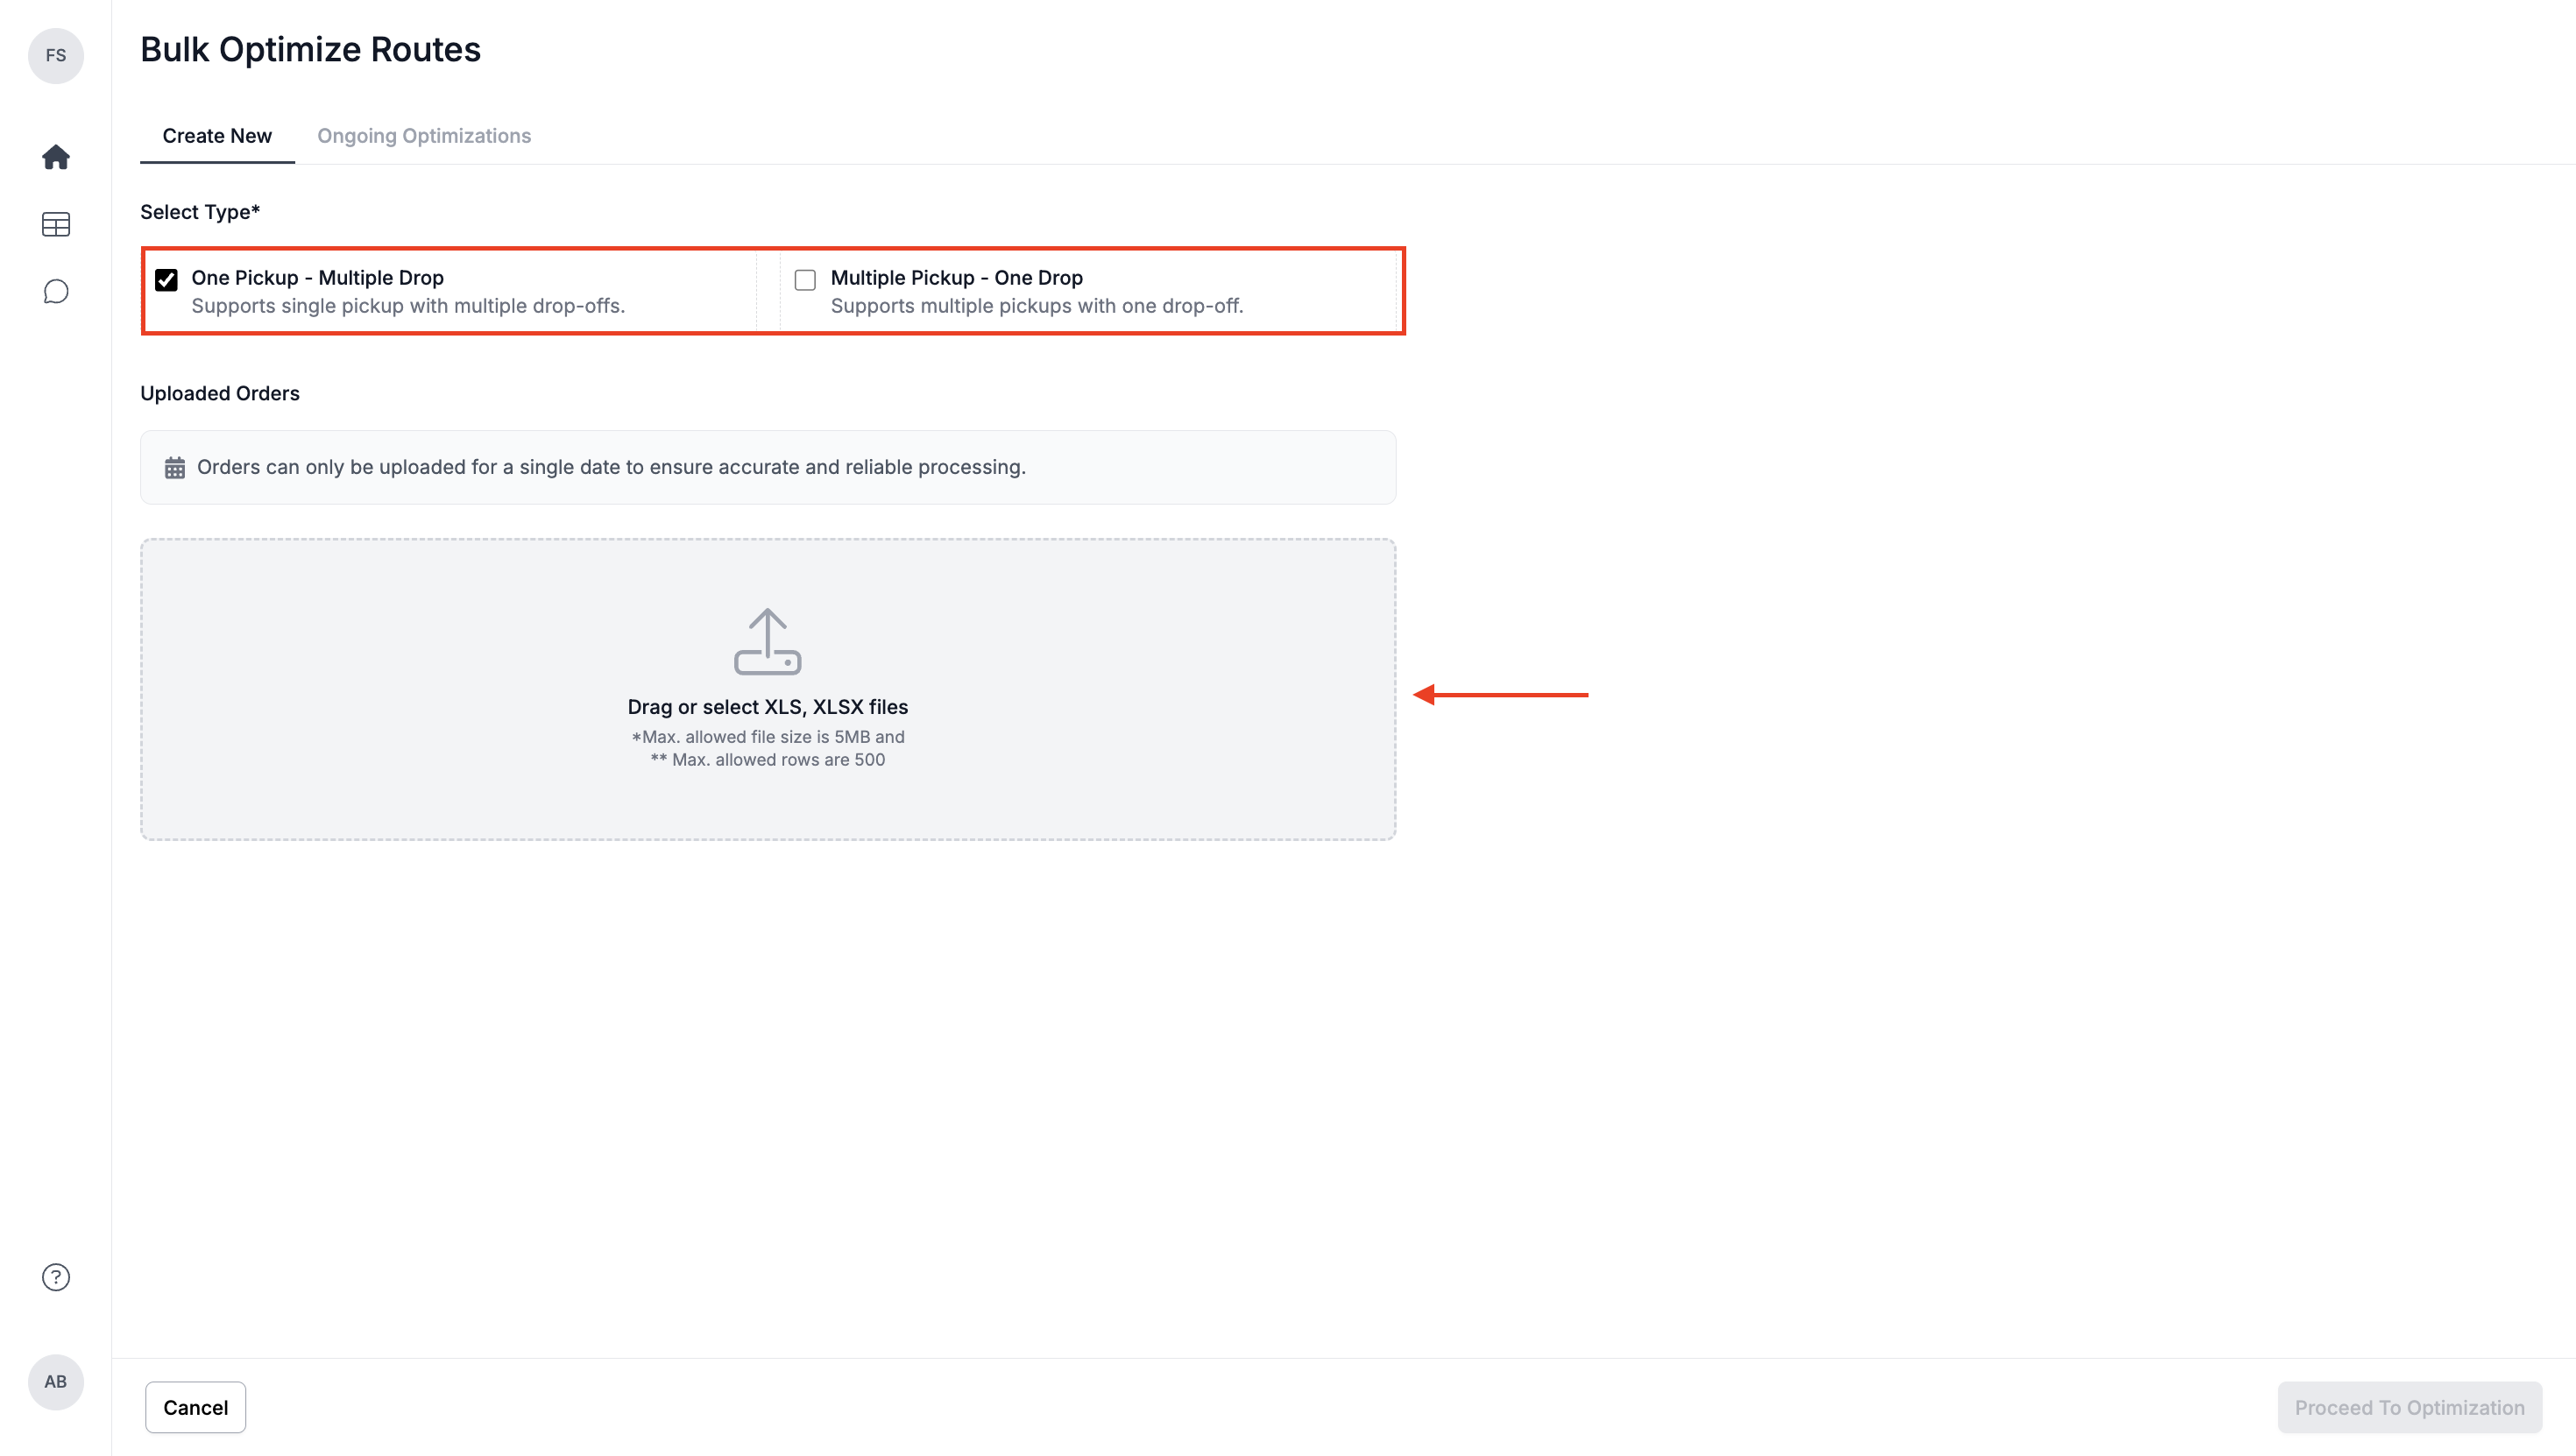
Under the create new tab, choose your preferred option, One Pickup → Multiple Drop-offs or Multiple Pickups → One Drop-off. Click on the uploader section and upload your sheet.
-
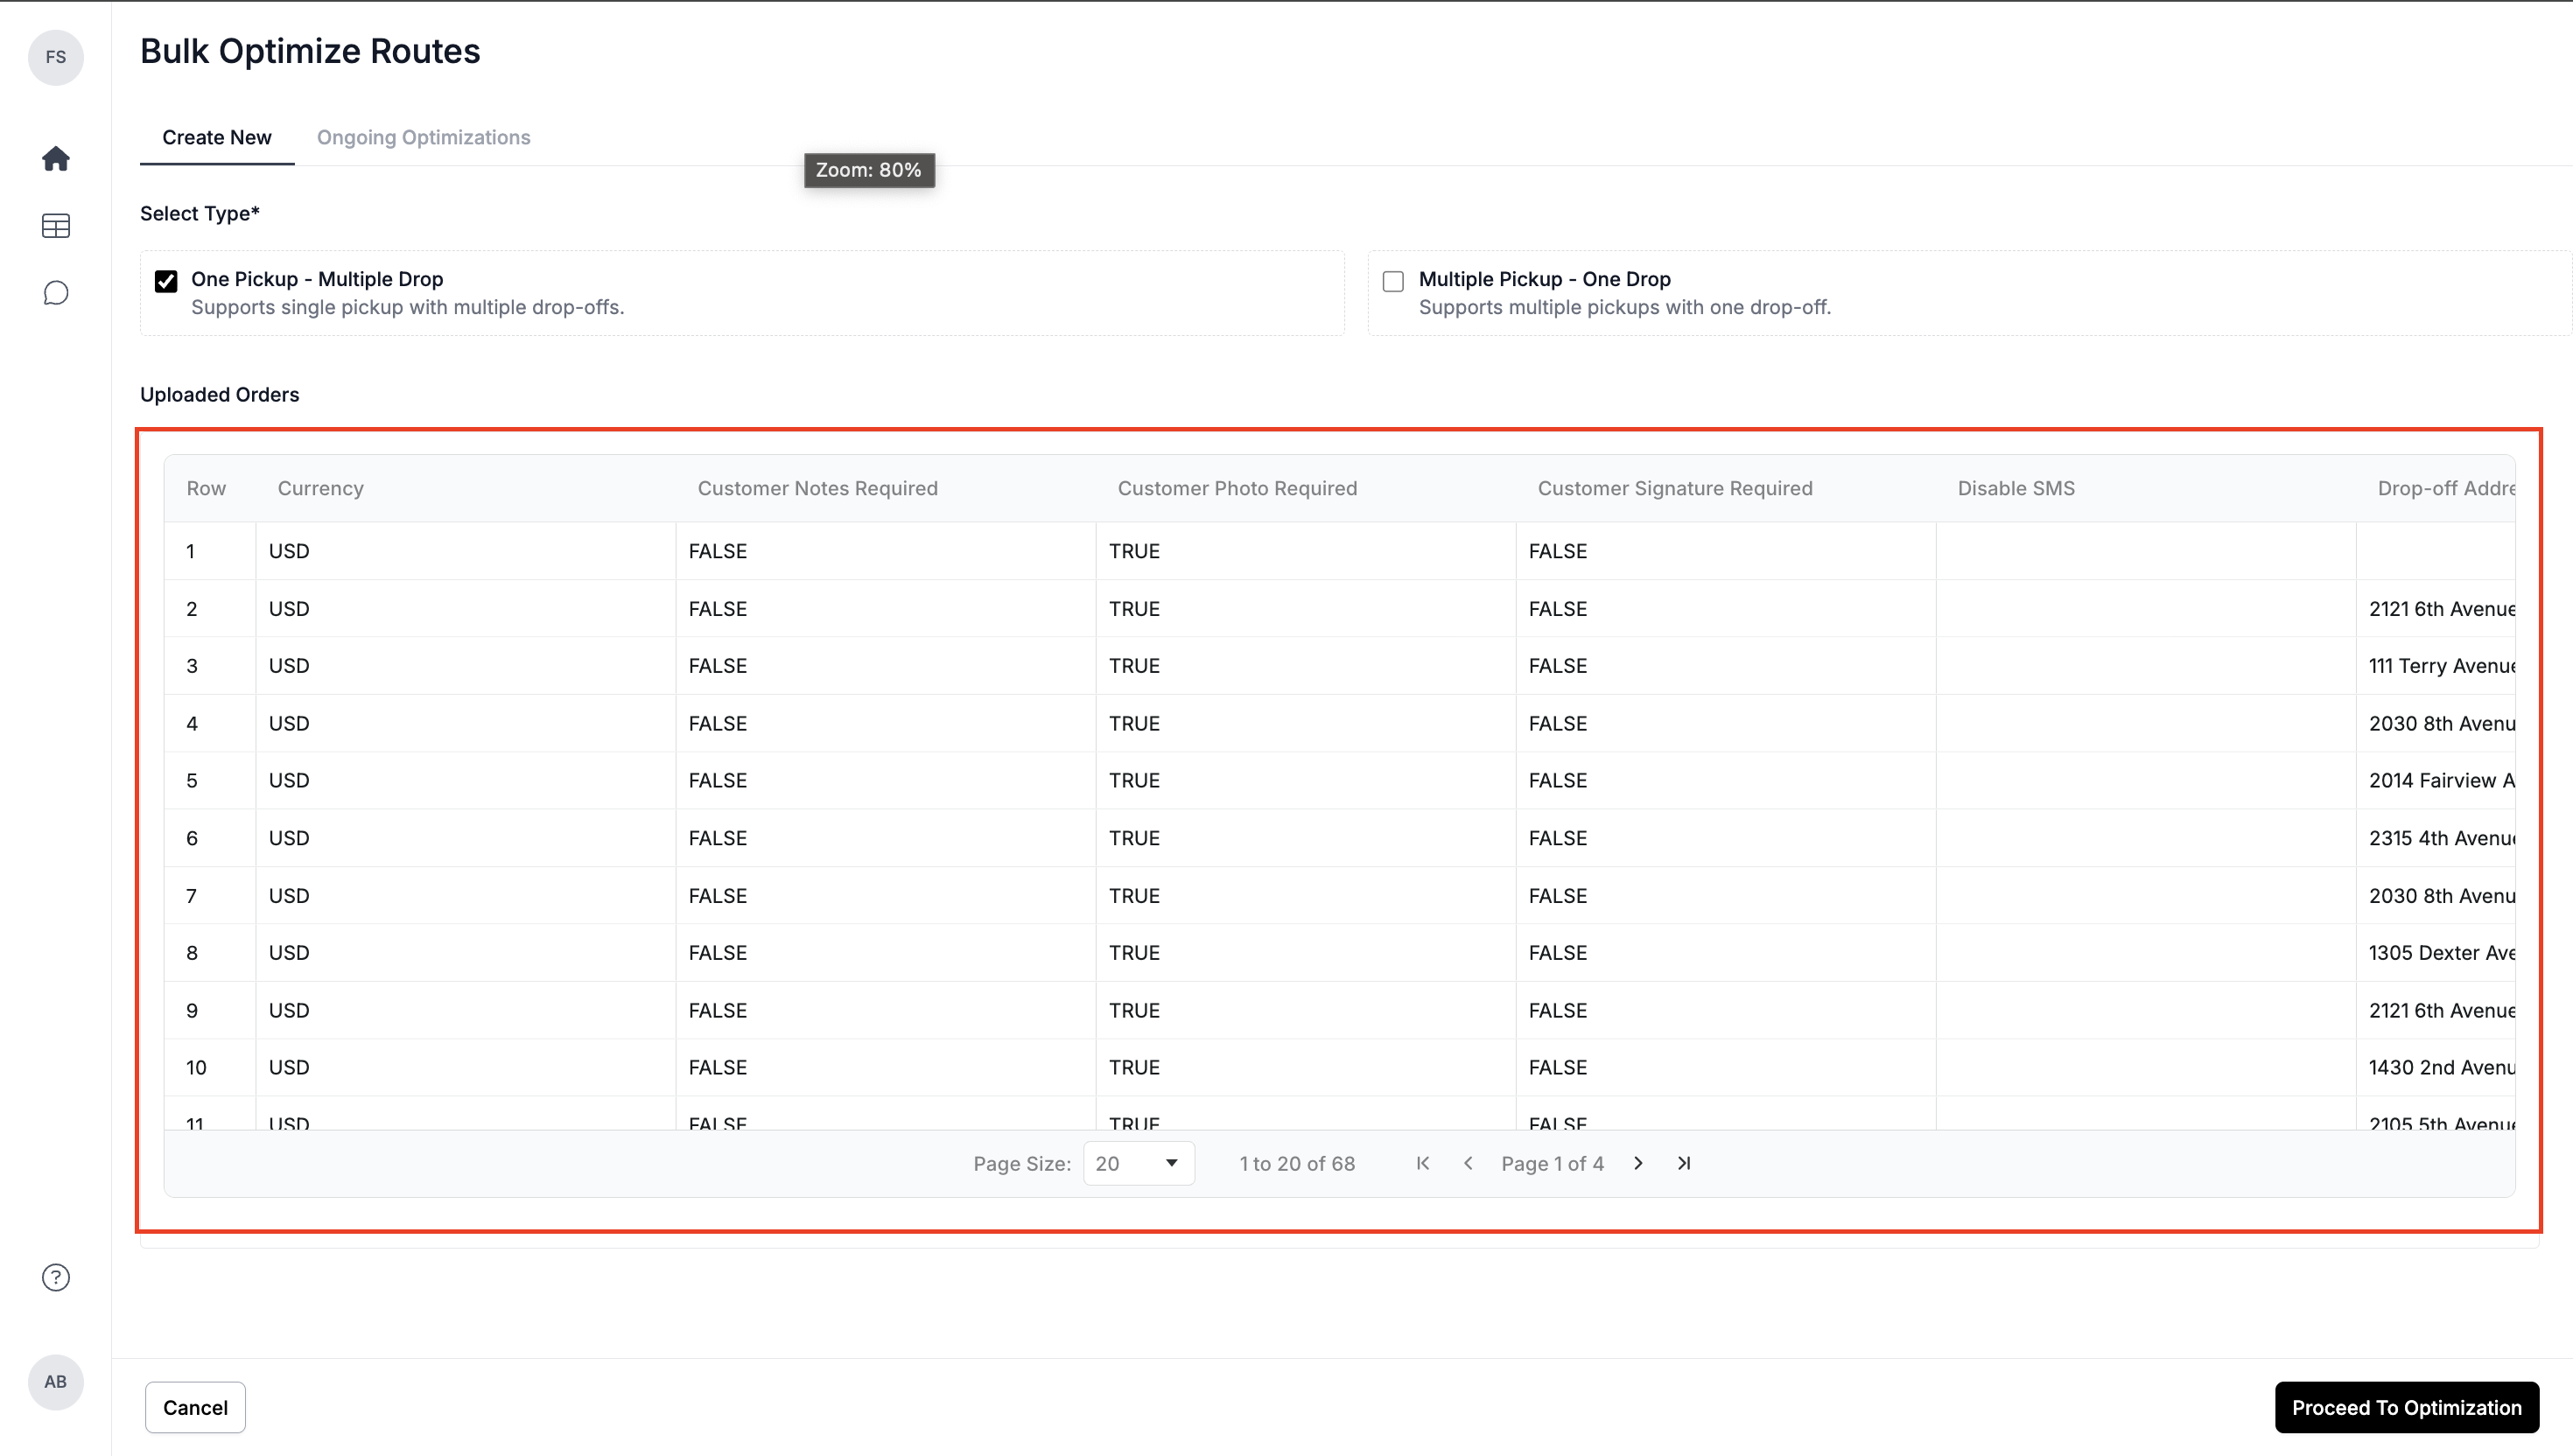
Once uploaded, you’ll see a preview of all orders from your sheet. Review the data to ensure everything looks correct. Click on Proceed to Optimization and you’ll be redirected to the Bulk Optimization screen.
-
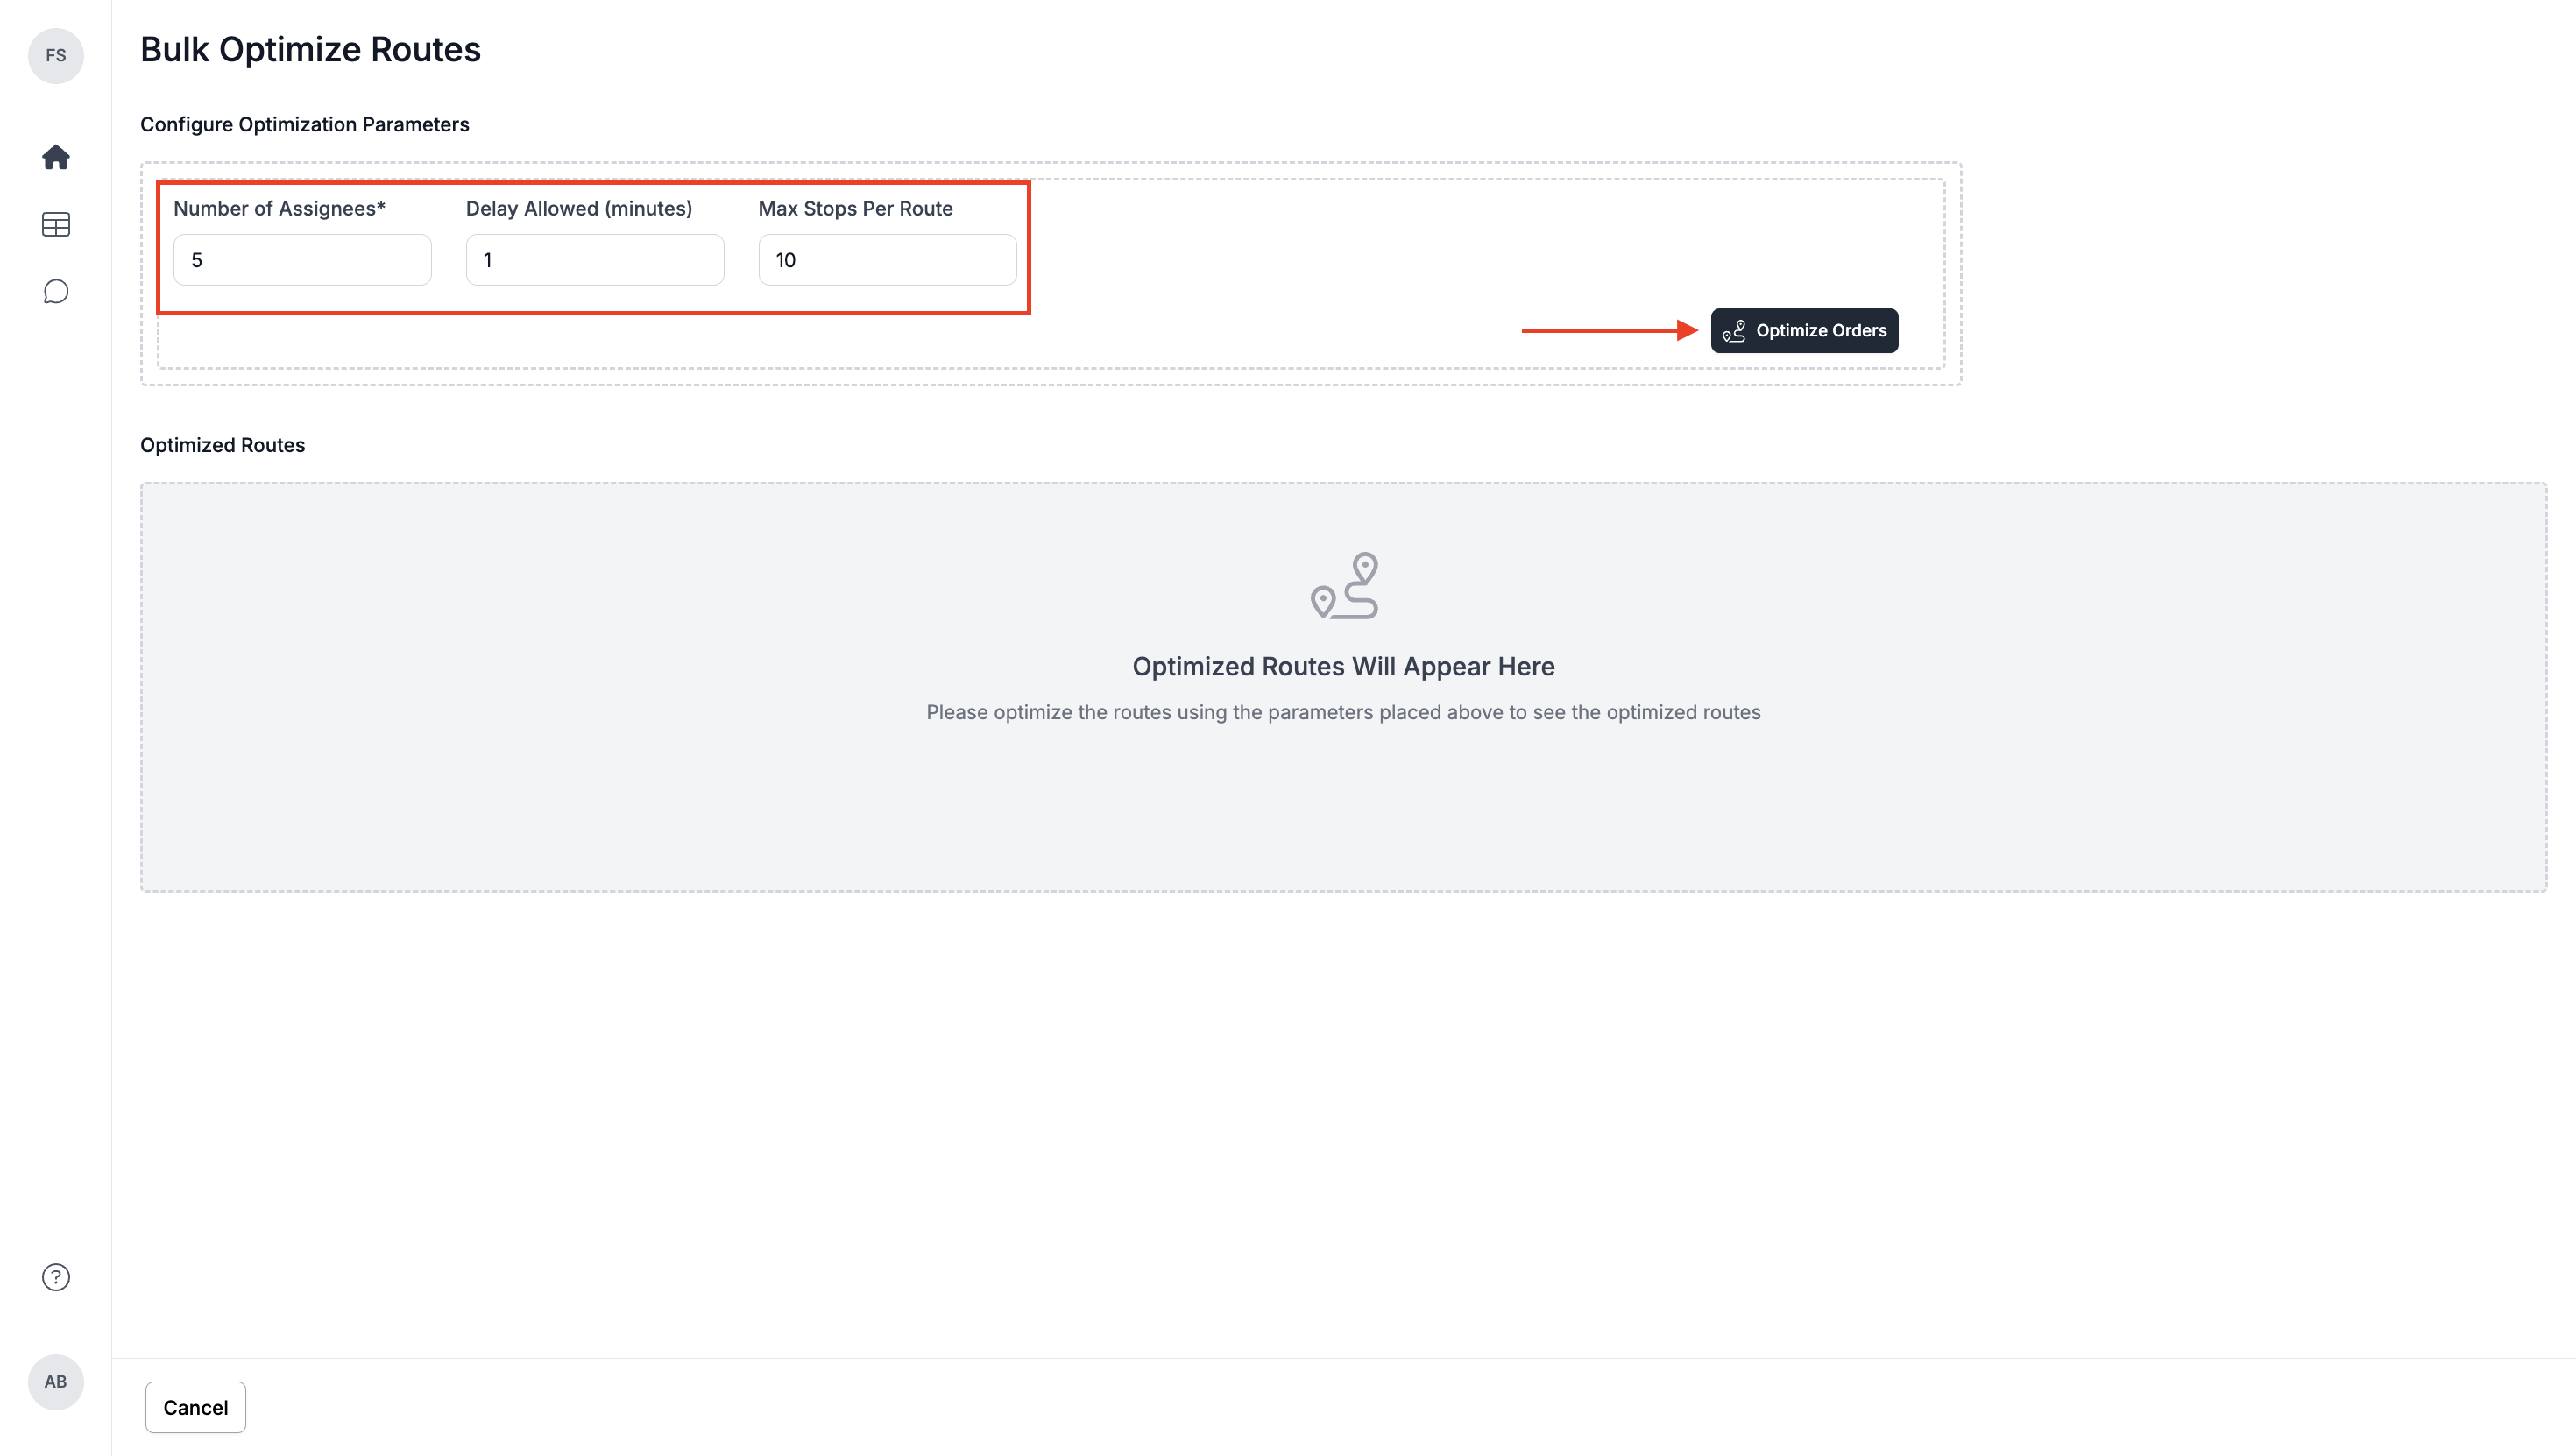
Set your optimization parameters based on operational needs—number of assignees, delay, and max orders per route. Once configured, click Optimize Routes. The process runs in the background, so you can continue using the platform without interruption.
-
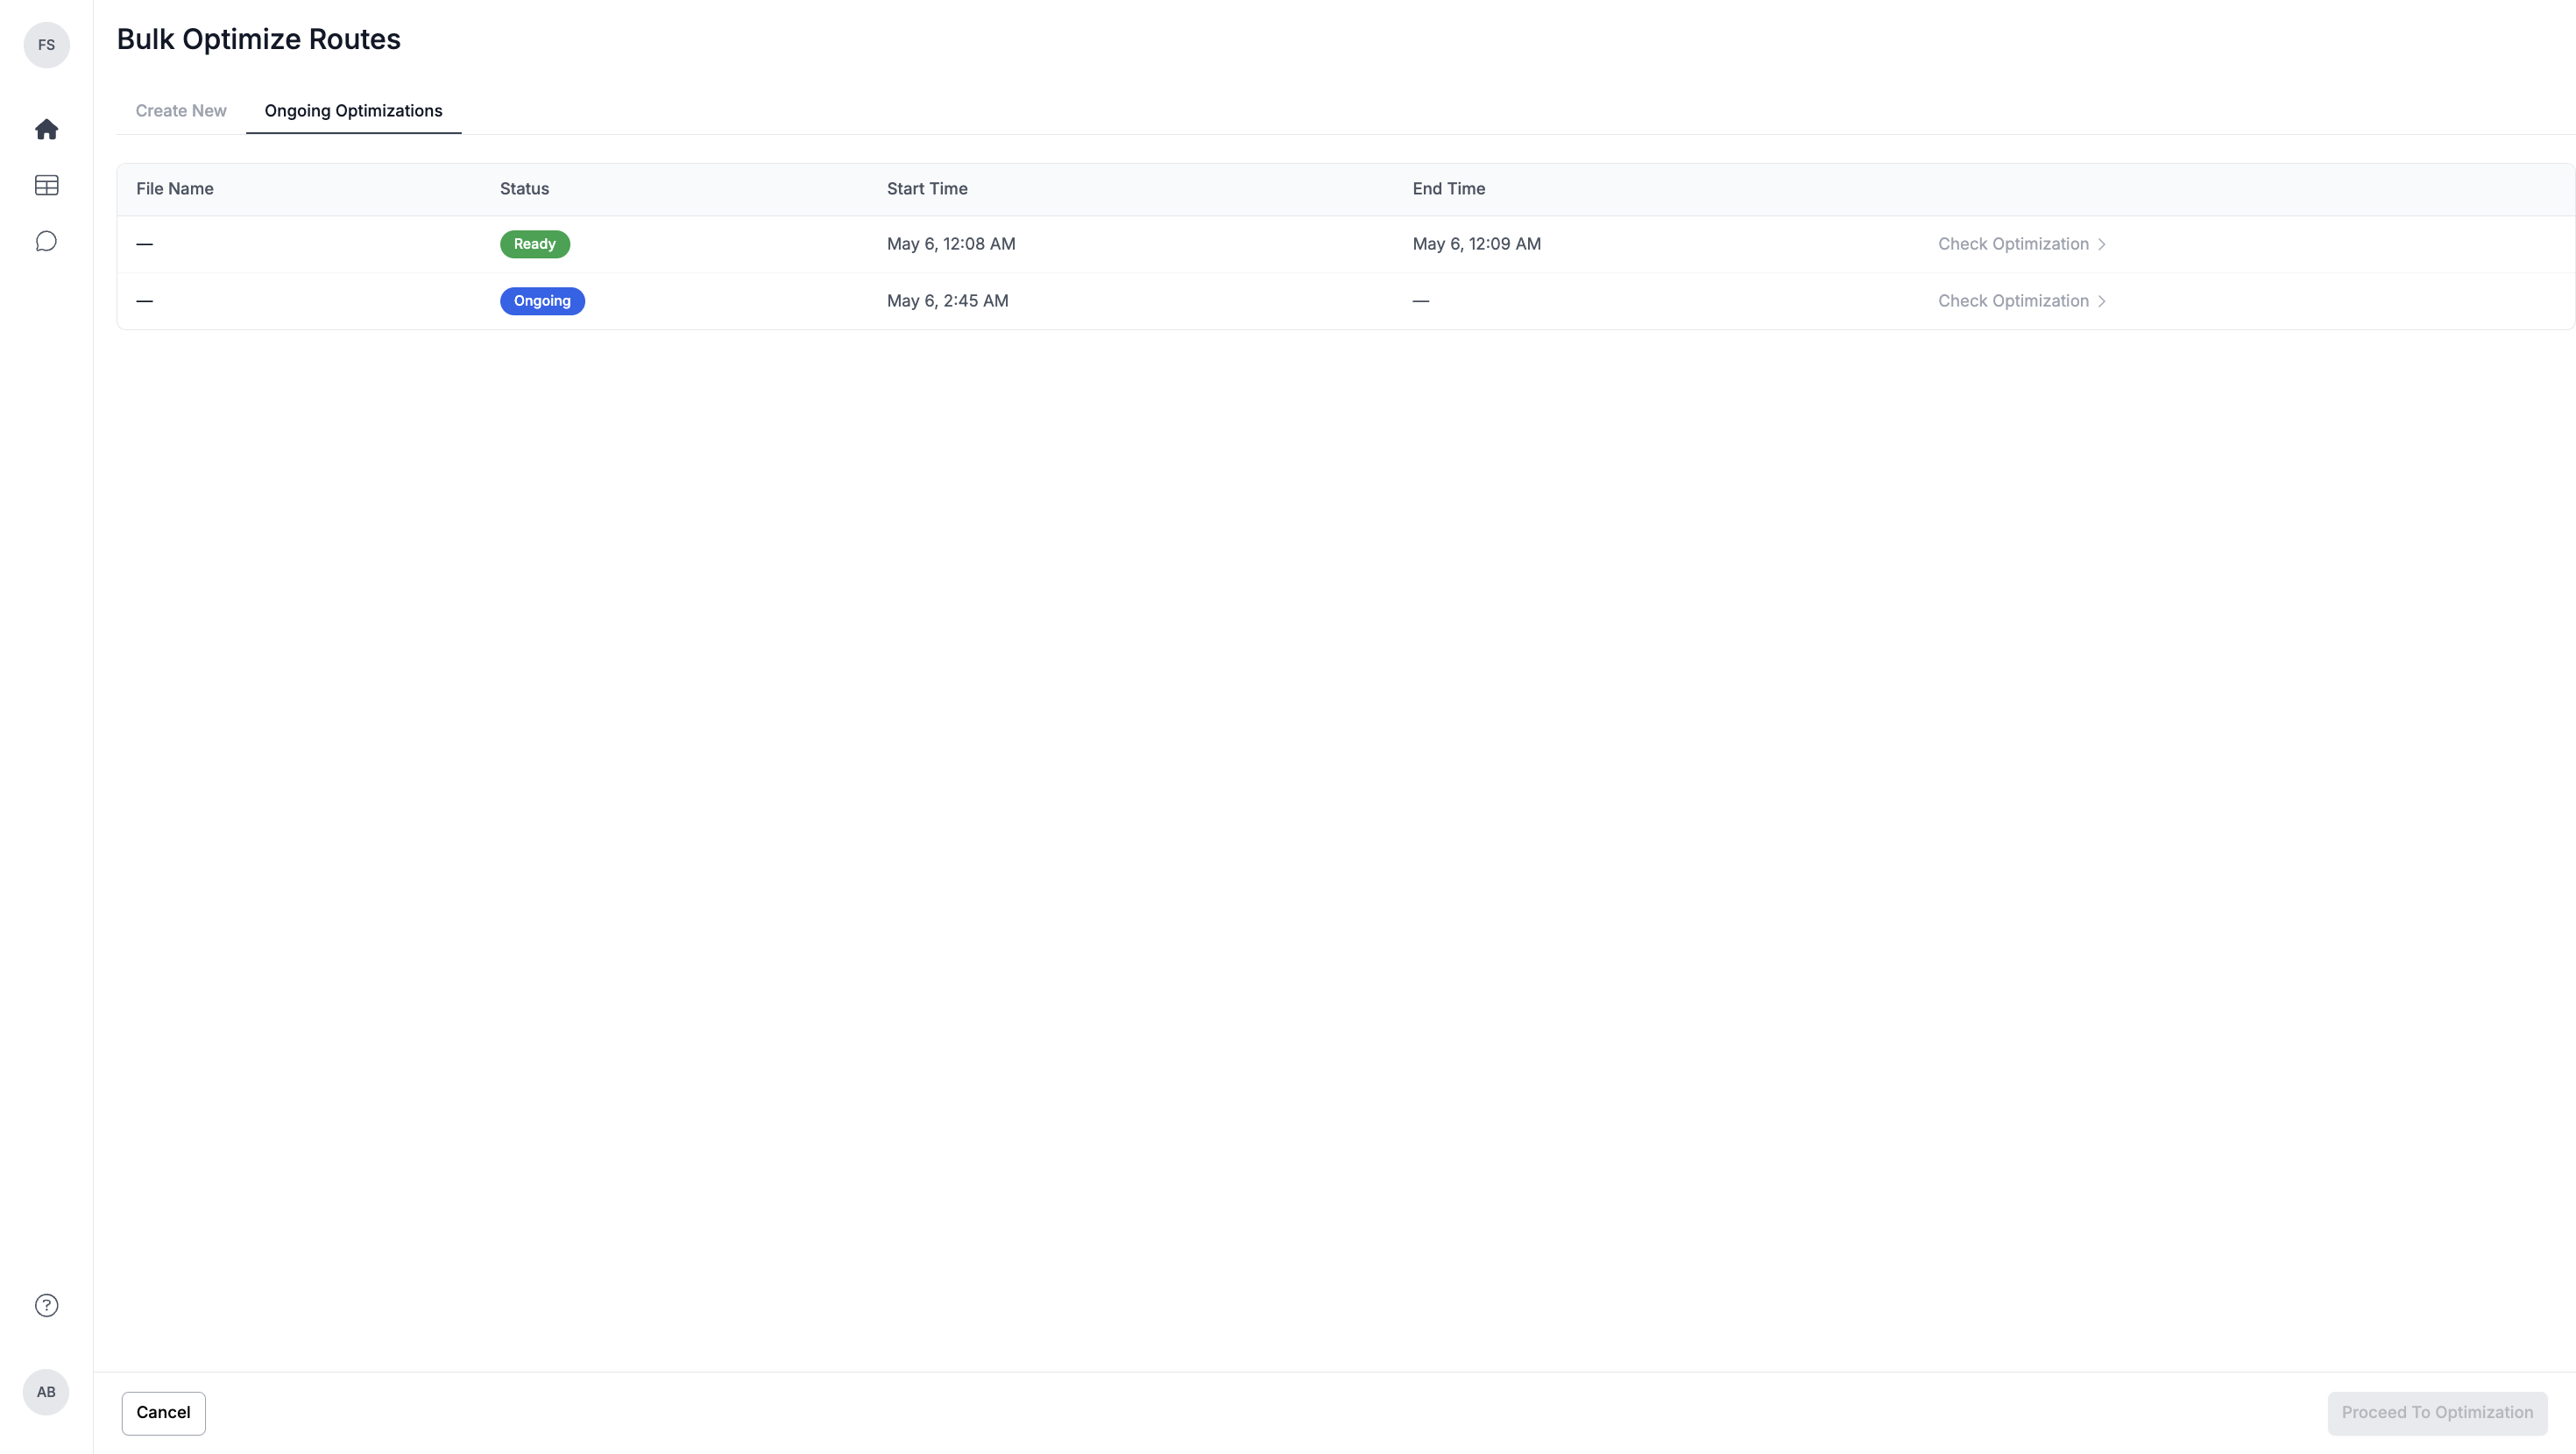
Check the number of completed and ongoing optimizations under the ongoing optimizations tab. You can click on the Check Optimization button to navigate to the ongoing/ready optimization for review.
-
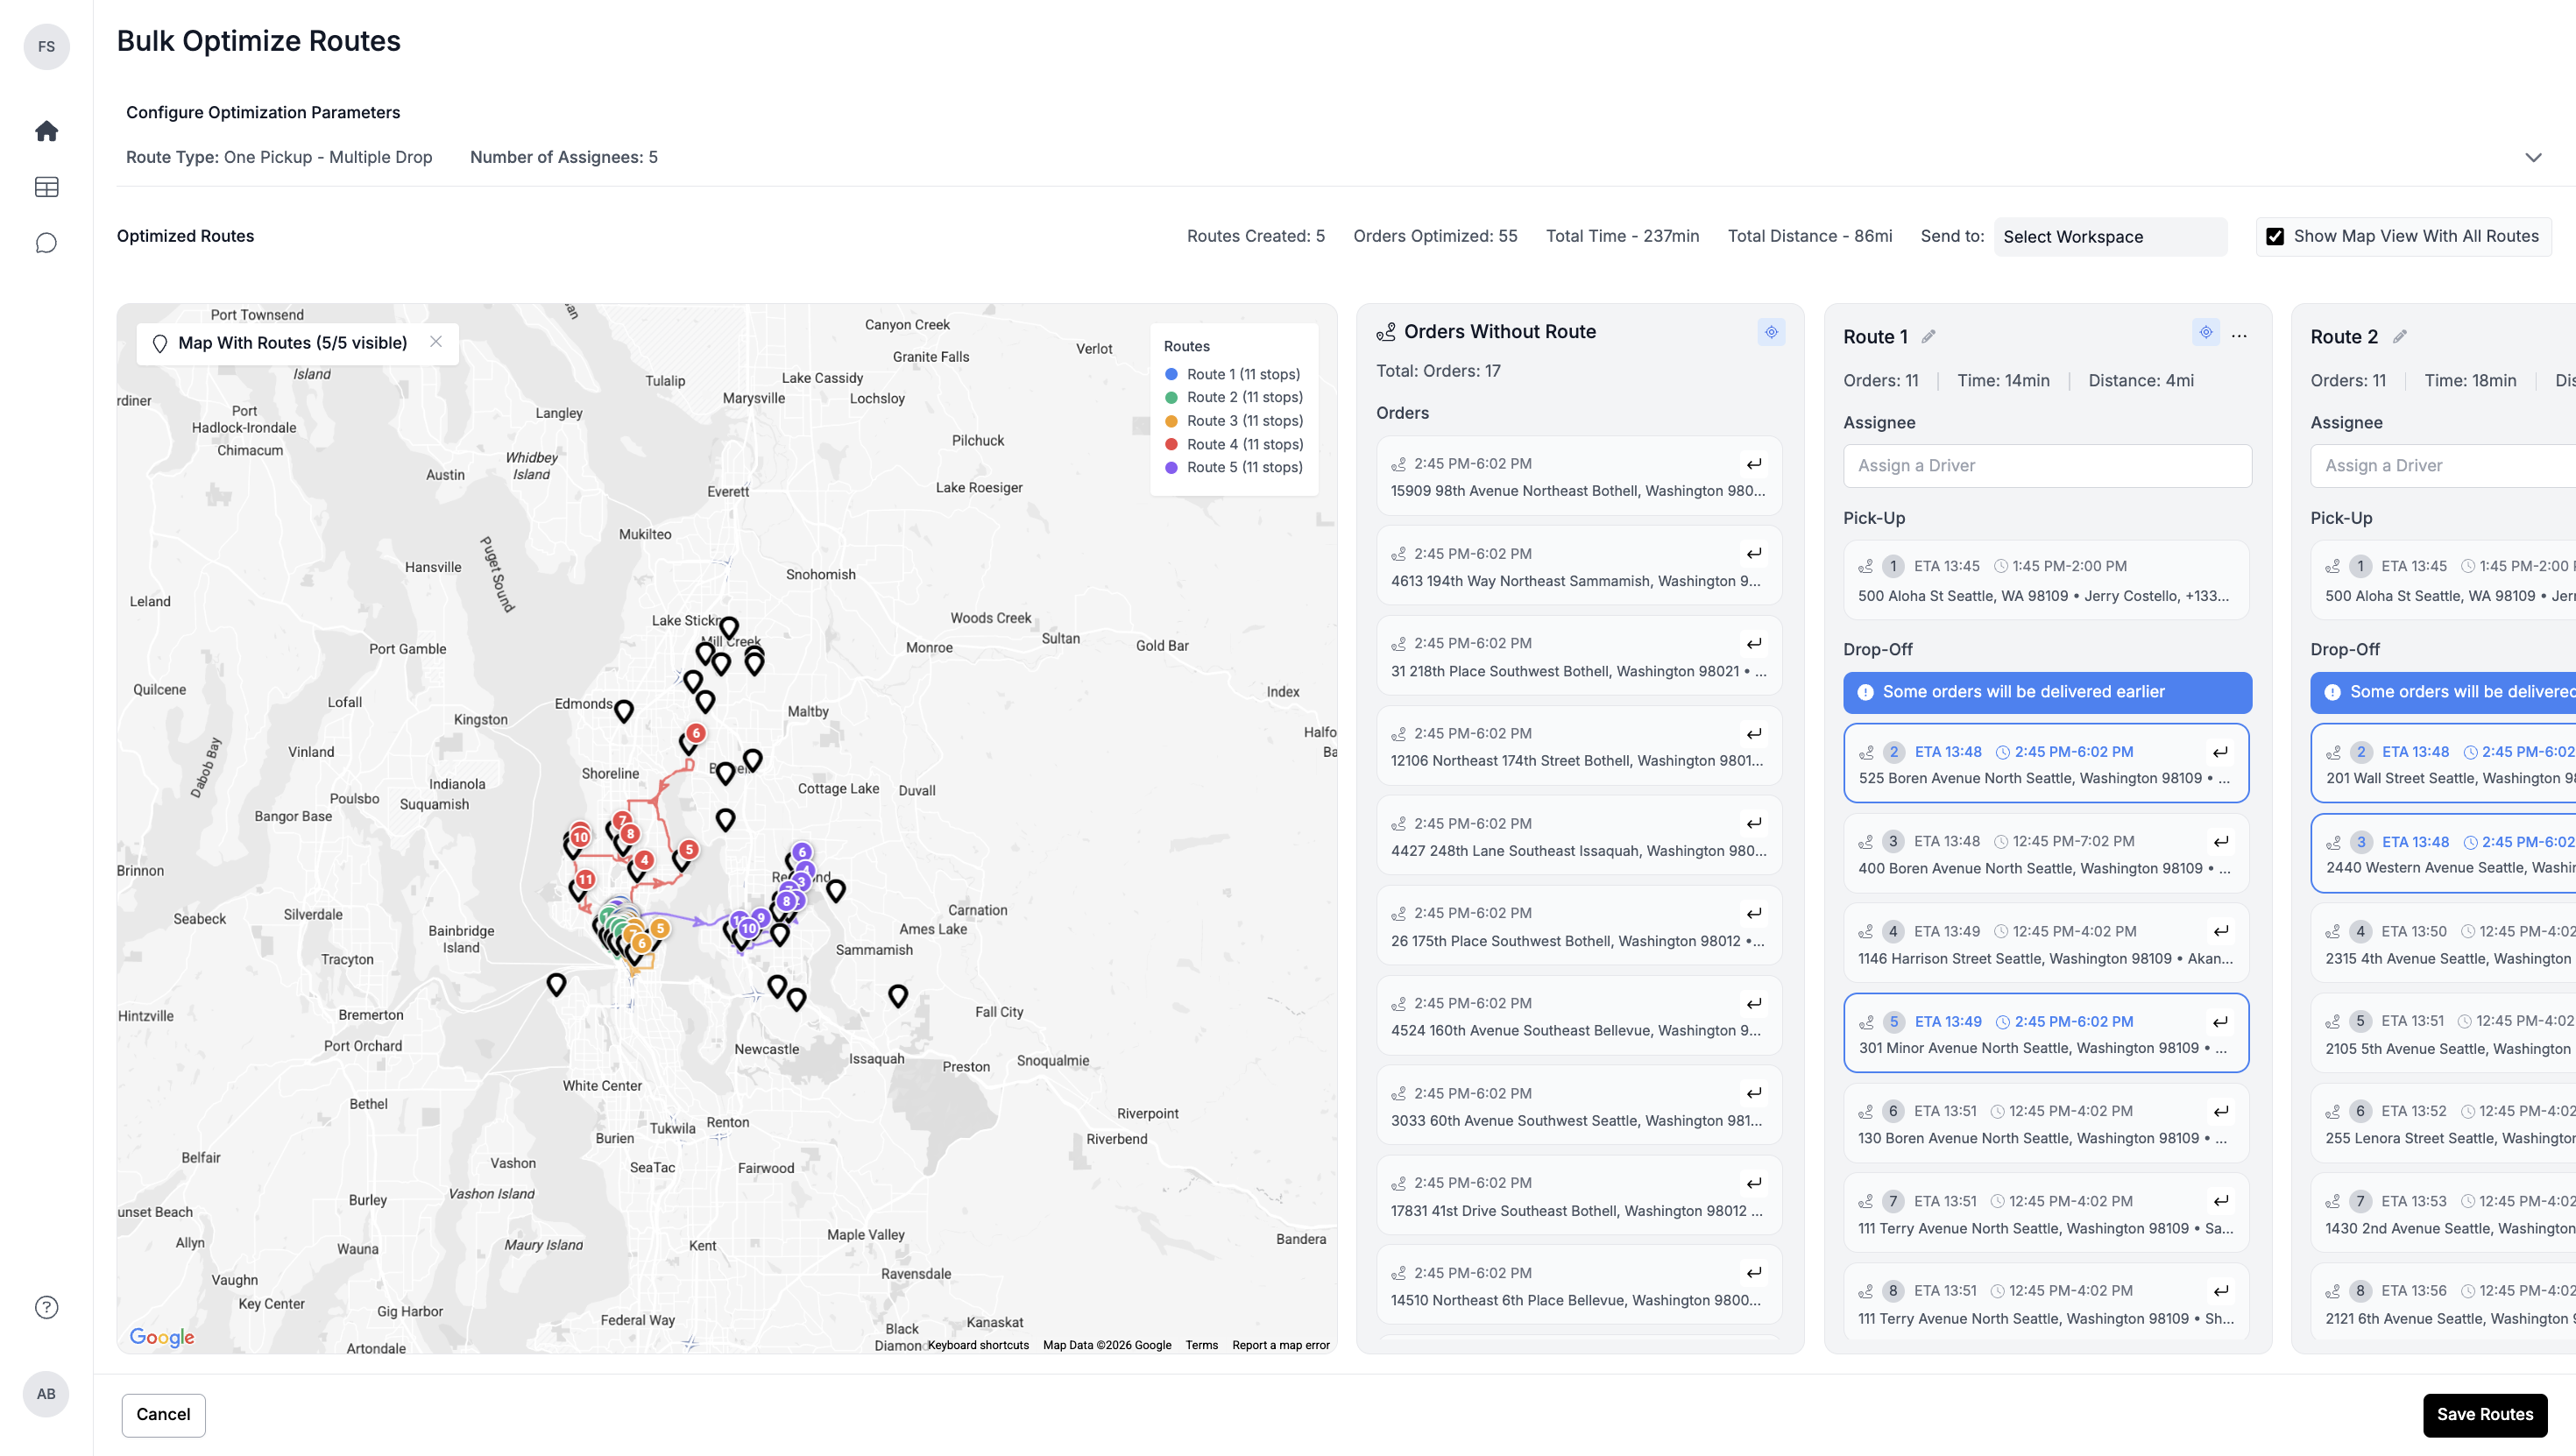
Once optimization is complete, you’ll see total orders, routes created, and total time/distance. Unoptimized orders appear under “Orders Without Route”, and you can toggle the map view as needed.
-
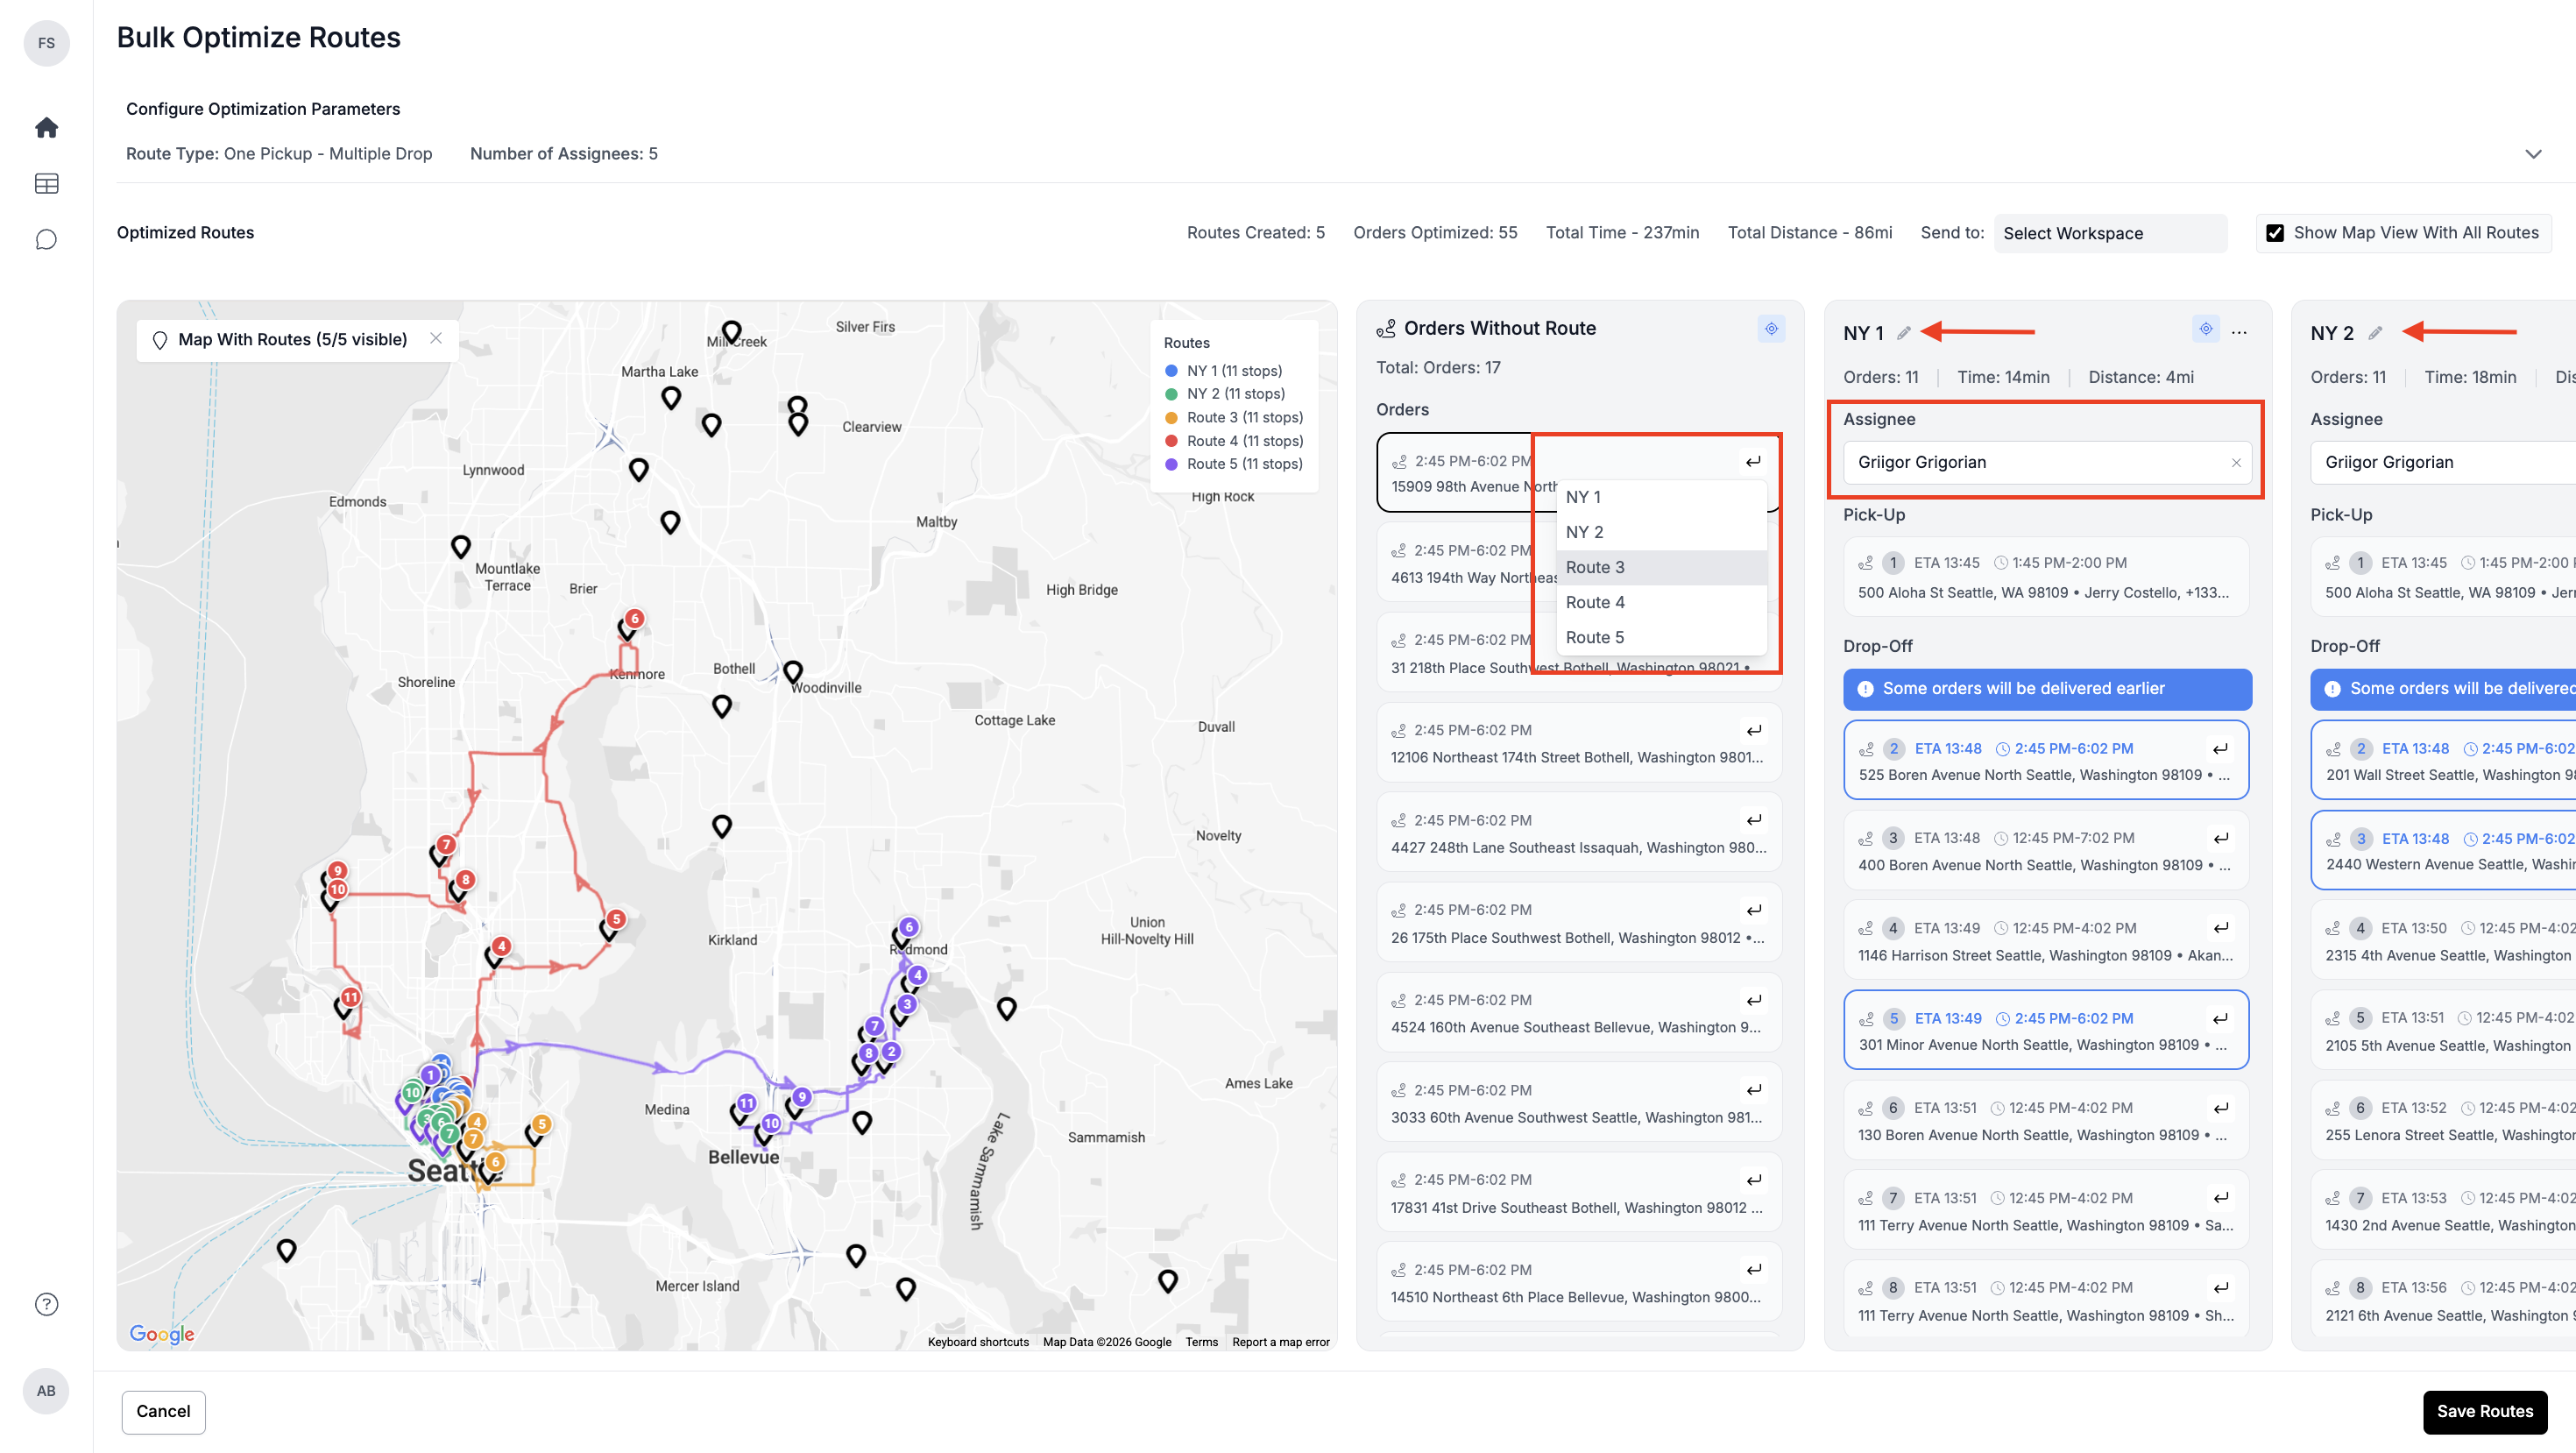
Review the optimized routes, assign route names (e.g., NY-1, NY-2) and drivers, and make final adjustments (e.g., move or add orders). Optionally select a workspace to send the routes to, then click Save Routes.
-
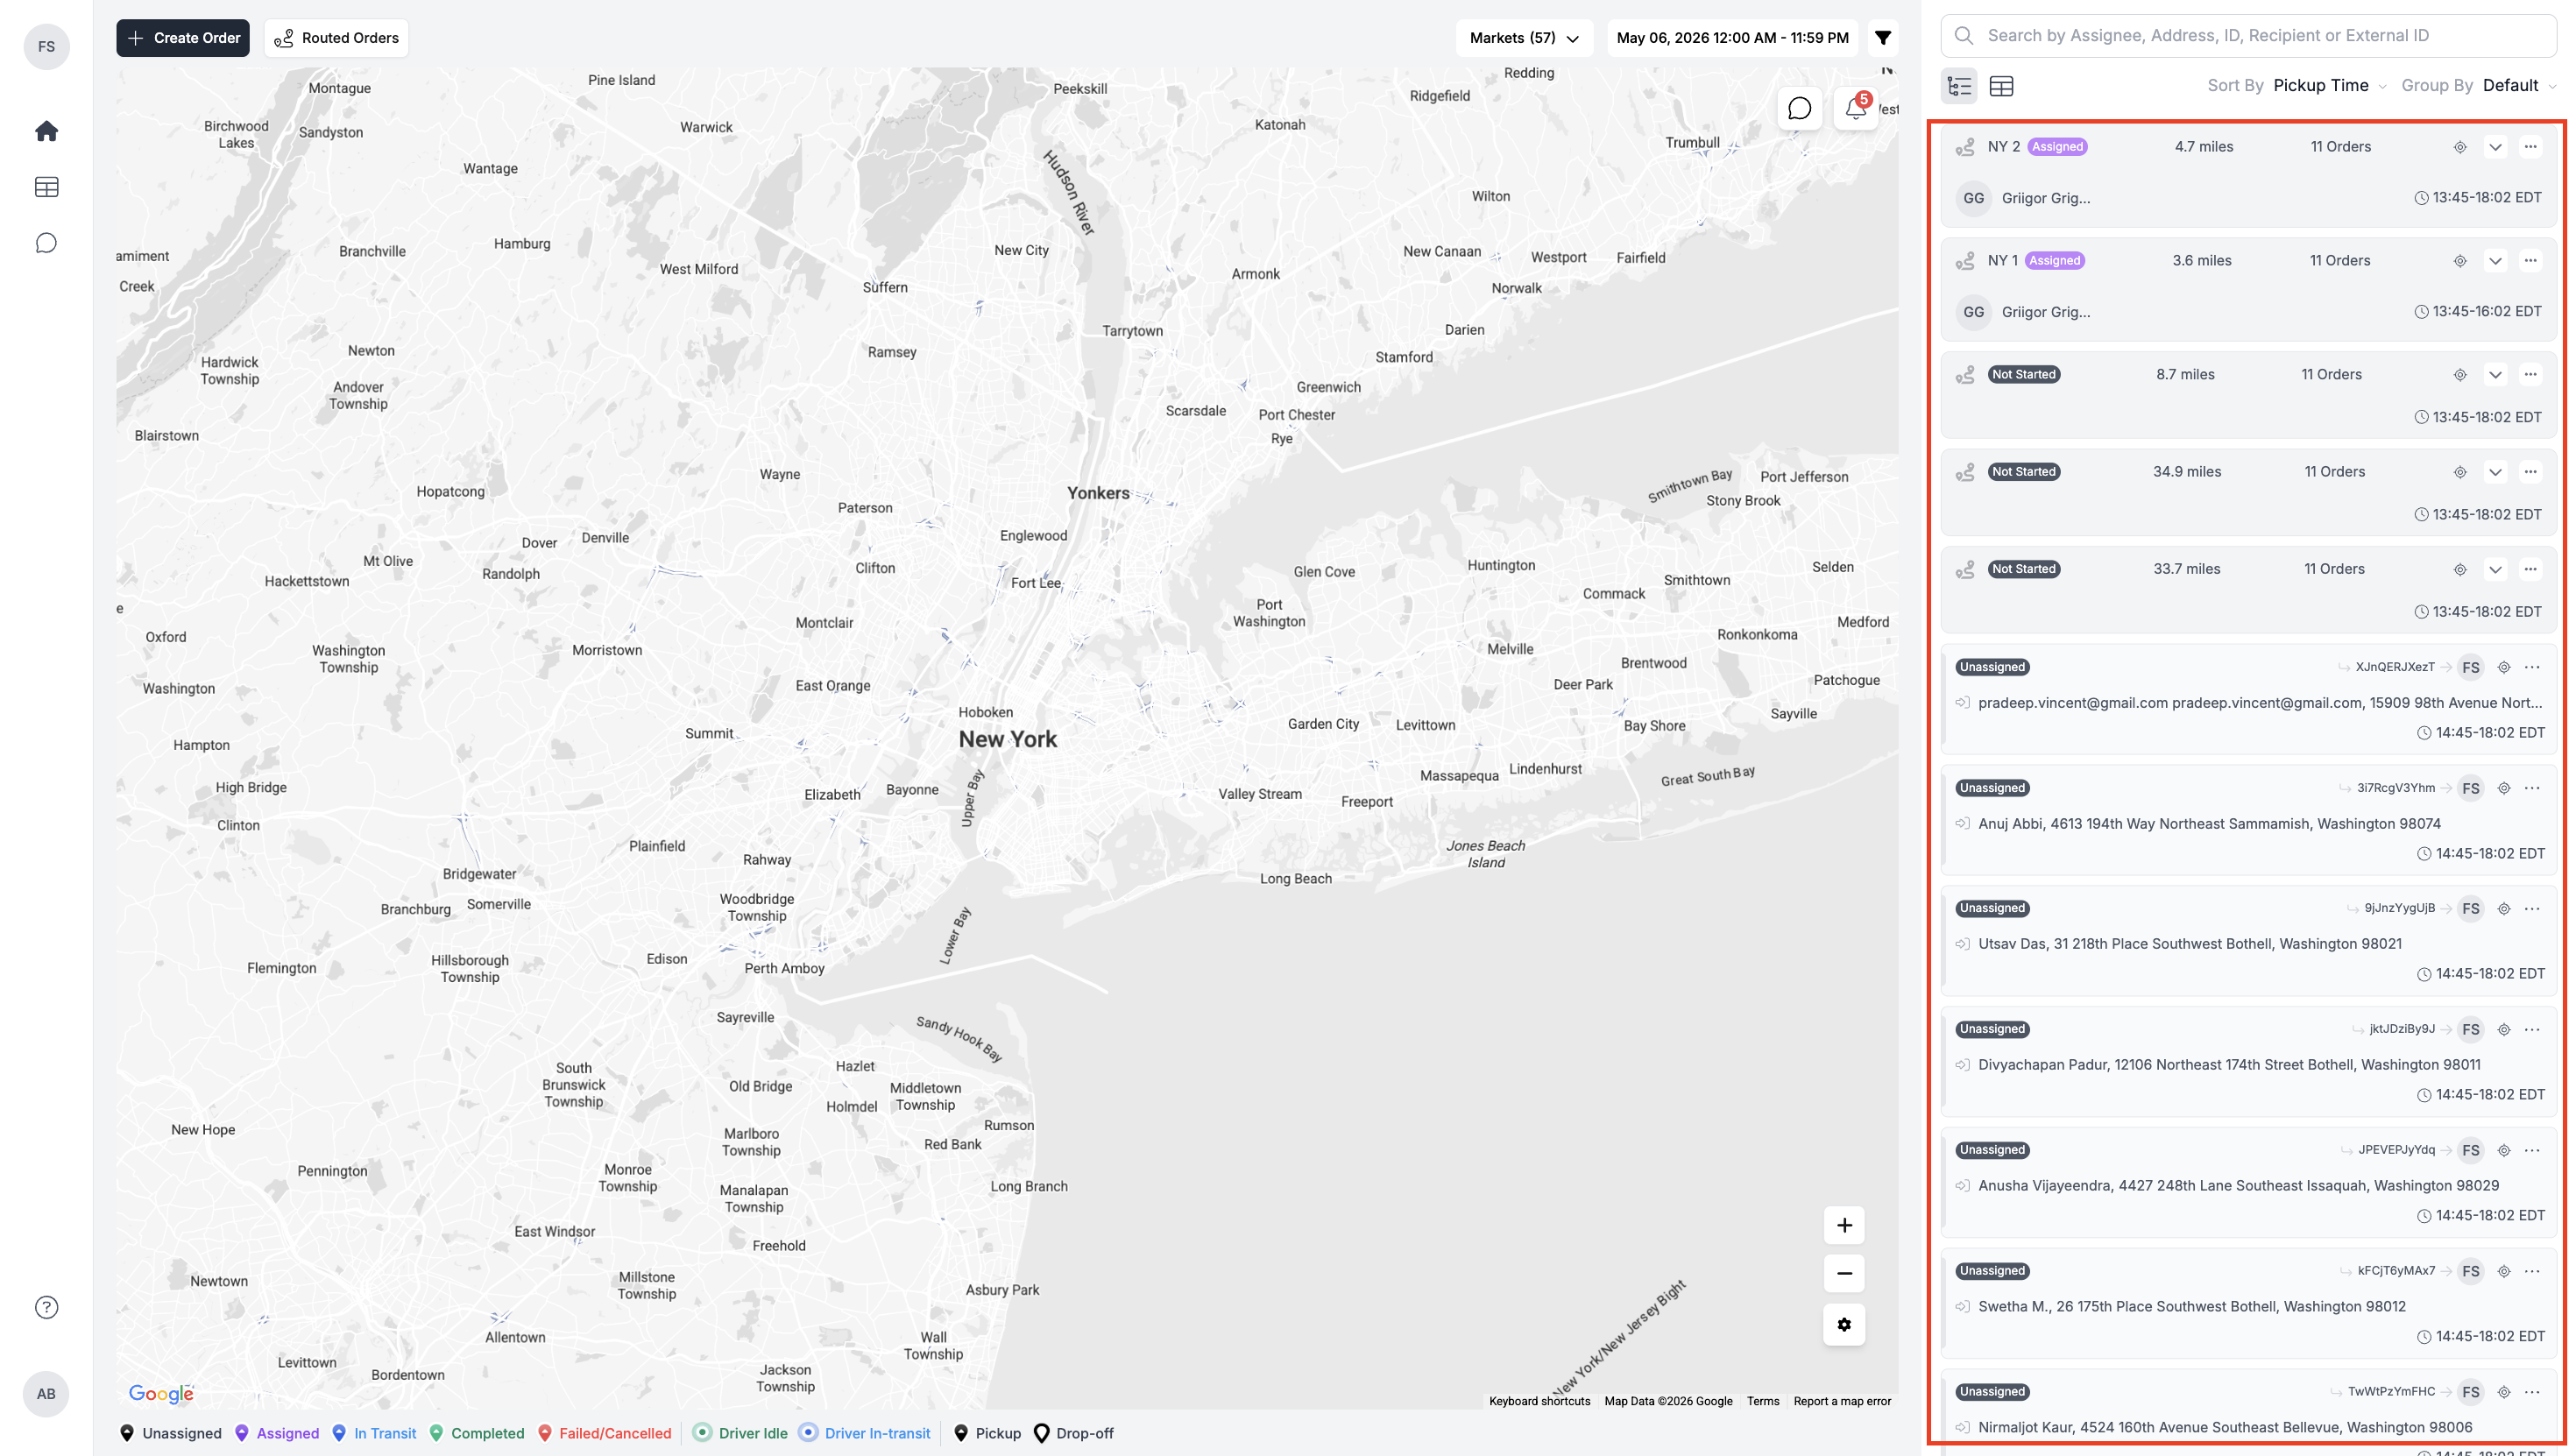
Once Saved, all the routes will be added to the Dispatch / Orders panel.
Important Notes
- Bulk optimization runs in the background — you don’t need to wait on the screen.
- Optimization results depend heavily on the parameters you set.
- Not all orders may be optimized — this is expected if constraints are strict.
- Always review the preview screen before proceeding.
- Use meaningful route names and driver assignments for easier tracking.
- Map view can be toggled to simplify the interface when reviewing routes.